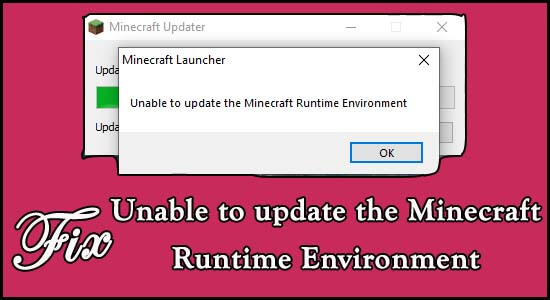
Many users confirmed they are seeing the “Unable to update the Minecraft runtime environment” error when trying to launch Minecraft Launcher? And the error generally occurs in the Minecraft Java Edition.
If you are also dealing with the error, then you are in the right place, here you will get detailed information related to this problem. Unable to start Minecraft runtime environment error is very annoying as it prevents you from starting the launcher, which means that you can not make any single change from it.
But don’t worry, as many users managed to fix the problem by Repairing the Minecraft Launcher, Removing third parts or faulty Minecraft Mods, or simply Updating the Java Runtime Environment (described in detail below).
So follow the fixes to solve Minecraft says unable to update the launcher issue by following the workable solutions that worked for several affected users. But before jumping into troubleshooting solutions, it is important to understand the common culprits that trigger the error.
What Causes “Unable to Update the Minecraft Runtime Environment” Error?
- Insufficient Minecraft Launcher Permissions – Sometimes using third-party applications on your laptop PC can interfere with the Minecraft process, this is due to the Java runtime is not updated correctly. And it prevents Minecraft to launch on Windows 10, to fix this problem you have to Run Minecraft Launcher as an administrator.
- Minecraft Mods – Minecraft offer numerous modes, and the gamers download that mode and install it on their system to increase the gaming experience. But in some cases, Modes can lead to an issue, and cause conflict which might lead to this error message while updating. In this case, you have to remove those modes from your system completely.
- Outdated Java Runtime Environment – If your Java Runtime Environment is outdated, you may display this error message when launching Minecraft Launcher. To fix this problem Update your Java Runtime Environment.
If you are wondering how to fix Minecraft launcher unable to update the Minecraft runtime environment problem, then read this article to the end and try the one-on-one solution to fix it completely.
How to Fix “Unable to Update the Minecraft Runtime Environment”?
Solution #1: Move Curse Folder to System’s C Drive
According to some gamers, they fix the problem by moving the Curse folder to the C drive.
To do so, locate the Curse folder of the Minecraft launcher and copy or cut the folder and paste it into the C drive of your System.
Try this method and see whether your problem is fixed or not, if you still face the same problem then move down to the next solution.
Solution #2: Run Minecraft Launcher as an Administrator
To run the program as an Administrator is a basic trick to run the program without any errors and bugs. Similar to this if you run Minecraft Launcher as an Administrator authority, then this might work for you to get past the error.
To do so, follow the below-given instructions:
- First, right-click on the Minecraft launcher application.
- After that click on the Properties.
- Now, go to the Compatibility tab.
- After that click on the Run this program as an administrator option.
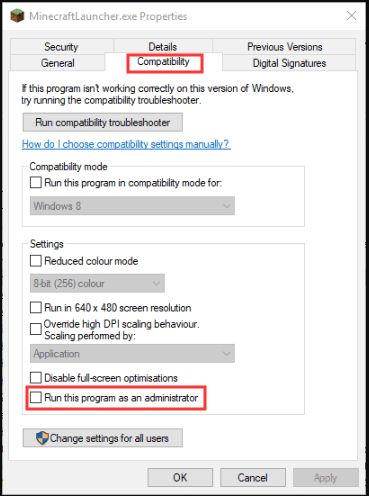
- Click on the apply button, and press ok to confirm the process.
Solution #3: Disable the Anti-virus/Firewall Protection in Windows Security
Anti-virus software usually blocks third-party applications or games from running on your system. On the other hand, when you try to update your games or application the antivirus may cause conflict. Anti-virus software or firewall blocks the access of the application so it is better to disable it.
So, it is recommended to turn off your Antivirus software to prevent any errors or bugs. So, follow the instruction to do so:
- First click on the Windows Start button
- Now click on the Settings option
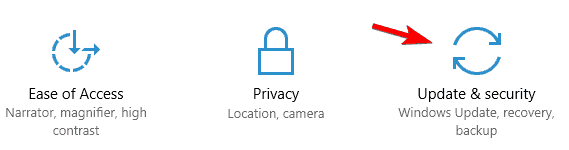
- Navigate to the Update & Security option
- Click on the Windows Security
- After that select the Virus & threat protection option
- Now click on the Manage settings option, In the Windows 10 old version click on the Virus & threat protection settings
- After that, disable the Real-time protection to Off
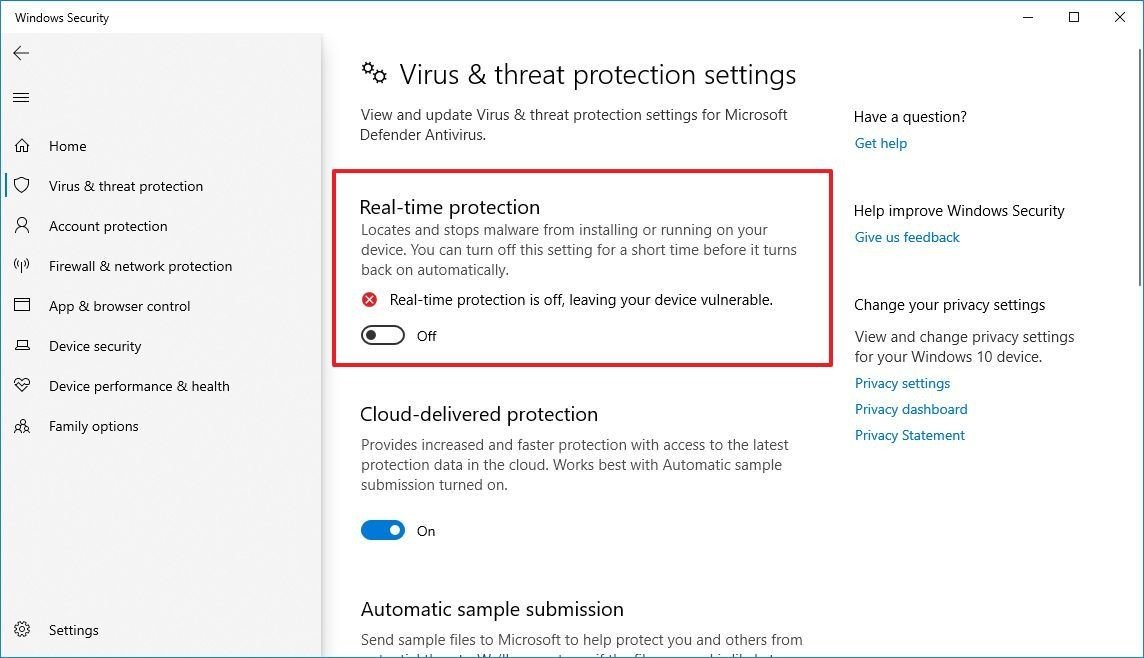
After disabling the Defender antivirus protection in Windows Security, now run the Minecraft launcher and see if the problem still exists or not.
Solution #4: Copy & Paste the Runtime Folder to Another Location
After following all the above solutions if you are still facing the same problem then don’t worry try this solution to fix your problem.
If the modpacks of the Launcher folder are not working then you may see the error unable to start the Minecraft runtime environment. To solve this problem, copy Runtime Program Files (x86) from its Minecraft installation directory & paste the folder to the Curse Launcher folder.
After doing so check if the program still exists or not. If you still face the same problem then you need to repair your Minecraft Launcher.
Solution #5: Repair the Minecraft Launcher.
If there is any corrupted or broken file present in the application, then your Minecraft says unable to update launcher error. In order to fix this problem, you can repair your Minecraft Launcher via the Programs and Features option.
- Click on the Windows + R button together to open the Run utility.
- Now, type the following command on the text box.
appwiz.cpl
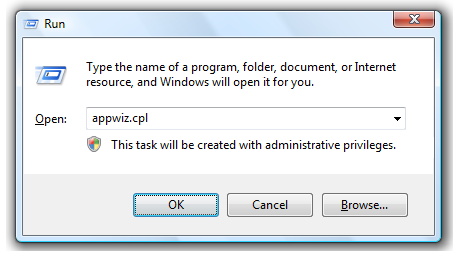
- Now, click on the Enter button.
- Here you can see all the programs that are installed on your PC.
- Locate the Minecraft launcher and right-click on it.
- Now, click on the Repair option, and follow the prompts instruction to repair the Minecraft launcher.
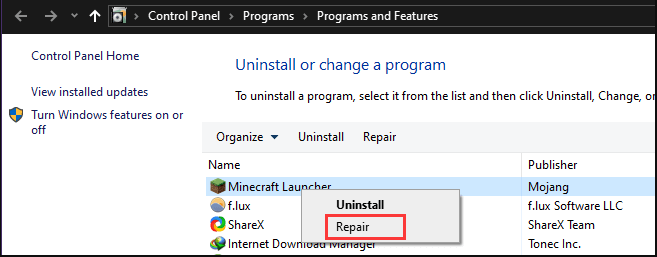
- After completing the process try to update your game and see the Minecraft launcher unable to update the Minecraft runtime environment error exist or not.
Solution #6: Remove Minecraft Mods
Sometimes, due to the third party mods, Minecraft starts crashing and can lead to this issue. This mode gives a great experience while playing games on your PC, But in some cases, it causes numerous errors while using the Minecraft launcher. To fix this problem you have to delete all the third party Minecraft mods from your PC and check whether your problem is fixed or not. So, follow the below-given instruction to do so:
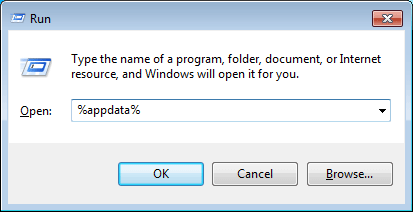
- First, press the Windows + R key together to open the Run dialogue box.
- Now, type the following command and press Enter.
%AppData%
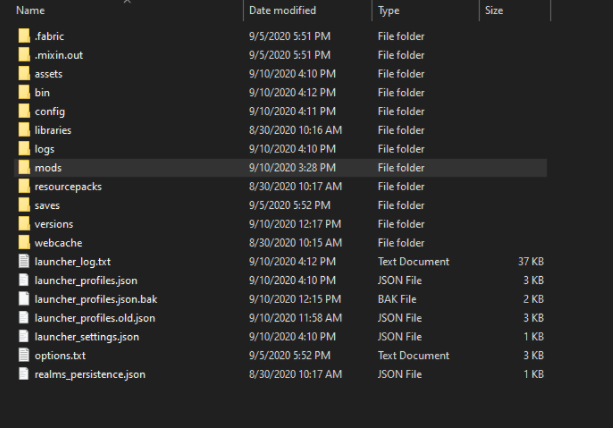
- Now, your Windows Explorer will open. You are in the Roaming directory, so, open the .minecraft folder.
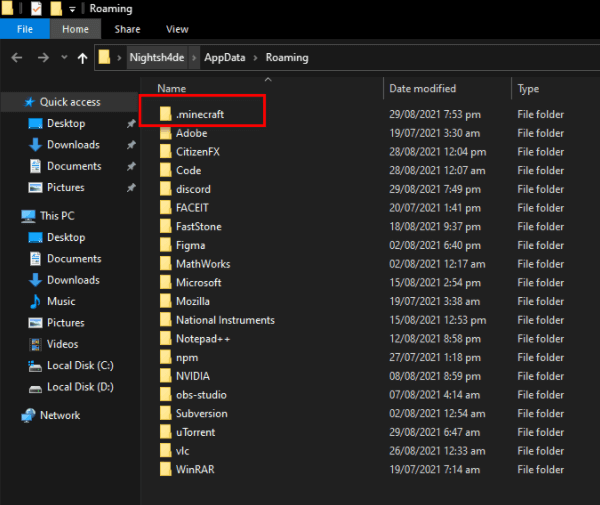
- Here you have two options, 1st is to delete the Mods and the second is to delete the bin folder.
To delete the Mods:
- First, open the .minecraft and click on the mods folder to open it.
- Now, Right-click and delete all the Mods individually
To delete the bin folder:
- First, open the .minecraft and click on the bin folder to open it.
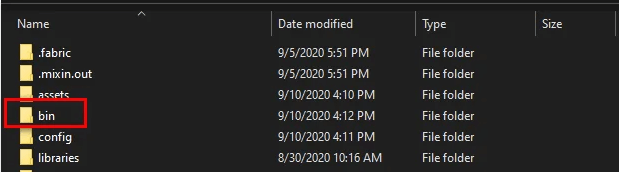
- Now, delete the bin folder.
After deleting the modes or bin folder, go ahead and check whether your Minecraft says unable to update launcher problem is fixed or not. If in case you still face the same problem then reinstall the Minecraft launcher.
Solution #7: Install Minecraft Launcher
If you are using the external hard drive for your PC or laptop, and still don’t install Minecraft launcher on your Windows OS drive, and facing unable to update the Minecraft runtime environment problem then this solution may fix your problem.
Lots of gamers reported that they fix this problem by installing the Minecraft launcher on their system boot drive.
In case, you install Minecraft Launcher on your System Drive already and facing the same problem then uninstall your present Minecraft launcher and install the latest version system drive.
Follow, the below-given instruction to Reinstall Minecraft Launcher:
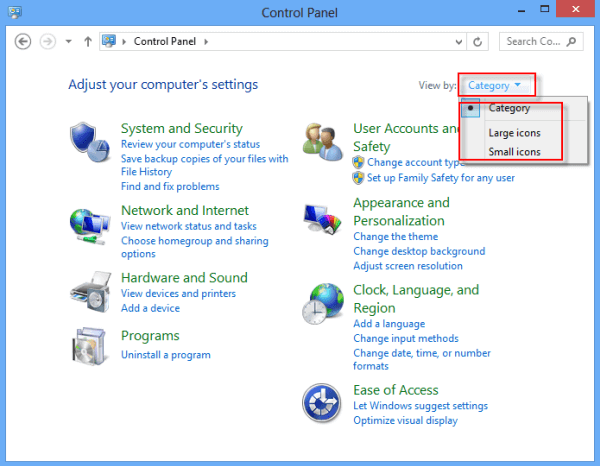
- First, open the Windows start button
- Now, in the search box, type control and then select Control Panel from the result.
- After that, on the Right Side of the Tab, you will get View by: from the help of the drop-down select Category option.
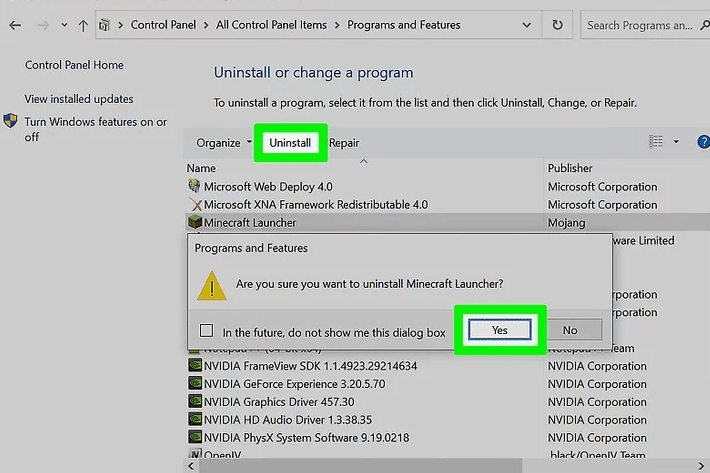
- Now, select Uninstall a program option.

- In the list of the Installed applications, locate the Minecraft launcher and right-click on It, or you can select Minecraft launcher and click on the Uninstall button on the top. Now, follow the prompts to uninstall the program.
- After uninstalling the program, download it again from the Minecraft launcher official website.
- once the download process gets finished then install the Minecraft launcher on the Operating system boot drive.
- Now, start the launcher with the help of a system drive and check your problem is fixed or not.
Solution #8: Update Java Runtime Environment
If you try all the above solutions and are still unable to fix this problem then Update your Java Runtime Environment manually by downloading the latest version from the official website.
So, follow the below-given instruction to so:
- First, open the official website of Java Runtime Environment.
- Now, scroll down to the Windows section and click on the Windows Online option.
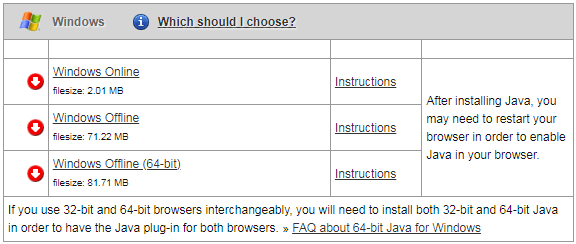
- Now downloading starts, after downloading start installation of the file on your Windows PC
- Follow on-screen prompt instructions to update the Java Runtime Environment.
- After completing the update process, restart your PC. It is estimated the Minecraft launcher Unable to update the Minecraft Runtime Environment” problem is resolved now.
Recommended Solution – Fix Various Computer Errors/Problems
If you find your Windows PC/laptop is running slow or you are encountering various stubborn computer errors and issues then it is suggested to scan your system with the one and only PC Repair Tool.
This is an advanced repair tool that just by scanning once detects and fixes various Windows problems and stubborn computer errors.
With this, you can fix various update errors, repair the corrupted Windows system files, DLL errors, registry errors, prevent virus or malware infection, and much more.
This not only fixes errors but also optimizes your Windows PC performance like a new one to optimize the gaming performance.
Get PC Repair Tool to Make Your PC Error Free & Speed up
Conclusion:
Here I have provided ample information related to fixing Unable to update the Minecraft Runtime Environment issue. Now, it’s your turn to follow the above-given instruction carefully and fix the issue completely.
Hope this article is helpful to you, and don’t forget to share which solution works for you and also share this post with your friends struggling with the same error.
If you have any queries or questions regarding this article, feel free to share with us, and you can also contact us on our Facebook page.
Good Luck..!
Hardeep has always been a Windows lover ever since she got her hands on her first Windows XP PC. She has always been enthusiastic about technological stuff, especially Artificial Intelligence (AI) computing. Before joining PC Error Fix, she worked as a freelancer and worked on numerous technical projects.