The newly released Windows 11 is with us from October 2021, and worldwide various users upgraded to this Microsoft latest desktop. Many users after switching to Windows 11, notices they require reinstalling the printer, the old as well as if bought a new printer.
Installing the printer can be done easily as Windows 11 automatically detect the printer, but sometimes it fails. So, in this case, you need to add the wireless variety printers to Windows 11 manually.
Users can add wireless and non-wireless printers easily with the in-built tools and options. And the process to add wireless and non-wireless printers won’t differ much.
So, in this guide, we are here with detailed steps on how to add a printer in Windows 11 including the local as well as wireless printer both automatically and manually.
How Do You Add a Printer to Windows 11?
A printer can be added to Windows 11 very easily. Manly, you have to set your printer and connect it to your Windows 11. It can be added manually as well as automatically, so read this article to add a printer in Windows 11.
1: Add local Printer on Windows 11 Automatically.
Connect your printer’s USB cable to an available USB port on your computer and turn on the printer.
After that, Windows 11 identifies your printer and automatically installs the driver of the printer and configures it to work. Just follow a few basic steps as outlined below and your printer will start working.
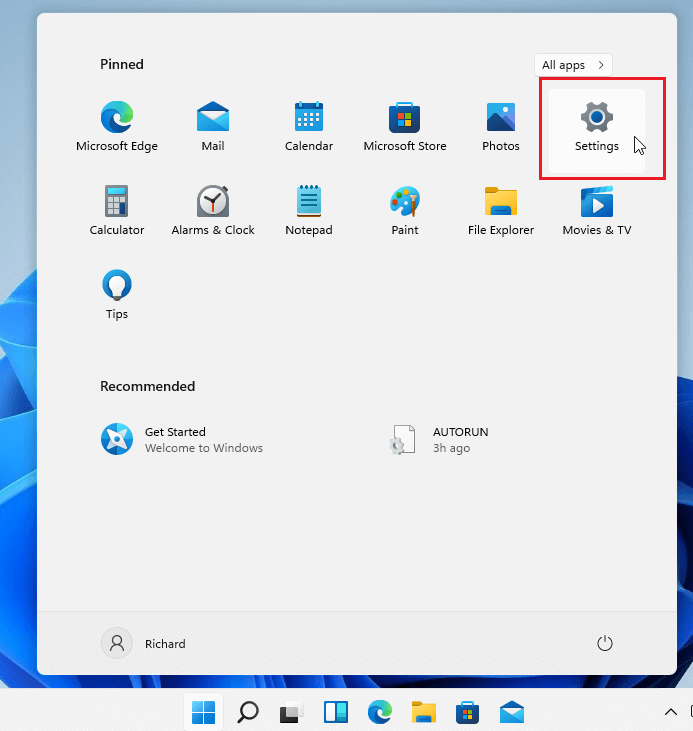
- Press Windows Key + I to open Settings. Or right-click on the Windows Start button and then click on the Settings option.
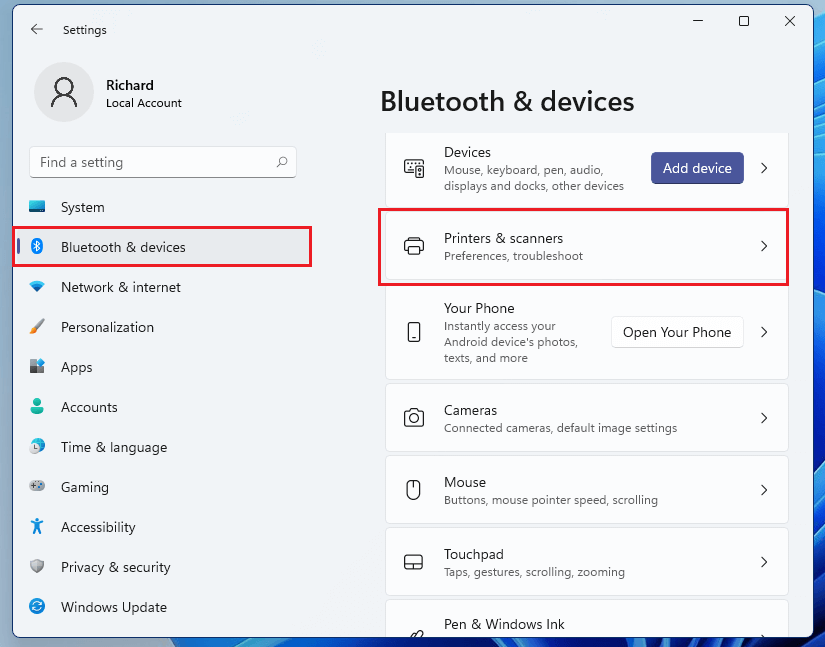
- After that, click on the Bluetooth & devices option.
- Navigate to the Printers & scanners option.
- Now, click on the Add device button.
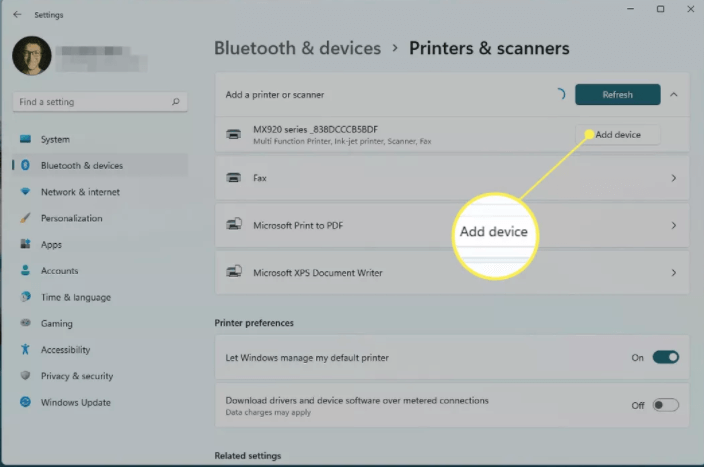
- Your window will find all the nearby printers, so wait till Windows locate your printer.
- After your printer is located, click on the Add device next to the printer’s name that you want to install on your PC.
- Now, wait till your printer gets installed.
If in case, this method does not work and your Windows 11 is unable to find your Printer, then try adding the printer manually
2: Add the Printer on Windows 11 Manually
- First, click Windows key + I together to open System Settings.
- In the Windows System Settings, click on the Bluetooth & devices option.
- Then on the right side of the screen click on the option Printers & scanners option.
- Now a Printer and scanners settings page will open, here click on Add a printer or scanner button.
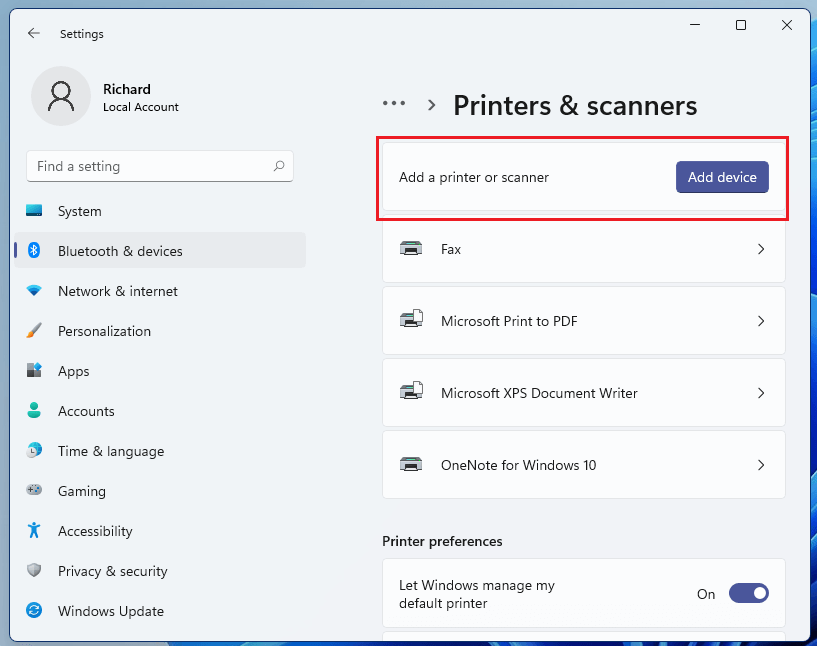
- Wait till Windows 11 locate the nearby printers, then choose the one you want to use from the list and select Add device.
- Your window will find all the nearby printers, so wait till Windows locate your printer and then click on Add device next to your printer.
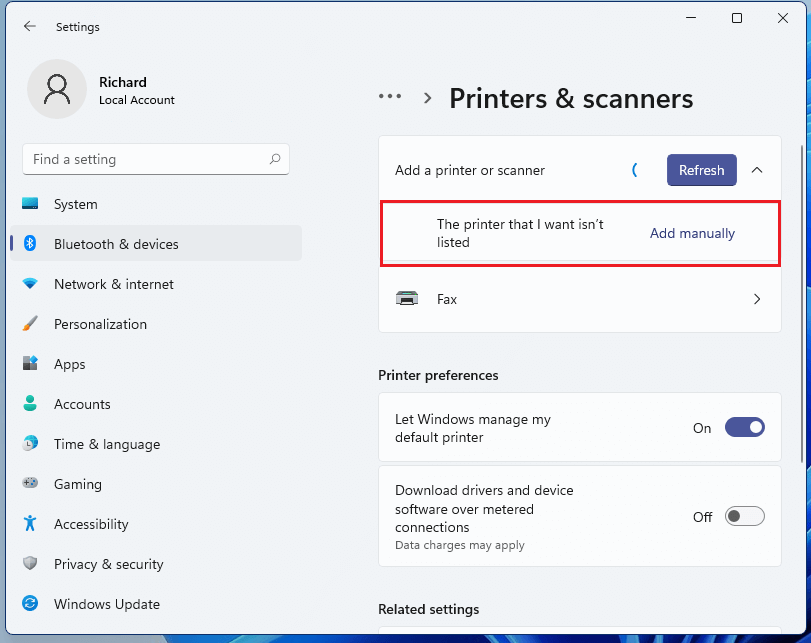
- But in case you get a message saying that “The printer that I want isn’t listed” then you have to click on Add manually option.
- You will see a list of 5 different options that work for wireless or network-connected printers.
- So, if your printer is connected directly or locally to the PC then select Add a local printer or network printer with manual settings.
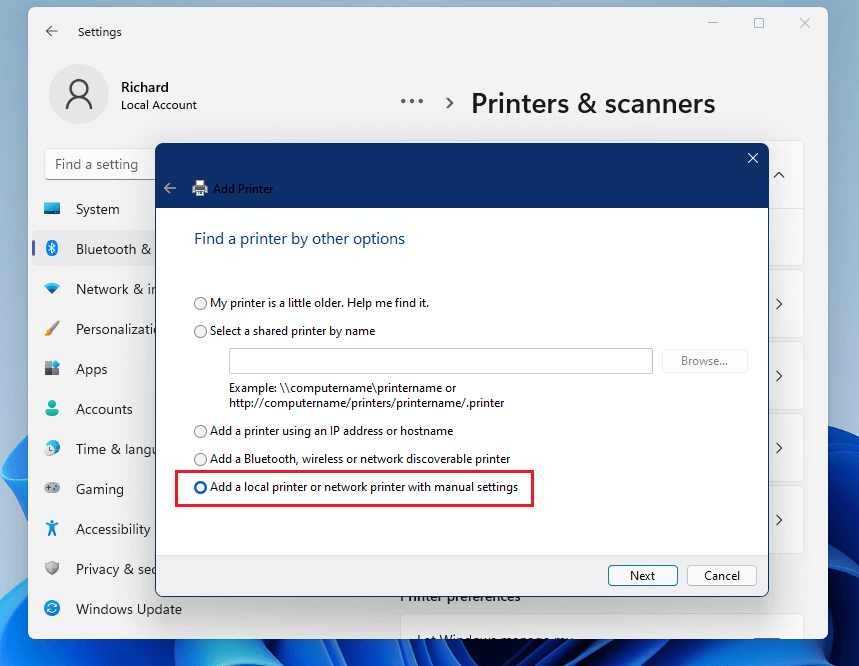
- Click on the next button to continue.
- Here you have to click on the Use an existing post.
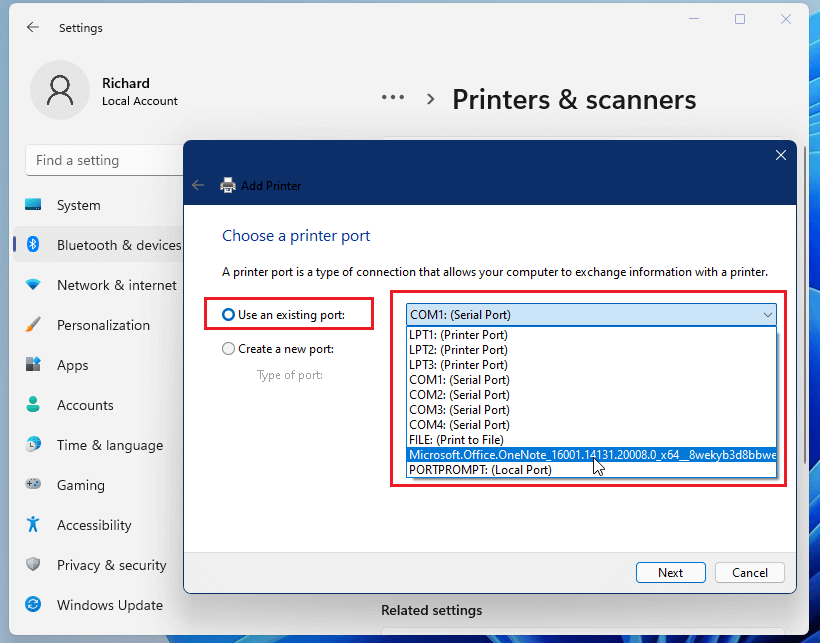
- Next, select the medium on the list from which your printer is connected on your PC. Usually, the printer is connected to a USB port.
- Now to install the printer driver, check if you have a CD which includes printer drivers, then insert the CD into your system
- After that, click on the Have Disk button.
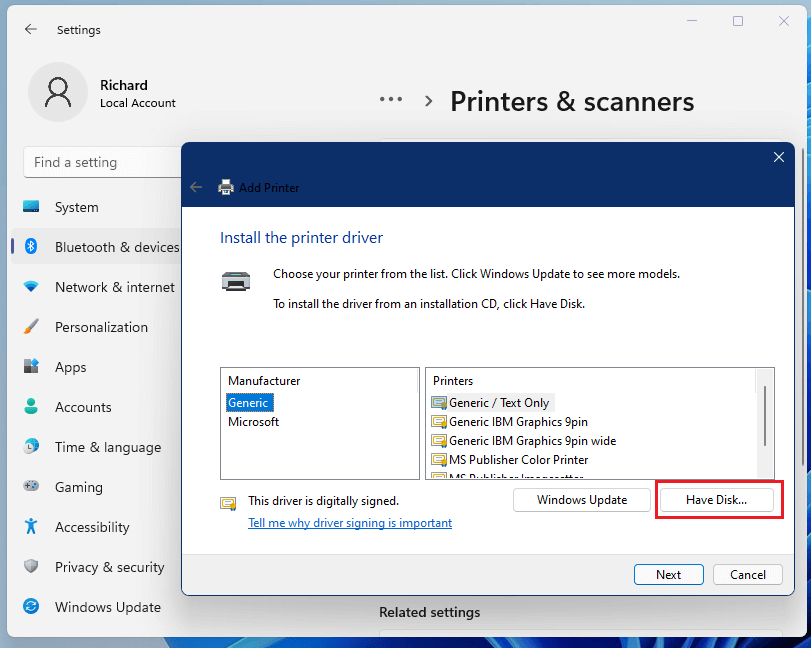
- Then go to the location where you save the printer driver and browse the driver folder and install it. After completing, check the printer.
Now, if your printer doesn’t have a disc that includes a printer driver then follow the steps for installing a printer driver.
- In case you don’t have the printer driver CD then select the Windows Update option next to Have disk option.
- Wait till the window display a message saying that “Windows is updating the list of printers”.
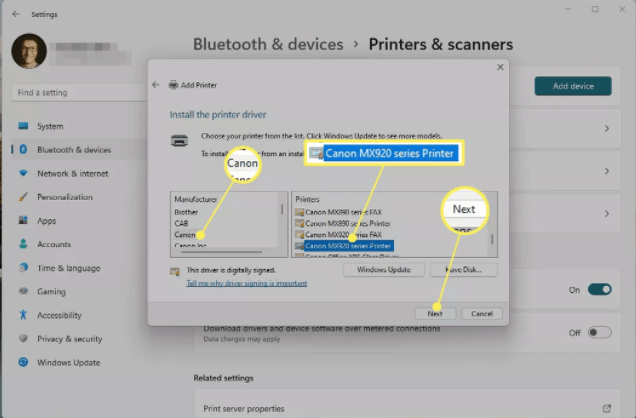
- Now, from the left column select the printer’s manufacturer option
- From the right column, you have to select the model and then press the Next button.
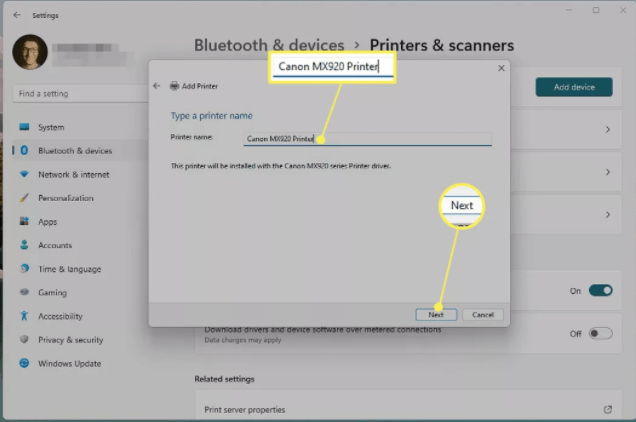
- Name your printer, and then click on the Next button.
Please Note: If you see a message showing which driver version to use then choose to Replace the current driver option. But if you are sure the installed driver is correct then select the option Use the driver that is currently installed.
- Wait till your printer is installed on Windows 11.
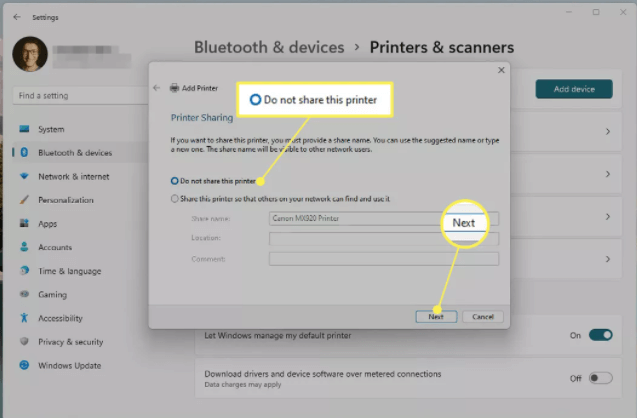
- Now, select Do not share this printer option and then click on the Next button. (If you want to share your printer then click on the Share this printer option, and fill in all the details that are required.)
- A success page will appear on the screen.
- Now, click on the Print a test page, if you want to test your page or else click on Finish
3: Add a Wireless printer on Windows 11
Well, some printers work on the wireless connection so, if your printer is linked to the network through Wi-fi or wired then as it is turned on, your Windows 11 system will detect it automatically.
Windows easily find entire available printers that are plugged into other devices and shared on the network. But sometimes it might fail, then you can manually install the wireless printer on Windows 11.
Follow the manual steps to add a wireless printer manually.
- Select the Windows Start button.
- Now, go to the Settings option.
- Then, click on the Devices option.
- After that, click on Printers & scanners.
- Now, select the Add a printer or scanner.
- Wait till the PC scan the nearby printer, then select the printer that you want to connect.
- Now, click on Add device button next to the printer you want to use.
After doing so your network or wireless Printer will be installed on Windows 11 PC.
Recommended Solution to Fix Windows 10 & 11 Errors/Problems
If you find your Windows PC/laptop is running slow or you are encountering various stubborn computer errors and issues then it is suggested to scan your system with the only PC Repair Tool.
This is an advanced repair tool that just by scanning once detects and fixes various Windows problems and stubborn computer errors.
With this, you can fix various update errors, repair the corrupted Windows system files, DLL errors, registry errors, prevent virus or malware infection, and much more.
This not only fixes errors but also optimizes your Windows PC performance like a new one to optimize the gaming performance.
Get PC Repair Tool to Make Your PC Error Free & Speed up
Conclusion:
So, that’s all about how to add printers to Windows 11. Following the steps given, you can add a local printer as well as a wireless printer to your Windows 11 PC.
We hope the information provided is useful for you and help you to install the printer easily.
However, if you are using an old printer then you may encounter issues in finding the latest drivers compatible with the new operating system. In this case, reinstalling the driver or searching for the latest one on the manufacturer website may work in your case.
If in case you are having any further queries then feel free to share them with us on our Facebook page.
Hardeep has always been a Windows lover ever since she got her hands on her first Windows XP PC. She has always been enthusiastic about technological stuff, especially Artificial Intelligence (AI) computing. Before joining PC Error Fix, she worked as a freelancer and worked on numerous technical projects.