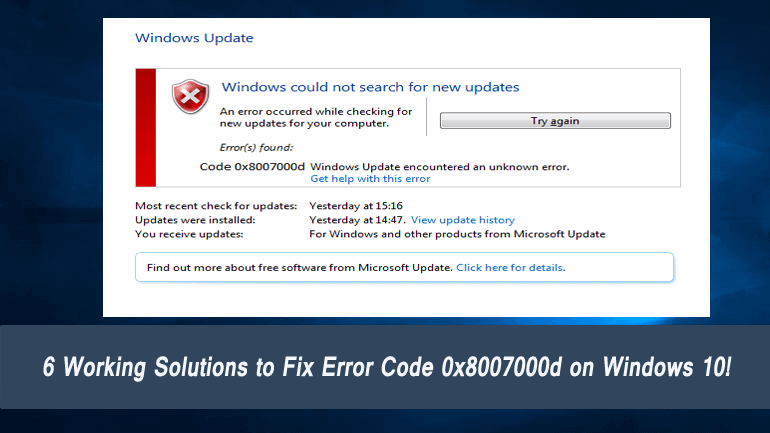
While updating the Windows 10 or installing any latest Windows 10 update if you are getting Error Code 0x8007000d then you are in the right place. In this blog, we will discuss how to fix the Windows 10 update error 0x8007000d.
This error code is the most common Windows update error that frequently occurs on the Windows 10 operating system. There are various other update errors available that can affect the entire update process by throwing error messages.
Here, if you are trying to update the Creators update then you must know about the List of Windows 10 Creators Update Issues.
Now coming to the point; still, it is not clear that why error 0x8007000d is occurring. But don’t worry as some of the sure-shot solutions to get rid of update error 0x8007000d are described in this blog.
Simply, follow the below-given methods one by one and update your Windows 10 system without any error.
How to Fix Error Code 0x8007000d in Windows 10
Solution 1: Run System File Checker
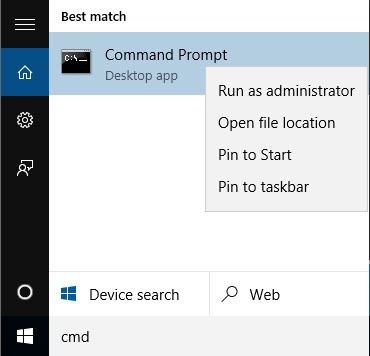
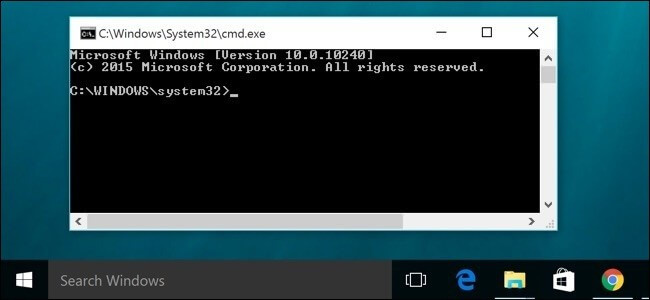
- You need to open Command Prompt, go to the Windows search option and type cmd in the search box, and hit Enter key.
- And in the Command Prompt right-click and choose Run as Administrator.
- Now you need to run the following commands one by one. To do this type and press Enter after each of them:
WSReset.exe
dism /online /cleanup-image /restorehealth
dism /online /cleanup-image /StartComponentCleanup
sfc /scannow
powershell
Get-AppXPackage -AllUsers |Where-Object {$_.InstallLocation -like “*SystemApps*”} | Foreach {Add-AppxPackage -DisableDevelopmentMode -Register “$($_.InstallLocation)\AppXManifest.xml”}
- After executing all the commands you need to restart your computer.
Now check if the Windows 10 update error 0x8007000d is fixed or not.
Solution 2: Try Group Policy Editor
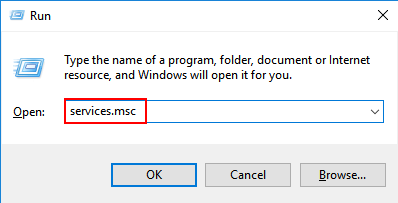
- Open Run Command Prompt, press Win key + R
- In the run dialogue box, type services.msc and hit Enter.
- Choose Computer Configuration and then Administrative Templates.
- After it, opt for System and double-click on the Specify Settings for optional component installation and component repair.
- Select Enabled and Contact Windows Update.
- Click OK
- Restart your PC
After applying these steps, now check for Windows updates.
Solution 3: Run the DISM tool
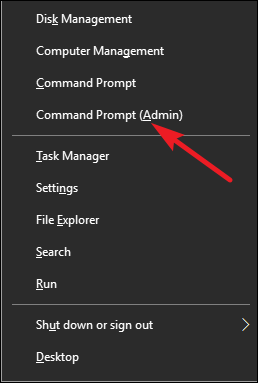
Open the Command Prompt with admin privilege.
Right-click on the Window logo present on the bottom left the corner and choose Command Prompt (Admin).
In the command box Window, you need to run the below-given commands one by one. To do this, hit ENTER after each of them.
DISM.exe /Online /Cleanup-image /Scanhealth
DISM.exe /Online /Cleanup-image /Restorehealth
Now, reboot your system and check if the updates can be installed now.
Solution 4: Manually Reset the Windows Update Components
After resetting the Windows Update components you can fix all types of update errors.
- Open the command prompt with Admin Privilege.
2. Once opening the command prompt you need to run the following commands one by one. To do this, press Enter after each one of them to execute them.
net stop bitsnet stop wuauserv
net stop appidsvc
net stop cryptsvc
- After it, you have to delete the qmgr*.dat
- To do this task you need to run the following command, and an Enter to execute it:
Del “%ALLUSERSPROFILE%\Application Data\Microsoft\Network\Downloader\qmgr*.dat
- Now, Navigate to the System32 folder, and reregister the BITS files, as well as the Windows Update files.
- In the command prompt, you need to run below-given command.
cd /d %windir%\system32
- You also need to run the following commands. Press Enter after each one for execution. This is for resetting the aforementioned BITS and Windows Update files.
regsvr32.exe atl.dll
regsvr32.exe urlmon.dll
regsvr32.exe mshtml.dll
regsvr32.exe shdocvw.dll
regsvr32.exe browseui.dll
regsvr32.exe jscript.dll
regsvr32.exe vbscript.dll
regsvr32.exe scrrun.dll
regsvr32.exe msxml.dll
regsvr32.exe msxml3.dll
regsvr32.exe msxml6.dll
regsvr32.exe actxprxy.dll
regsvr32.exe softpub.dll
regsvr32.exe wintrust.dll
regsvr32.exe dssenh.dll
regsvr32.exe rsaenh.dll
regsvr32.exe gpkcsp.dll
regsvr32.exe sccbase.dll
regsvr32.exe slbcsp.dll
regsvr32.exe cryptdlg.dll
regsvr32.exe oleaut32.dll
regsvr32.exe ole32.dll
regsvr32.exe shell32.dll
regsvr32.exe initpki.dll
regsvr32.exe wuapi.dll
regsvr32.exe wuaueng.dll
regsvr32.exe wuaueng1.dll
regsvr32.exe wucltui.dll
regsvr32.exe wups.dll
regsvr32.exe wups2.dll
regsvr32.exe wuweb.dll
regsvr32.exe qmgr.dll
regsvr32.exe qmgrprxy.dll
regsvr32.exe wucltux.dll
regsvr32.exe muweb.dll
regsvr32.exe wuwebv.dll
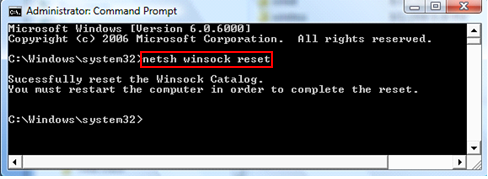
- Again type “netsh winsock reset” in the Command Prompt and press enter to execute it, This command will reset Winsock.
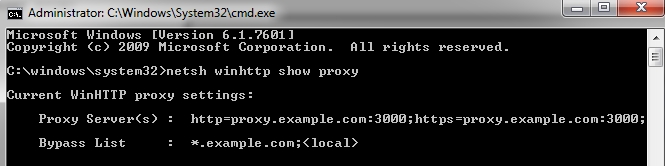
9. Now, reset the Proxy, type in netsh winhttp reset proxy and press Enter Key.
10. Re-boot the services you stopped firstly, hit ENTER key after each one
net start bits
net start wuauserv
net start appidsvc
net start cryptsvc
- At last, Restart your computer/Laptop. This will defiantly fix your update issue.
Solution 5: Delete everything in SoftwareDistribution Folder
- Click Win+R, then type the “%systemroot%\SoftwareDistribution\Download” and press Enter.
- Choose everything inside of Download folder Ctrl + A
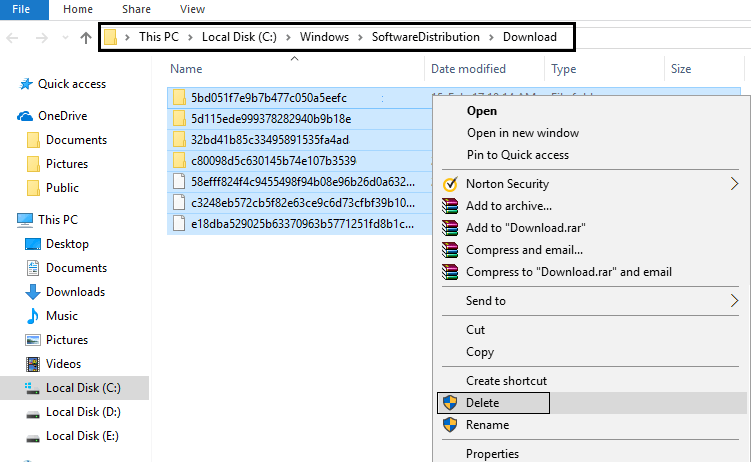
3. Then Delete it.
4. Check the action in resulting pop-up and close everything.
5. Delete everything from the Recycle bin and after that Restart your PC to save changes.
Again, you should try to update the Windows and this time it may start downloading the update without any issue.
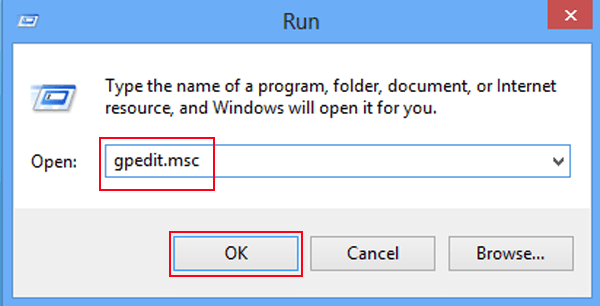
Solution 6: Use Group Policy Editor
- Open the run dialogue box, press Win+R
- In the run box, you need to enter gpedit.msc and press Enter key.
- Select Computer Configuration, then Administrative Templates
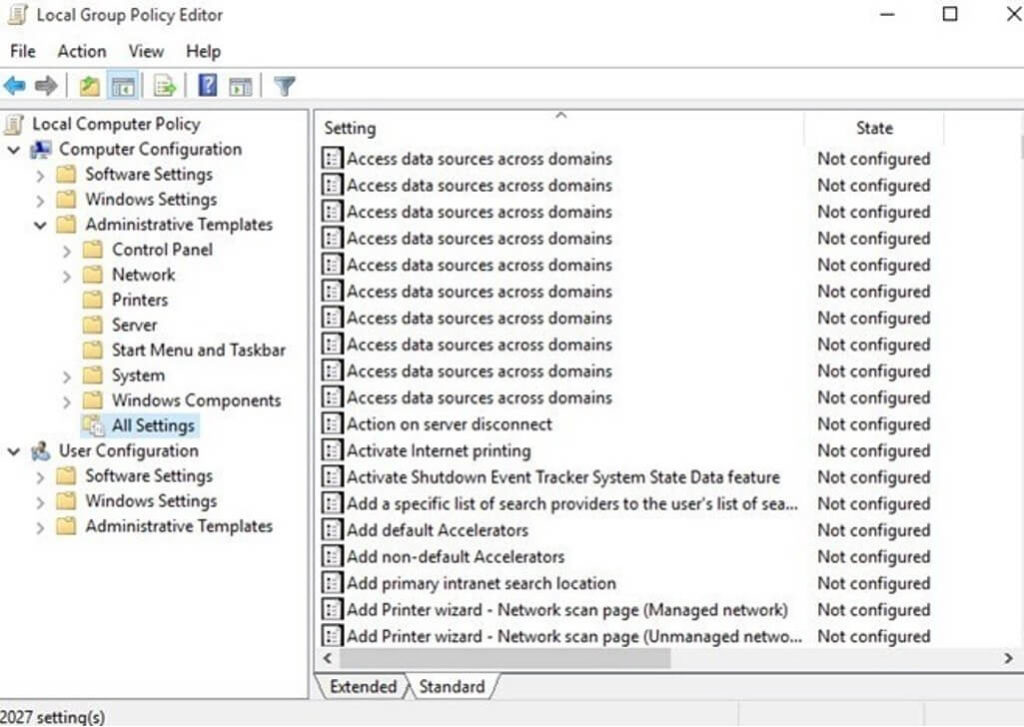
- Choose System
- Now, double-click on the Specify settings for optional component installation and component repair option
- Choose Enabled and Contact Windows Update directly
- Click on the OK
- Now, restart the update process.
Hope the given solutions work for you, but if not then participate in the below-given thread to know more about the error 0x8007000d.
Participate in the Microsoft’s Conversation on Windows 10 Error Code 0x8007000d, @ https://answers.microsoft.com/en-us/windows/forum/windows_10-update/windows-10-update-error-0x8007000d/8c8801fe-39d7-4117-96ff-cd4c9e339b2c?auth=1
Automatic Solution to Fix Windows 10 Error 0x8007000d
After using the above solutions, if you are failed to fix error 0x8007000d in Windows 10 then, it is suggested to run the advanced Windows Repair Tool to fix various Windows issues and errors.
This tool also helps you to fix errors like damaged files, common computer issues, also protect you against virus infection, registry corruption, application errors, DLL errors and others. It not only resolves the Windows errors & issues but also optimizes the Windows PC performance.
Get Windows Repair Tool, to fix various errors & issues easily
Conclusion:
Hopefully, the mentioned solutions will resolve your update related issues. Although the given solutions are effective for numerous people and hope, this works in your case to fix error 0x8007000d.
Now, after knowing everything about how to fix error code 0x8007000d, you should try the given solutions to fix windows update 0x8007000d.
But, while executing any command it is suggested to type them carefully. As a single mistake while typing the command can cause other serious issues.
Or else you can also use Windows Repair Tool, to fix Windows update related errors and make your system error-free.
Good Luck!!!
Hardeep has always been a Windows lover ever since she got her hands on her first Windows XP PC. She has always been enthusiastic about technological stuff, especially Artificial Intelligence (AI) computing. Before joining PC Error Fix, she worked as a freelancer and worked on numerous technical projects.