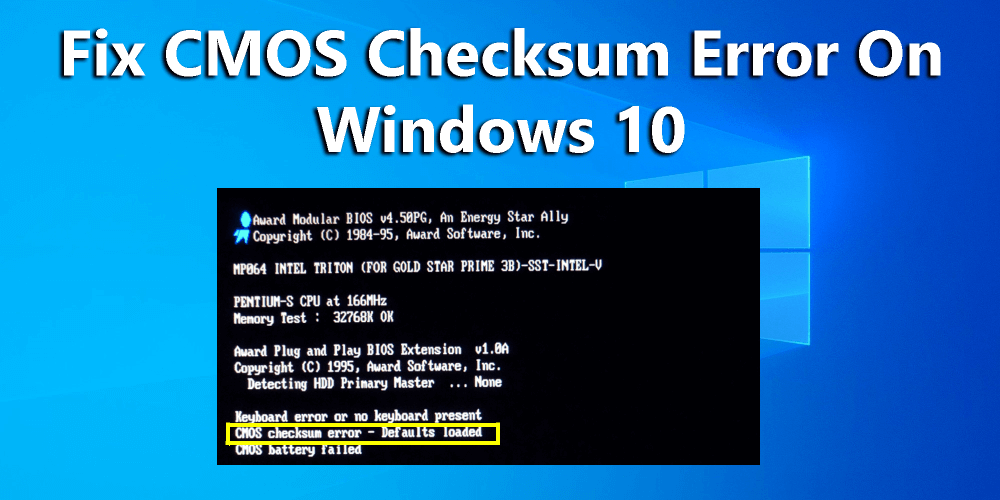
The CMOS checksum error is one of the common PC/Laptop errors, which occurs when a user turns on their system. If you are getting this CMOS error message and unable to boot your PC/Laptop then don’t worry as you can easily troubleshoot CMOS checksum error.
Before applying any solution to repair CMOS checksum error, first of all, you should know about the CMOS and causes of CMOS checksum error.
Complementary Metal-Oxide Semiconductor in short CMOS is a battery-powered semiconductor chip on the motherboard, which stores all BIOS settings.
The checksum error is linked to the BIOS (Basic Input/Output System), it is the first program that loads when user power on the computer. BIOS is responsible to initialize and test the hardware, such as the CPU, memory, keyboard, mouse, etc.
This type of error message appears when the CMOS battery gets exhausted or used up. If the BIOS values get damaged, then it makes CMOS unable to retain data, and hence you’ll get the checksum error message.
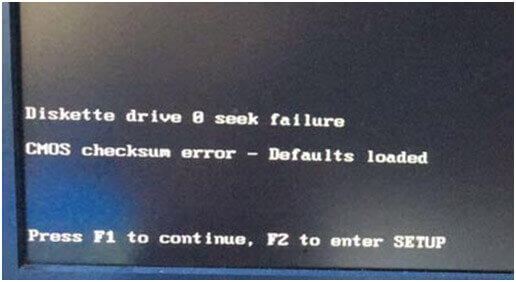
This error message appears with a black screen window and some information about the error:
“Diskette drive 0 seek failure
CMOS checksum error – Defaults loaded
Press F1 to continue, F2 to enter SETUP”
Some Common Causes of CMOS Error
Improper Shutdown of System: This is one of the common causes of getting CMOS error; improper system shutdown can corrupt the BIOS values. Sudden power failure while using a computer may also affect the CMOS and lead to this error message.
After Updating BIOS: Sometimes when user updates system BIOS then values stored in CMOS may have been reset. So, it is recommended to reset the CMOS and setup re-enter all values. After doing this save and exit from CMOS setup.
Dead Battery: When the battery dies that is required to enable CMOS to retain BSOD settings during the computer switched off, it leads to the checksum error.
Corrupted or Outdated BIOS: BIOS needs to be updated in order to stay in sync with OS and hardware components. Sometimes, the cause of the error becomes more sinister as viruses discreetly change the checksum value. And, this occurs the CMOS checksum error.
Damaged Motherboard: If the motherboard of your computer is physically damaged, then it can cause this CMOS error.
How to Troubleshoot CMOS Checksum Error on Windows 10 System?
In order to overcome from CMOS Checksum Error on the windows system, you must apply below-given troubleshooting methods.
Method 1: Restart Your Computer
Sometimes, a sudden shutdown or power cut to your computer can cause the CMOS checksum error in Windows 10 computers.
Even shutting down the computer using the power button without following the conventional shutdown procedure may also corrupt the BIOS and lead to the CMOS checksum error appear on the computer.
If this is the case with you, then follow the computer’s instructions to reboot your computer. And, now the CMOS checksum error on your Windows 10 computer should have resolved. But if you are still receiving the error, then move to the next solution.
Method 2: Reset the BIOS to Fix CMOS Checksum Error – Defaults Loaded
If you are still getting CMOS checksum error message while the startup of your PC or laptop, then you should try after resetting the BIOS values. Simply follow the below-given steps:
- Start your computer on the black screen with the checksum error.
- After getting this error message “Press F1 to continue, F2 to enter SETUP”, press the F2 key to enter the BIOS settings.
Note: To open the BIOS setting you may need to press other keys (like the Del key). This is based on your BIOS.
- See the keys usage information on the screen and select the Load Defaults.
- If the system show “Load BIOS Defaults(Y/N)?”, then press the Y key to confirm.
- After doing this exit from the BIOS setting and turn off the computer. Again boot your PC to see if the error still persists or not.
- If the problem is still unfixed then again enter the BIOS setting.
- Choose the Standard CMOS Features.
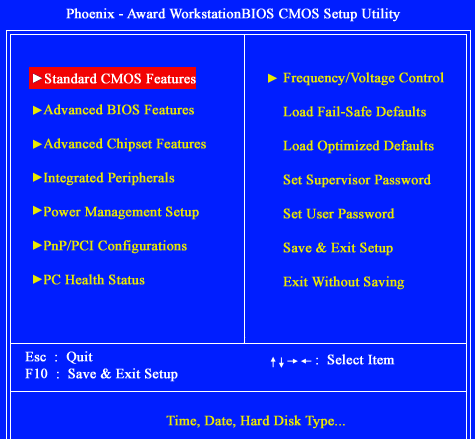
- Check the Date and Time. If they are incorrect then modify the values and save the changes.
- Also, check the SATA or Drive. In case your system has no diskette drive on the computer, you can choose Disable/None/Not Detected to stop the diskette drive scanning.
- Save the changes and exit from the BIOS.
After all, turn on your Windows desktop and you will see that the error is gone.
Note: Different BIOS has different interfaces and option descriptions. So, it is recommended to double confirm before taking any action.
Method 3: Change the Old CMOS Battery to Fix the Checksum Error
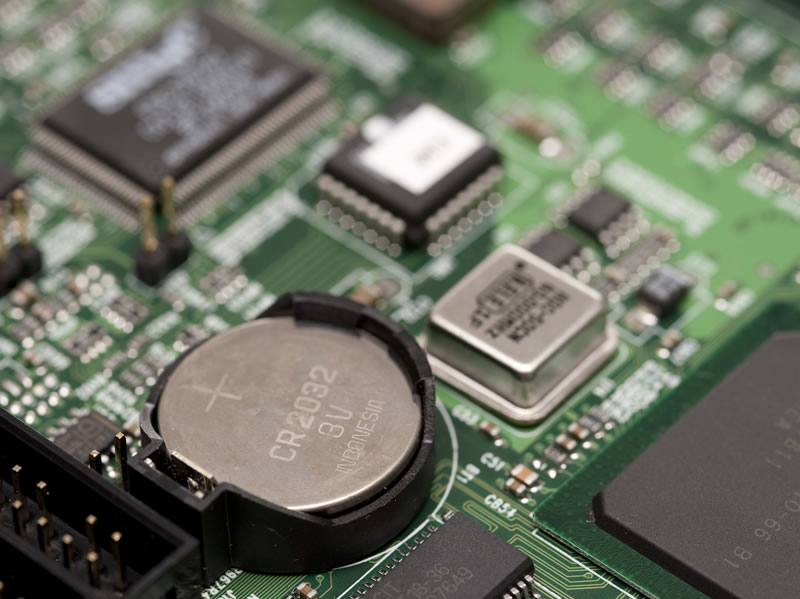
The exhausted CMOS battery is one of the common causes of a checksum error. Generally, the battery of model number CR2032 3V becomes faulty very soon. So, either contact any technician or purchase a battery from computer stores to replace your old one.
Note: If you are using the computer for more than 5 years then it is recommended to replace the CMOS battery.
Replace OLD or NOT working CMOS battery:
- Buy a new CMOS battery.
- Shut down the computer and disconnect all the power supply for the CPU.
- Open the computer case and find the old battery on the motherboard.
- Carefully remove the old CMOS battery.
- Attach the new battery into the battery socket. Make sure that the battery is firmly placed like the old one.
NOTE: If you are new to the computer or unable to replace CMOS battery yourself then it is recommended to contact computer technicians for help.
Method 4: Fix Terminals of CMOS Battery
The most common problem that users face is that CMOS checksum error continued to appear even after replacing the CMOS battery. Usually, if the CMOS battery has more than 3 volts, then it should function properly without any problem and reset to the accurate BIOS settings.
There is a possibility that there is a power-related issue, and it’s not just because of the battery. The positive and negative pins that bring power from the battery might not be connected properly. And that’s why the battery would not be able to supply any power.
To fix this issue, remove the CMOS battery from your computer and bend the positive pin in and negative pin-up. Then, replace the CMOS battery and make sure it fits perfectly and connected properly with both the terminals.
Lastly, set everything back together, then restart your computer. Now, the checksum error shouldn’t appear anymore.
Method 5: Update BIOS
BIOS is crucial for your computer’s normal functioning. Hence, it is important to keep your BIOS updated, especially when PC fails to detect the peripheral devices. And, it becomes even more important if there is any BIOS error occurring on the computer, such as CMOS checksum error.
Generally, BIOS updates automatically on the computer. But if you have not received the recent updates of the BIOS, then you can visit the manufacturer’s website.
For this, follow the given steps:
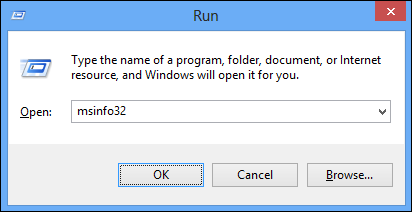
- Press Windows + R key to open the Run dialog box
- Type msinfo32 in the Run dialog box and press the Enter key to open the System Information window
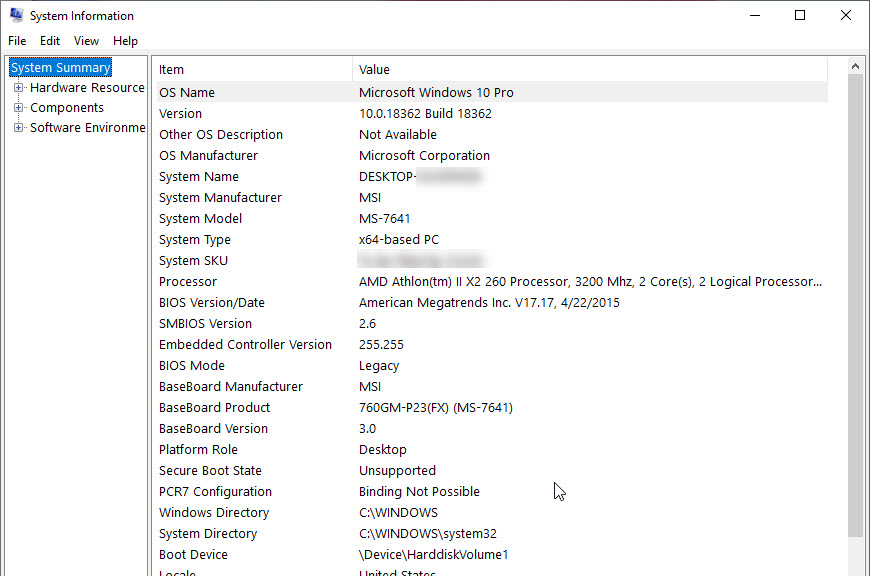
- In the System Information window, search for the BIOS Version/Date to see the BIOS version installed on your computer
- Now, visit the manufacturer’s website to check if there is an update available for that BIOS version
- If available, download the update and install it on your computer
Please Note: Updating BIOS or making any changes in it is very risky. It overwrites BIOS with new data, and a single error can damage your computer. Hence, it is advisable to do it under the guidance of an expert technician or do it only if it is extremely needed.
Best Solution to Make Your Computer Error Free
If you are struggling with the various issues and errors on the Windows computer and looking for an ultimate solution to fix these PC issues, then try the PC Repair Tool. This tool is a one-stop solution for all PC related issues.
It is an advanced repair tool that scans your PC to detect and fix errors. This tool fixes DLL, game, update, BSOD, registry errors, repairs corrupt/damaged or inaccessible system files, keeps PC secure from virus/malware, and much more.
The features of this tool don’t end here. It also helps to boost the performance of your PC by optimizing it and makes it run smoothly without any error or issues.
Get PC Repair Tool to Fix PC Errors/Issues
Conclusion
The CMOS checksum error is one of the irritating errors Windows users came across while booting their computers. And this irritation will turn into frustration if the error will not be fixed soon.
Fortunately, the solutions discussed in this article will surely help you to fix the CMOS checksum error on the Windows 10 computer. And, it will also make your PC functioning properly.
I hope you find this article helpful and the fixes helped you in resolving this CMOS error and now your computer works normally without any error.
Furthermore, if you have any queries or suggestions regarding this error, then feel free to share it with us on Facebook or Twitter.
Hardeep has always been a Windows lover ever since she got her hands on her first Windows XP PC. She has always been enthusiastic about technological stuff, especially Artificial Intelligence (AI) computing. Before joining PC Error Fix, she worked as a freelancer and worked on numerous technical projects.