Many customers have begun to receive Windows 11 updates. Microsoft has also released direct downloads on its own website for tech-savvy enthusiasts. The new Windows appears to be well-designed and promising. However, because this is an early software version, the user interface is not essentially refined.
A scenario in which the Windows 11 screen freezes but mouse works before the OS eventually crashes is one of the most common troubles that Windows 11 users are now experiencing. Users who have experienced this problem indicate that they have no choice but to perform a hard reboot to get their PC back up and running.
To Windows 11 freezing/crashing, we recommend Advanced System Repair:
This software is your one stop solution to fix Windows errors, protect you from malware, clean junks and optimize your PC for maximum performance in 3 easy steps:
- Download Advanaced System Repair rated Excellent on Trustpilot.
- Click Install & Scan Now to install & scan issues causing the PC problems.
- Next, click on Click Here to Fix All Issues Now to fix, clean, protect and optimize your PC effectively.
Windows 11 users are likely to also encounter issues with the GUI, such as instability and so on, due to the fact that it is still in its early stages of development.
So, here in this article get to know what is causing the problem and follow the fixes given to circumvent the error.
Why Is Windows 11 Randomly Freezing?
The following are possible causes why Windows suddenly freezes but the mouse still works:
- Unstable Resolution – As it turns out, if you’re running Windows 11 with a low-end GPU that can’t manage the resolution you’re trying to enforce during resource-intensive operations, you’ll run into this problem. In this situation, lowering the screen resolution will completely eliminate the freezes.
- VRAM Insufficiency – If you only have 4 GB of RAM, you may run into problems like this when your system needs to relocate temporary data to your virtual memory because RAM is already full. If your system freezes when attempting to free up VRAM, you can completely resolve the issue by forcing Windows 11 to use a larger paging file.
- Incompatible GPU drivers – Another reason you might get this issue is if you recently switched to Windows 11 from an older version of Windows and are still using the old GPU drivers. In this situation, you’ll need to upgrade your GPU driver to Windows 11 counterparts, either through Device Manager, WU, or private Nvidia or AMD software.
- Power Adapter Bug – Certain laptop models (especially ASUS and MSI models) appear to be affected by a Windows 11 bug that causes freezes and crashes as soon as the battery is fully charged. You can either unplug the AC adapter or use Device Manager to disable the ACPI Battery Control capability to avoid this problem.
- Conflict in Sonic Studio 3 – When installed on Windows 11, there is one ASUS program that has been known to cause freezes (Sonic Studio 3). Unfortunately, there is no official or unofficial solution that will allow you to resolve the problem while keeping the software installed.
- The Version of BIOS or vBIOS is No Longer Supported – Until motherboard makers begin shipping hardware that is fully tuned for Windows 11, BIOS-induced crashes and performance issues are to be expected. Until then, make sure you’re using the most recent BIOS update available for your motherboard.
How to Fix the “Windows 11 Screen Freezes but Mouse Works” Issue?
The following are 11 ways for resolving the “Windows randomly freezing“ problem:
Fix 1 – Change the Screen Resolution
Your screen resolution may be too high for your GPU to process at times, resulting in crashes on Windows 11.
Follow the following steps to change your screen resolution:
- Right-click on the Start Menu to bring up the context menu.
- Choose your options and select System.
- Go to the Display tab.
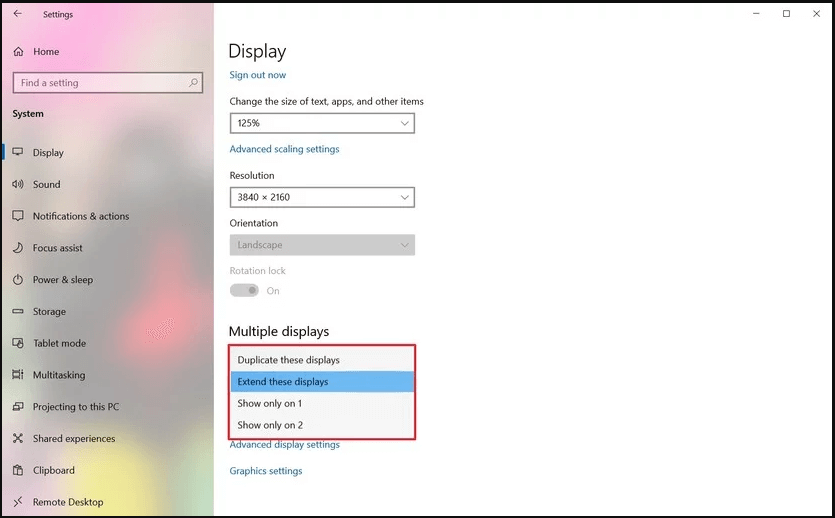
- Select Menu from the Display Resolution drop-down menu
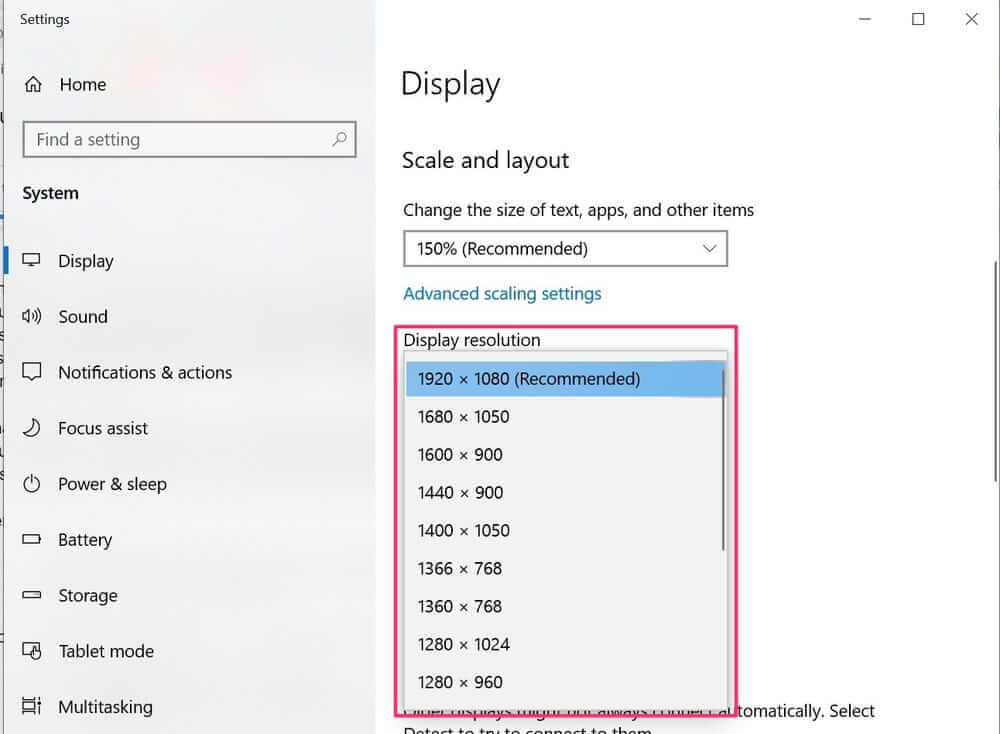
- Choose your preferred screen resolution.
- Now, select it by clicking on it.
If you can’t adjust your screen resolution, it’s possible that your system drivers are out of date. If you’re having trouble changing your screen resolution, try installing your drivers in Compatibility Mode.
Fix 2 – Change the Virtual Memory Settings
When your applications start to slow down before stopping and becoming completely unresponsive, it’s usually because your Windows has run out of RAM.
If you have a lot of RAM (16 GB or more), this won’t be an issue, but if you just have 4 GB and are trying to accomplish resource-intensive tasks like video editing, rendering, gaming, or utilizing RAM-intensive software like Maya or Unity, you’ll probably have a lot of freezes on Windows 11.
Because of the way Windows 11 manages memory, some of these freezes may progress to a Black Screen of Death (BSOD), which may forcefully restart your computer.
If this scenario applies, instead of adding extra RAM to your machine, you can solve the problem by expanding virtual memory (vRAM). Increasing the VRAM will increase the free space allotted for RAM overflow, preventing your app from freezing due to a lack of memory.
To boost VRAM on Windows 11, follow the steps below:
- On Windows 11, press Windows key + I to access the Settings menu.
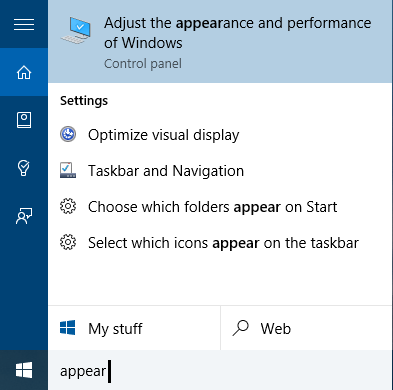
- Search for ‘performance’ in the Settings menu’s settings box (top-left corner).
- When the findings are in, go to the context menu that just appeared and select Adjust Appearance and Performance of Windows.
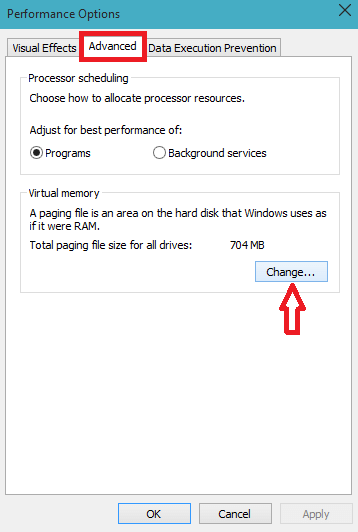
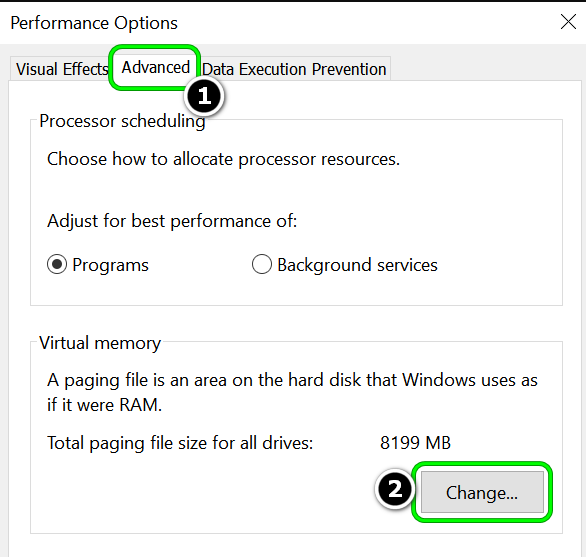
- Select the Advanced tab from the ribbon menu at the top of the Performance Options menu once you’re inside.
- After that, select the Change option (under Virtual Memory).
- Start by comparing the Recommended paging file size value with the Currently allocated in the Virtual Memory window.
- If the value of Currently allocated is less than the Recommended value, uncheck the box for Automatically manage paging file size for all drivers, select C (OS drive) from Paging file size for each drive, and then pick the Recommended value.
- Then, in the Initial Size box, put the Recommended value, and in the Maximum Size box, enter a greater figure.
Note: If you have enough storage space, go double the size of the recommended figure.
- Finally, click Ok to save your changes.
Then restart your computer to see whether the random freezes and crashes have gone away or not.
Fix 3 – Install the Latest Device Drivers
As previously stated, Windows 11 freezes at odd times, typically due to outdated drivers. In this scenario, updating all of the drivers at once may be beneficial in resolving the issue.
Follow the instructions below to update your device drivers:
- Right-click on the Start Menu to bring up the context menu.
- Choose your Options
- Go to the Windows Update website.
- Select Advanced Options > Optional Updates > from the menu updates to Drivers

- Select the updates you wish to install from the Driver Updates
- Your system will now check for updates automatically. If any updates are available, your machine will download and install them automatically.
Fix 4 – Update Dedicated GPU Drivers
Keep in mind that these types of freezes on Windows 11 might also be caused by an outdated GPU driver. If you’ve recently upgraded to Windows 11 from a previous Windows version and are still utilizing the old GPU disks that we’ve transferred over to the new OS, you’re almost going to run into this issue.
Fortunately, both Nvidia and AMD have begun distributing updated drivers that are created exclusively for Windows 11.
You can possibly use Device Manager to force their installation if your machine doesn’t use them yet. If this fails, you can install the latest available driver using Nvidia or AMD’s proprietary software.
To make sure you’re using dedicated GPU drivers that are completely compatible with Windows 11, follow the steps below:
- To launch the Run dialogue box, press Windows key + R. To open Device Manager, type ‘devmgmt.msc’ into the text box and click Enter.

- When the User Account Control prompts you, select Yes to grant administrator privileges.
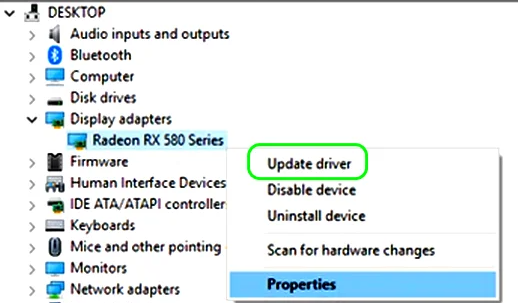
- When you’re in Device Manager, scroll down through the list of installed devices and expand the Display Adapters drop-down option.
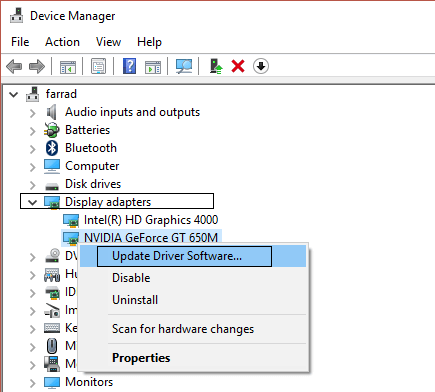
- Right-click on your dedicated GPU in the Display Adapters drop-down menu and select Update Driver from the context menu that appears.
- When you arrive at the next screen, select Automatically search for updated driver software and wait for the initial scan to finish.
- If a new driver version is found, install it on your Windows 11 machine by following the on-screen directions.
Note: If the wizard fails to find a new driver version, go to Windows Update and search for updated drivers to see if the WU component can find a newer version.
If a new GPU driver has just been installed, reboot your Windows 11 machine to see if the freezing issues have been rectified.
If this scan does not disclose a new driver version, you should utilize the proprietary driver upgrading tools produced by Nvidia and AMD to determine if you are running on the newest Windows 11-compatible drivers:
- GeForce Experience – Nvidia
- Adrenalin – AMD
Moreover, you can also update your device driver automatically using the dedicated Driver Updater tool. This scans your system and updates the drivers automatically.
Get Driver Updater to update the driver automatically
Fix 5 – Delete Temp Files
When you delete or uninstall an application from your computer, it usually leaves behind a few temporary files. These temporary files accumulate and potentially degrade your system’s overall performance. As a result, after eliminating any application or program on your system, you must clear temporary files.
Furthermore, these temporary files fill up your storage space. Other sorts of temporary files in Windows 11 include those leftovers when a new version is installed, upgrade logs, error reporting, temporary Windows installation files, and more.
Follow the instructions below to clean your system’s temp files:
- Right-click on the Start Menu to bring up the context menu.
- Choose your options and navigate to System
- Select Storage.
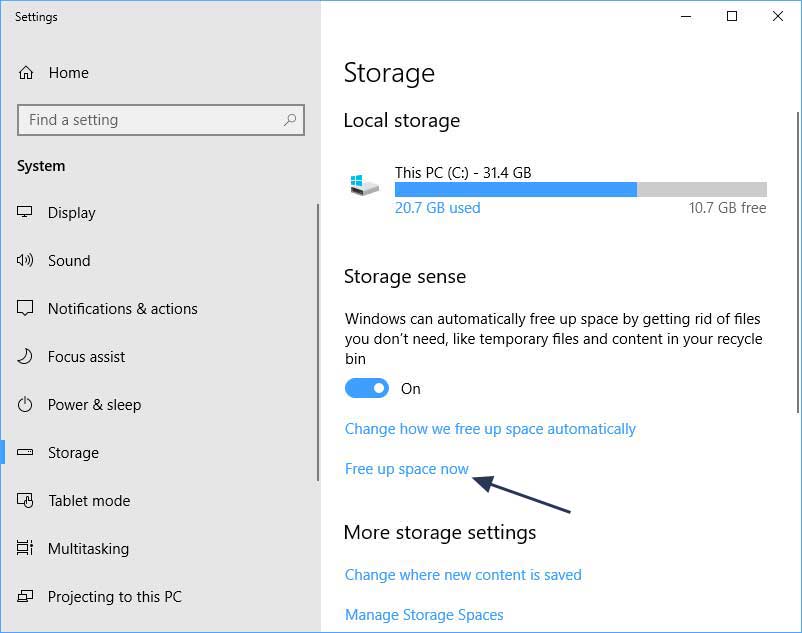
- Go to the Local Disk area and look for it.
- Select the Temporary Files action from the drop-down menu.
- Make a list of all the temporary files you want to get rid of.
- When the option to Remove Files is chosen, click it.
- The system will now erase all of the junk files from your computer automatically.
Fix 6 – Update the BIOS / vBIOS to the Latest Version
An outdated BIOS version is one of the most typical issues causing Windows 11 randomly freezing and unexpected crashes. Keep in mind that Windows 11 is still in its early stages, therefore system firmware problems should be expected until motherboard makers start releasing fully optimized Windows 11 hardware.
If you have a motherboard that was manufactured before the release of Windows 11, the first thing you should do is check to see if your motherboard has a pending BIOS or vBIOS update.
If you’re using a laptop, go online and search for ‘laptop model +drivers,’ then go to your manufacturer’s official download page and look for any BIOS updates that are newer than the one you’re using.
Note: If you’re using a PC, look up ‘motherboard model + drivers’ online to find the official driver fleet for your motherboard.
Keep in mind that most manufacturers have their own proprietary BIOS update software that must be used. ASUS, for example, offers EZ flash and MSI offers MFlash. It’s generally a good idea to read the instructions associated with the BIOS update before downloading it so you know exactly how to install it.
Some motherboard manufacturers are issuing BIOS updates that you can install directly from Windows, but avoid them unless they specifically state that the installer is Windows 11 compatible. It was found that some customer reports verifying that applying the BIOS update through Windows made things worse by causing the computer to refuse to boot.
Using the proprietary BIOS updating utility and following the official instructions for installing the update from BIOS or UEFI is the best way to update your BIOS version (instead of directly within Windows).
Free PC Repair Tool
Repair corrupt or missing system files, prevent virus/malware, file loss or any kind of PC issues.
Fix 7 – Execute the SFC command
When you upgrade to Windows 11, your PC may stall at odd intervals because it may have skipped or missed some files. It may also have installed a few faulty files that are causing your Windows to suddenly freeze but the mouse works. In such circumstances, running an SFC scan can assist in the repair corrupted Windows system files and the resolution of the problem.
Follow the instructions below to execute an SFC command scan:
- Select Start from the Start Menu and type cmd in the command prompt.
- Launch Command Prompt and run the program as an administrator

- Enter the following command in cmd.
- sfc /scannow
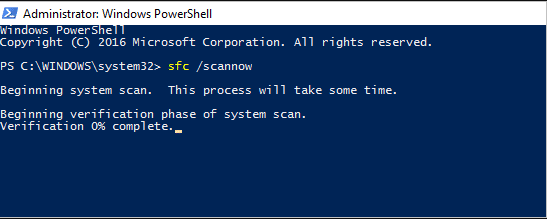
- Press the Enter key.
Your PC will now begin searching for and automatically repairing any missing, skipped, or corrupt files in the system. After the scan is finished, restart your computer.
Fix 8 – Switch to GEN 3 PCIe Settings
Because of the way GEN 4 data relating to your GPU is processed by Windows 11, if you’re already on PCIe 4 (Peripheral Component Interconnect Express), you can expect overall system stuttering.
This problem is now flying under the radar, with only a few users reporting it. However, you should be able to avoid the screen freezing by changing your PCIe settings in BIOS or UEFI settings from GEN 4 to GEN 3 until Microsoft becomes aware of the issue.
For many users using high-end PC configurations with a powerful GPU on Windows 11, this appears to have resolved the issue.
Note: Only follow this method after you’ve tried updating your BIOS to the most recent version available. Look for an option to revert back to Gen 3 under the Advanced options cluster in your UEFI or BIOS settings.
Fix 9 – Perform A Disk Check (Execute the Chkdsk Command)
Chkdsk is another command that is entirely dedicated to discovering and correcting any hard drive issues.
Follow the instructions given
- Select Start from the Start Menu> type cmd and hit Enter
- Now run the Command Prompt as an administrator
- Enter the following command in cmd and hit Enter
- chkdsk
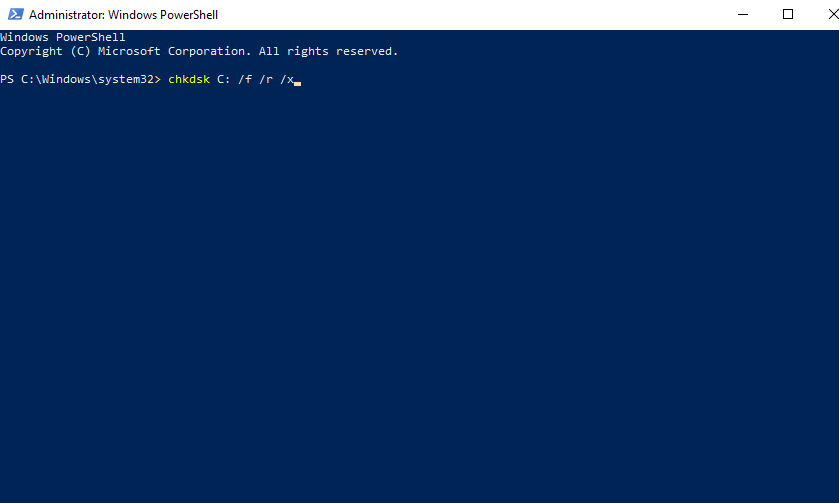
- Press the Enter key.
Your system will now do a check for problems on the drive. Rep this method until you’ve checked all of the purposes in your system. A notification will appear on your screen confirming that your drive was successfully scanned and that no issues were discovered. If you see errors, those errors are most likely the source of the problem. Stop updating the disk in this scenario.
Fix 9 – Run Startup Repair
If Windows 11 fails to load and instead displays the login screen or Windows 11 screen freezes but mouse works, the first thing you should do is run Startup Repair.
Follow the steps below to conduct the Windows startup fix.
- Turn on your computer.
- F11 should be pressed as soon as your computer starts up.
- This will take you to the Advanced Startup Options in Windows 11.
- When the computer starts up, select Troubleshoot.
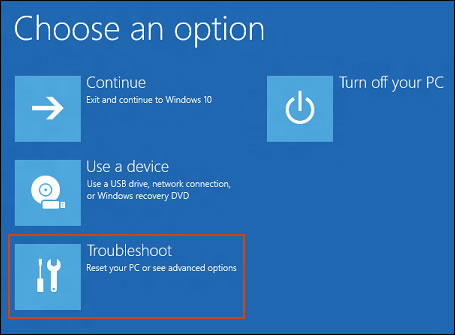
- Select Advanced Options.
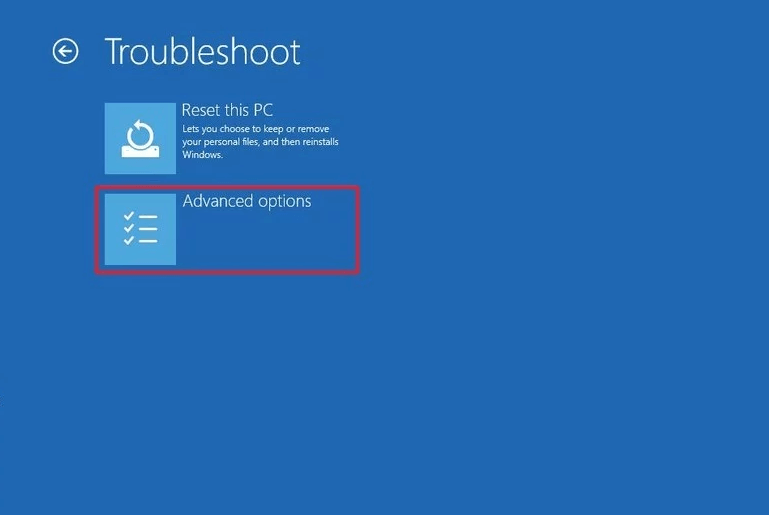
- Select the Startup Repair option from the drop-down menu.
Windows 11 will now automatically diagnose the issue and attempt to repair it. Allow a few minutes to pass.
Fix 11 – Reset Windows 11
If facing the “Windows 11 freezes but mouse working” issue and none of the above-mentioned methods works for you, the problem may be with the installed OS as a whole. In such circumstances, the only way to address the problem is to reset Windows 11.
If the above-mentioned fixes fail, proceed to the next step. This procedure will remove all data from your computer. As a result, before you reset Windows 11, make sure you back up all of your crucial data.
Follow the steps below to reset Windows 11:
- Right-click on the Start Menu
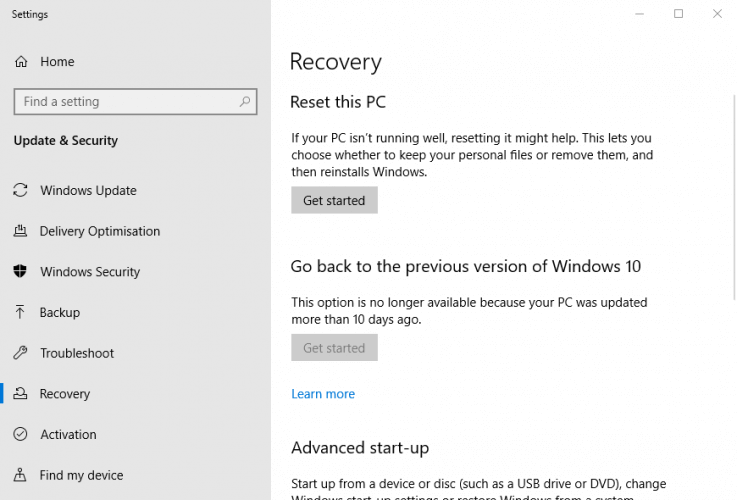
- Select Settings.
- Select Recovery from the System menu.

- Choose the option that says Reset PC.
- Directly beneath Reset PC, click Get Started.
- Select Remove Everything from the menu.

- If Windows informs you that you won’t be able to roll back to a previous OS version, click Next.
- Click Reset on the message prompt.
This will totally wipe your computer clean. As a result, you must save all of your key files, folders, photos, and documents to a portable device. Only follow the steps above if you can access Settings right away when the computer starts up. The cause of your Windows 11 freezing could be severe enough to prevent Windows from booting up.
It is difficult to access Settings in this situation. However, the sign-in screen can be used to reset Windows 11.
Best & Easy Solution to Fix Windows 11 Screen Freezes but Mouse Works
To fix various Windows PC problems like freezing, crashing or hanging it is suggested to scan your system with the PC Repair Tool.
This is an advanced, multifunctional tool that detects and fixes DLL-related errors just by scanning. It is a highly advanced and trusted tool, that repairs corrupted Windows system files, prevent your PC from file loss, remove virus or malware infection and much more.
So feel free to run this automatic utility and make your Windows PC error-free.
Get PC Repair Tool, to fix Windows 11 Screen Freezing/ Crashing Problem
Conclusion:
So, this is all about the Windows 11 screen freezes but mouse works problem.
Here I tried my best to list down the best possible solutions to get past the Windows 11 screen freezes or crashing problem.
It is estimated that one of our solutions managed to fix the error. Hope the article works for you.
If there is anything that I missed out or you have any queries or suggestions then you can write to us on our Facebook Page. Also, don’t forget to shoot the like button.
Good Luck..!
Hardeep has always been a Windows lover ever since she got her hands on her first Windows XP PC. She has always been enthusiastic about technological stuff, especially Artificial Intelligence (AI) computing. Before joining PC Error Fix, she worked as a freelancer and worked on numerous technical projects.