Memory Integrity can’t be turned on is a common problem reported by plenty of Windows 11 users. As per the users, the memory integrity feature is greyed out in the Windows security.
The problem is related to the incompatible driver, and due to this, the memory integrity feature stopped working or won’t turn on.
This is a serious problem as it puts the computer under threat and therefore needs to be resolved.
So here in this article, we have listed the potential fixes suggested by the experts and worked for many users to get past the Windows 11 memory integrity can’t be turned on a problem.
To repair corrupted Windows system files, we recommend Advanced System Repair:
This software is your one stop solution to fix Windows errors, protect you from malware, clean junks and optimize your PC for maximum performance in 3 easy steps:
- Download Advanaced System Repair rated Excellent on Trustpilot.
- Click Install & Scan Now to install & scan issues causing the PC problems.
- Next, click on Click Here to Fix All Issues Now to fix, clean, protect and optimize your PC effectively.
What is Memory Integrity?
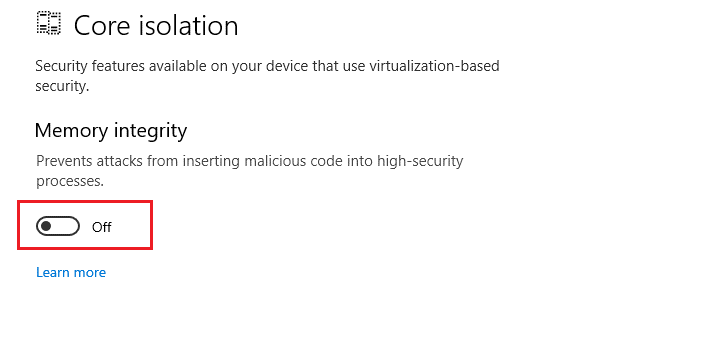
Memory integrity (also known as Hypervisor-protected Code Integrity (HVCI)) is one of the security features of Core isolation.
The Core isolation supports hardware on your Windows device that protects your OS from any malicious code, isolating a few processes in the system memory.
This feature is essential to be turned on your device to prevent any malware attacks. But in some cases, the users are unable to turn on the memory integrity feature in Windows 11. So here are the potential solutions to resolve the error completely.
How to Fix Memory Integrity Can’t Be Turned On Windows 11?
Before trying the below-listed solutions, consider restarting your Windows 11 PC, which fixes any temporary glitches. If this doesn’t work, proceed with the below-advanced troubleshooting hacks.
Solution 1: Identify the Problematic Driver Blocking Memory Integrity (if applicable)
The primary reason for this problem is the outdated or incompatible drivers on your PC. To resolve the issue, identify the problematic driver on your device that blocks the memory integrity feature and later delete it.
- Open the Windows Security app and go to Device security >Core isolation details.
- While enabling Memory integrity, if you face Resolve any driver incompatibilities and scan errors, press the Review incompatible drivers again.
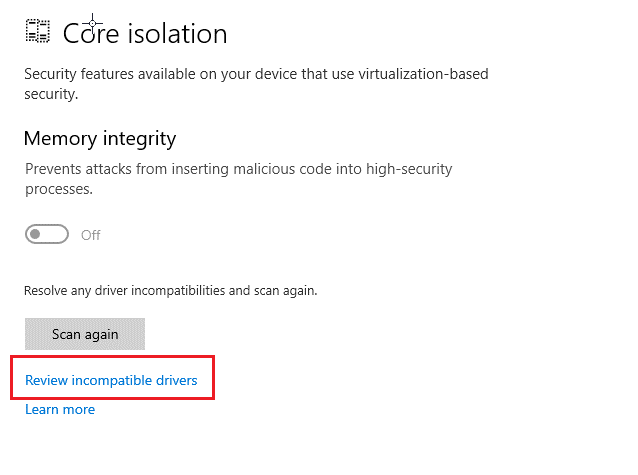
- In the next screen, note any incompatible drivers that automatically disable the memory integrity feature.
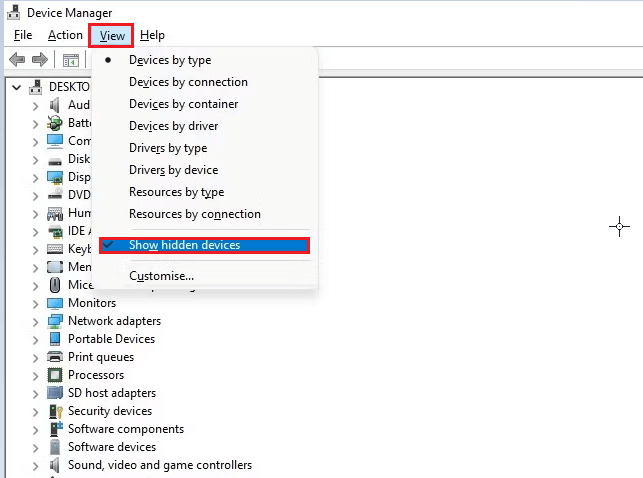
- Go to Device Manager and open View.
- Then, press the Show hidden devices option from the list.
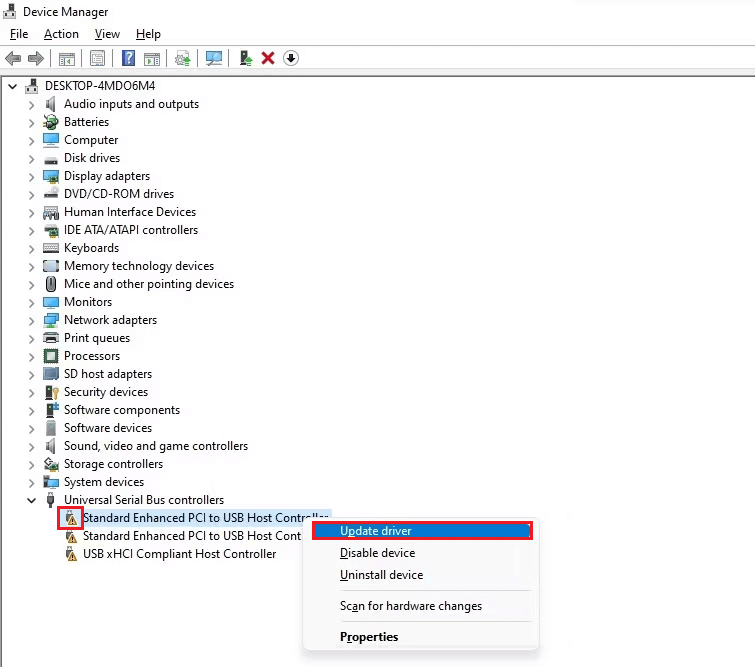
- Find any device drivers that show a yellow triangle in front of it with an exclamation mark inside the driver.
- Right-click on that driver or device and press the Update driver. Updating drivers must fix the problem.
- If this does not fix the issue, right-click on the driver and press the Properties.
- In the General tab, note down the error code in the Device status box.
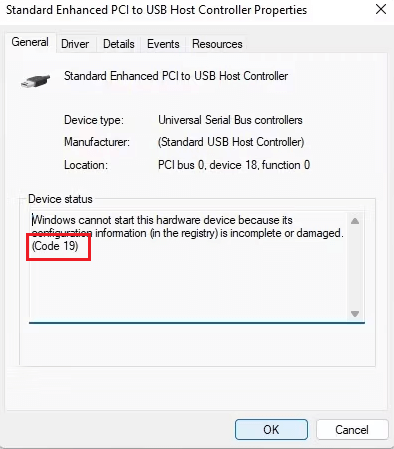
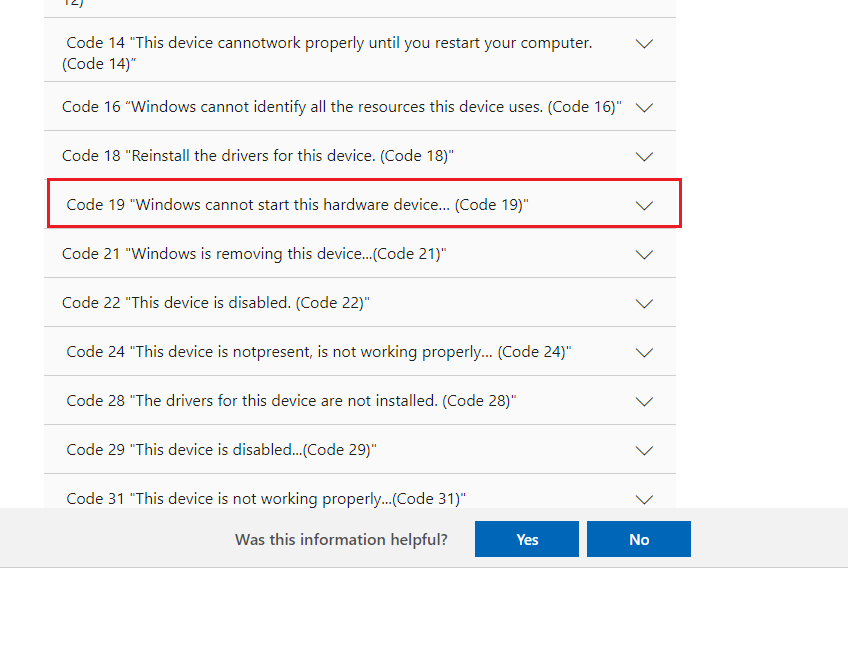
- You can refer to the official Microsoft Support documentation page, where you will get support on troubleshooting the listed error code.
Note: If the troubleshooting methods discussed in the Microsoft Support documentation do not help you turn on the memory integrity feature on your device, then you have to uninstall the problematic driver by using the conventional method (discussed below) or third-party software.
Solution 2: Reinstall Problematic Drivers
Once you have identified the problematic drivers that lead to the memory integrity feature cannot be turned on the issue on your PC, follow these instructions to reinstall them.
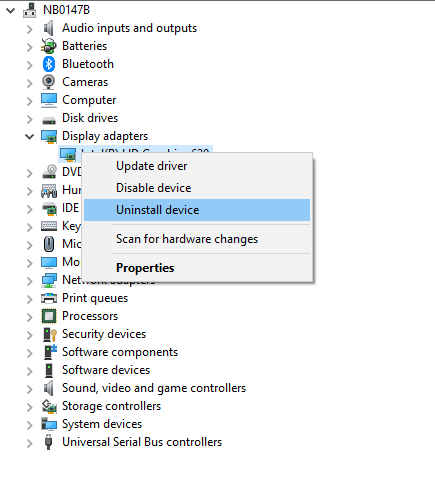
- Go to the Start menu and type Device Manager. Click on Open to launch it.
- Expand the Display adapters (taken, for example, follow the steps according to your problematic drivers) by double-clicking on it.
- Right-click on your driver and press the Uninstall device
- Confirm any prompt and download the new drivers.
- Open a new tab on your browser and navigate to the driver’s manufacturer’s website.
- Note down your Windows version and download the drivers correspondingly.
- Once the drivers are downloaded, navigate to My downloads and run the .exe files by double-clicking on them.
- Wait until the drivers are installed on your PC and restart it.
In addition, you can update the device driver automatically by using Driver Updater. This tool scans and selects which driver your computer requires scans it, and installs it on your PC.
Get Driver Updater to Update Entire System Drivers Automatically
Solution 3: Uninstall Problematic Driver via Autoruns
When the incompatible driver cannot be located in your Device Manager, you can use Autoruns, a third-party program that easily identifies and uninstalls any corrupt or incompatible drivers.
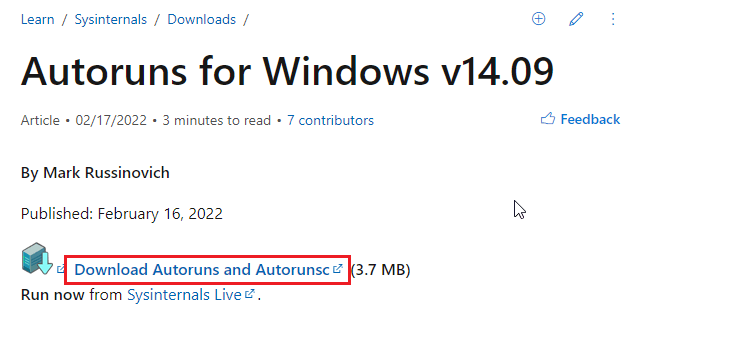
- Go to your browser and visit the official Microsoft website to download Autoruns.
- Now, click on Download Autoruns and Autorunsc link.
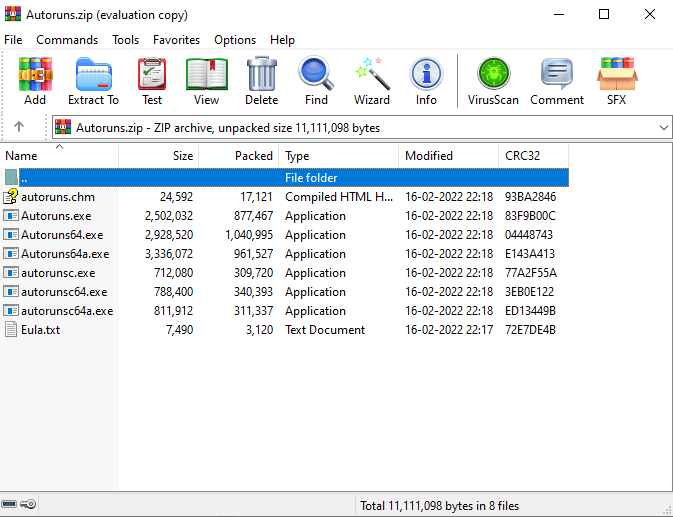
- Then, extract all the files from the downloaded zip file.
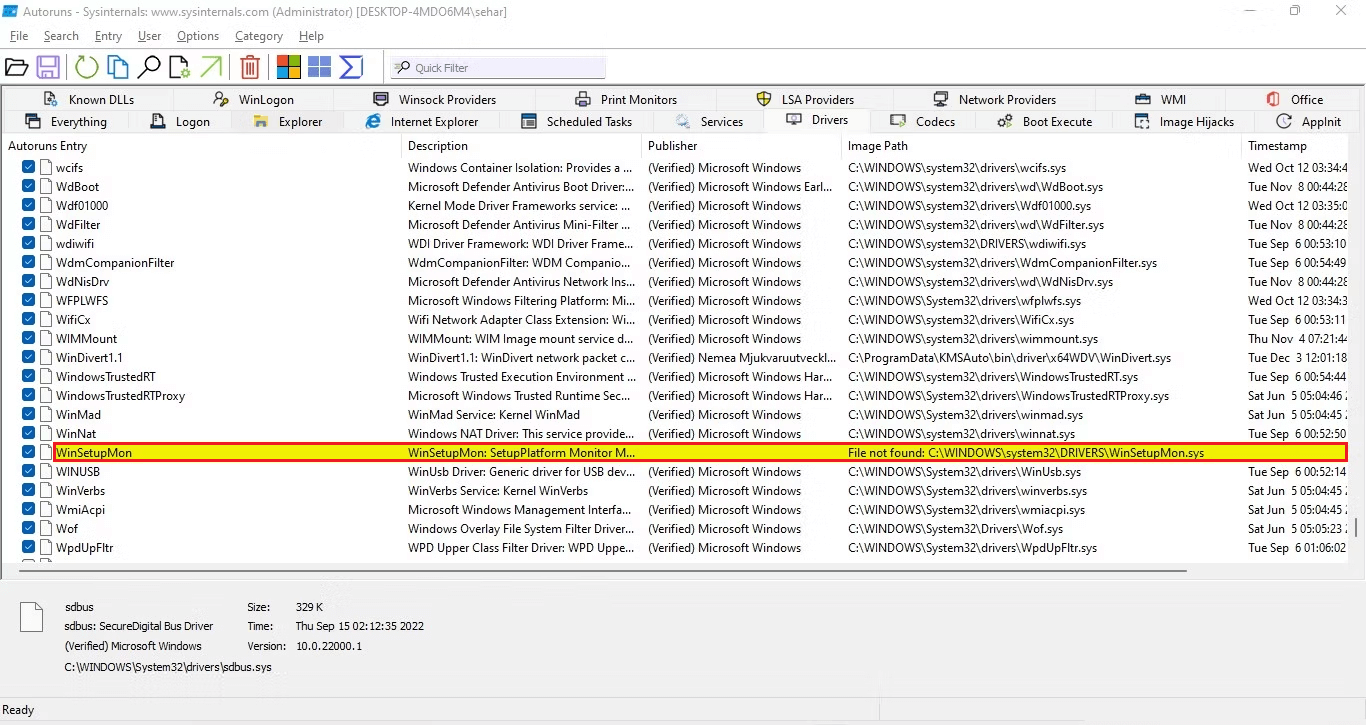
- Right-click on the executable file and press the Run as administrator
- Now, navigate to the Drivers tab, and here, the drivers with any incompatibilities will be highlighted.
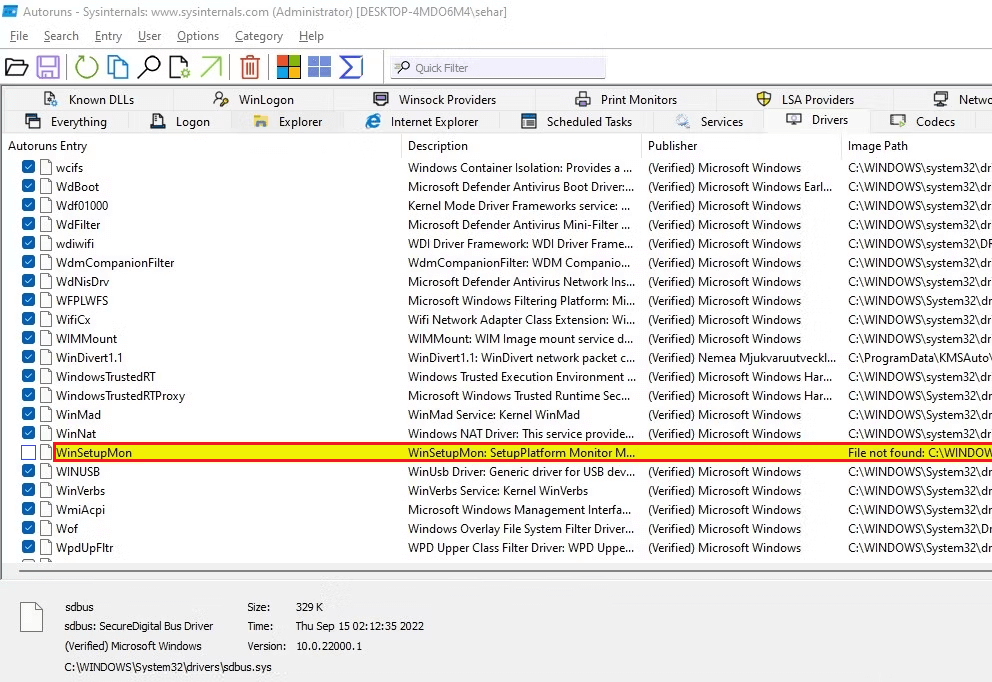
- Once you have identified them, uncheck the box to disable them.
- If you face any error while disabling the driver, right-click on it and press the Delete.
- Please reboot your computer to allow it to install the latest Windows drivers automatically, or you can download them from the official websites.
Still, if the memory integrity feature cannot be turned on, you must try tweaking some system settings as instructed in upcoming solutions.
Also Read: [100% SOLVED]: Device Driver Software was not Successfully Installed
Solution 4: Run SFC and DISM Scan
Most commonly, Memory integrity can’t be turned on Windows 11 issues occur if your system has corrupt files and folders. You can repair corrupted Windows system files using built-in Windows tools like System File Checker and Deployment Image Servicing and Management. The instructions below will help you perform an SFC/DISM scan on your Windows PC.
- Press the Windows + S keys and type cmd on the search bar.
- Now, please tap on the Run as administrator option to launch it with admin rights.
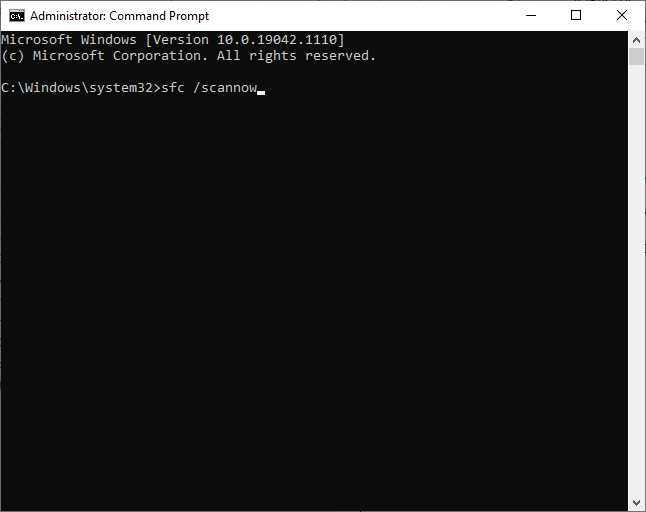
- Then, enter the following command in the command window and hit Enter on the keyboard.
sfc /scannow
- Check if you get Verification 100 % completed message and once you receive this message, check if you can turn on the memory integrity feature on your PC.
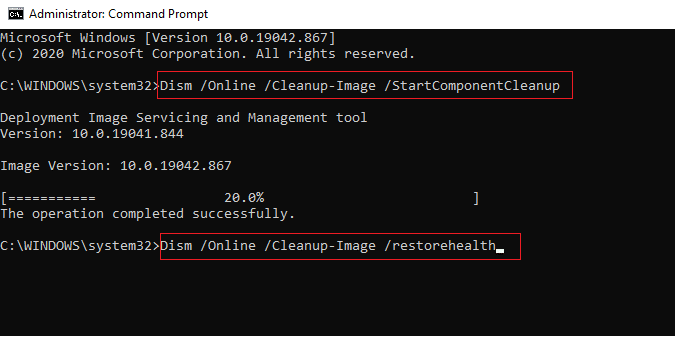
- If not, reboot your computer, open the command prompt as an admin again, and run the following commands.
dism.exe /Online /cleanup-image /scanhealth
dism.exe /Online /cleanup-image /startcomponentcleanup
dism.exe /Online /cleanup-image /restorehealth
- Once these commands are executed, re-do the SFC & DISM scan to ensure the feature works without errors.
Solution 5: Make Sure Hardware Virtualization is Enabled
Hardware Virtualizations is a method to create virtual versions of physical desktops and operating systems and then to share the physical hardware resources efficiently. As a result, a single physical machine can work as several virtual computers, increasing your PC’s efficiency and productivity. This method must be enabled to ensure the normal working of the memory integrity feature.
- Press the SHIFT key while holding the Shutdown button
- Now, click on the Restart option and press the Windows + C keys together to launch the Charm Bar.
- Then, tap on Settings.
- Now, navigate to the Change PC Settings option and then go to the General tab.
- Next, press the Advanced Startup option and then tap on Restart Now.
- Go to Troubleshoot > Advanced Options > UEFI Firmware Settings.
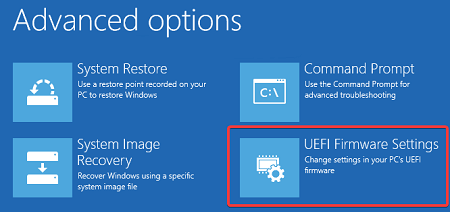
- Click on Restart.
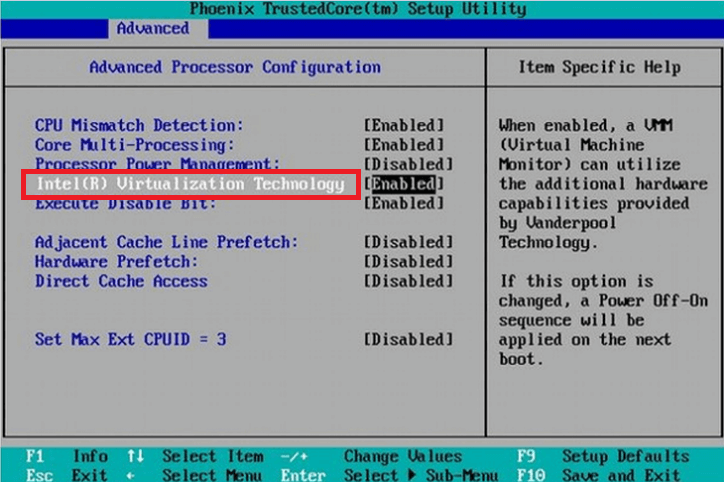
- Now in the BIOS settings (Advanced or Configuration tab), check if configuration items are related to the CPU. You can find this under the headings like Processor, Chipset, or Northbridge.
Note: The exact location of the hardware virtualization setting may vary for each manufacturer. Follow the steps accordingly.
- Within the CPU configuration settings screen, enable hardware virtualization settings may be called Intel® Virtualization Technology, VT-x, AMD-V, SVM, or Vanderpool.
- In addition, enable Intel VT-d or AMD IOMMU if they are available.
- Save the recent changes and restart your machine.
Solution 6: Enable Core Isolation & Memory Integrity in Settings
If you still can’t turn on Core isolation Memory integrity on your Windows computer, then you can manually enable the core isolation and memory integrity features in your settings as instructed below.
- Sign in to your PC as an administrator, hit the Windows key on your PC, and type Windows Security in the search menu.
- Then, click on Open.
- Now, switch to the Device security tab in the left pane.
- Next, click on the Core isolation details option as shown.
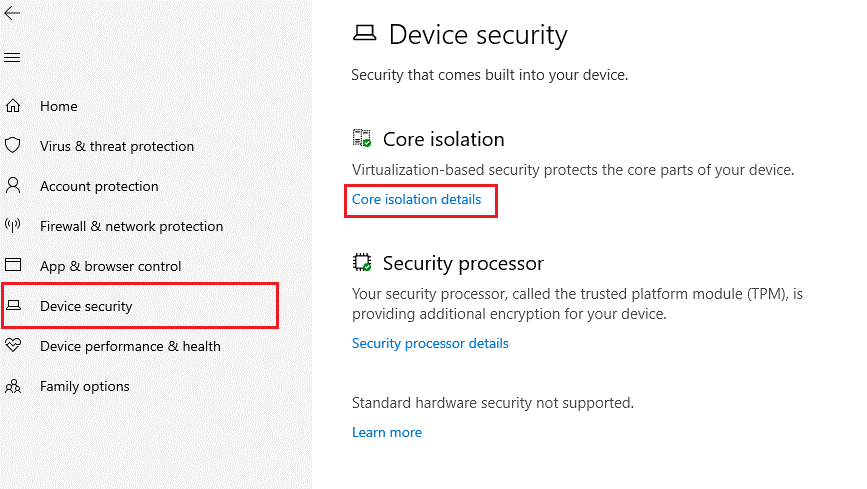
- Now, toggle on the Memory integrity setting as shown below.
- Reboot your computer when asked.
Solution 7: Enable Memory Integrity using the Registry Keys
You can fix memory integrity can’t be turned on issue on your Windows 11 PC by tweaking a few registry settings as instructed below.
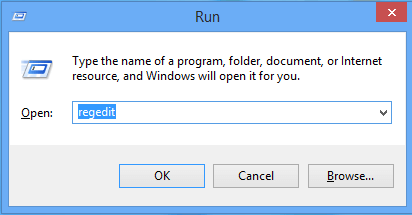
- Launch the Run dialog box by pressing the Windows + R keys
- Next, type regedit and click on OK.
- Now, navigate to the following location in the registry editor.
Computer\HKEY_LOCAL_MACHINE\SYSTEM\CurrentControlSet\Control\DeviceGuard\Scenarios
- Now, right-click on the Scenarios folder and click on New > Key as shown below.
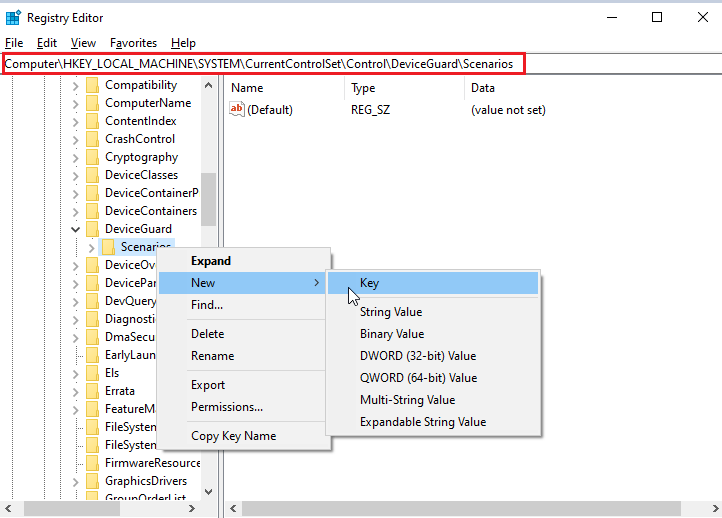
- Name the key as HypervisorEnforcedCodeIntegrity
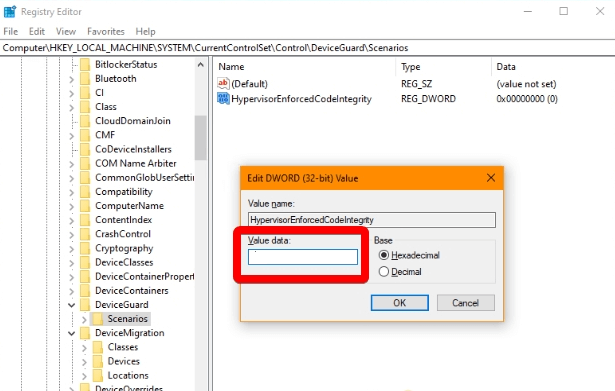
- Then, right-click on the newly added key and add a new DWORD (32-bit) value.
- Right-click on this DWORD (32-bit) value string key and fix the value as 1.
Note: The default value will be 1; changing it to 0 will disable the feature.
- Press the OK button and close all the windows.
- Reboot your computer.
Solution 8: Enable Memory Integrity using the Group Policy Editor
If enabling the memory integrity feature using registry keys did not help you, turn on memory integrity using the Group policy editor. Follow the below-listed instructions.
- Go to the Start menu and type Group Policy.
- Now, click on Edit Group Policy to launch it.
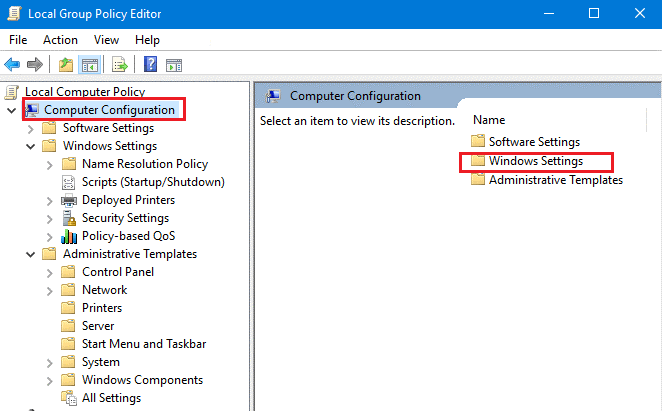
- Then, double-click on the Computer Configuration option on the left screen.
- On the right screen, double-click on the Windows Settings folder.
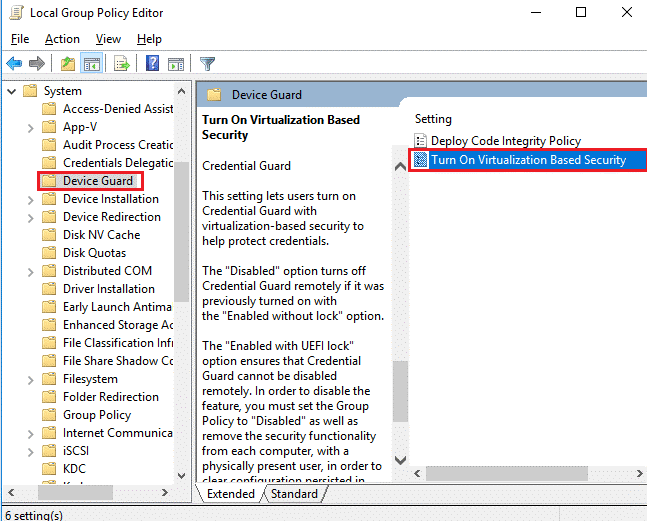
- Browse the Windows Settings folder to locate the Device Guard folder. Double-click on it to open the folder.
- Then, double-click on the Turn on Virtualization Based Security file.
- In the new window, click on the radio button next to the Enabled option in the top-left section of the window.
- Now, save the changes by pressing Apply and OK.
- Restart your PC, and the memory integrity feature will be turned on.
Solution 9: Disable Nested Virtualization (if applicable)
Your system’s virtualization software in the BIOS/UEFI settings can be used by only one application at a time. If you have enabled this Nested Virtualization on your system, this prevents you from opening the Memory Integrity feature each time you launch it. Follow the below instructions to disable this feature on your device.
- Go to the search menu and type Windows PowerShell. Click on Run as administrator to open it with admin rights.
- Now, please copy & paste this command line into the PowerShell window and wait until it is executed. Replace <VMName> with your actual Virtual Machine’s name.
Set-VMProcessor -VMName <VMName> -ExposeVirtualizationExtensions $false
For any third-party virtualization software, check and browse their settings for the steps to disable the Nested Virtualization feature.
Solution 10: Install Windows 11 Updates
In addition to installing the driver updates on your device, you have to install the latest operating system updates to troubleshoot the Windows 11 memory integrity can’t be turned on problem on your device.
If your Windows 11 computer is not up-to-date, follow the below-listed steps to update it.
- Press the Windows + I keys simultaneously to open Settings.
- Tap on the Windows Update option in the left pane.
- On the right screen, tap on Check for updates.
- If you find an update available, tap on the Install now option to update to the new version.
- If the Windows 11 OS is already updated, you will get You’re up to date
- After updating the device, restart your PC and check if the memory integrity feature is turned on.
Solution 11: Clean Installation of Windows 11
A clean installation of Windows 11 will erase the hard drive and apply a fresh copy of the operating system, which will help resolve any issues with an existing setup, including the one we are discussing. Follow the instructions listed below to clean and install the Windows 11 system.
- Open Windows 11 settings by pressing the Windows + I keys
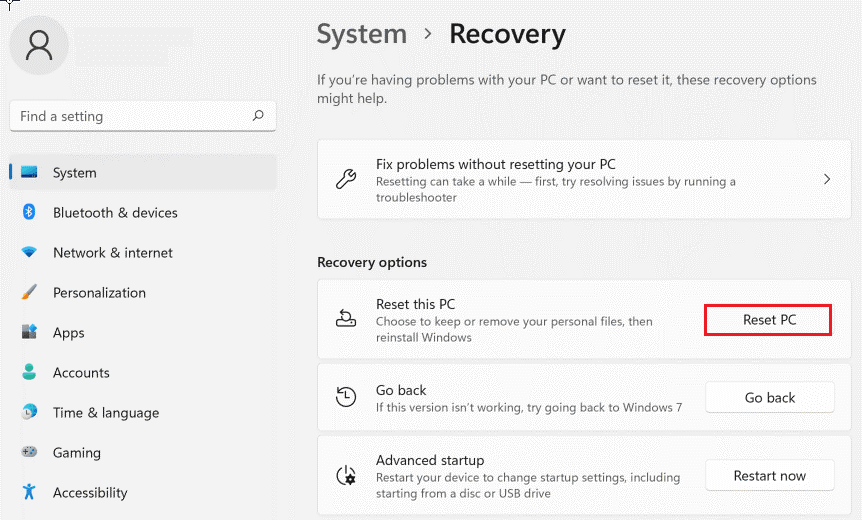
- Click on the System > Reset PC option under the Recovery options as shown.
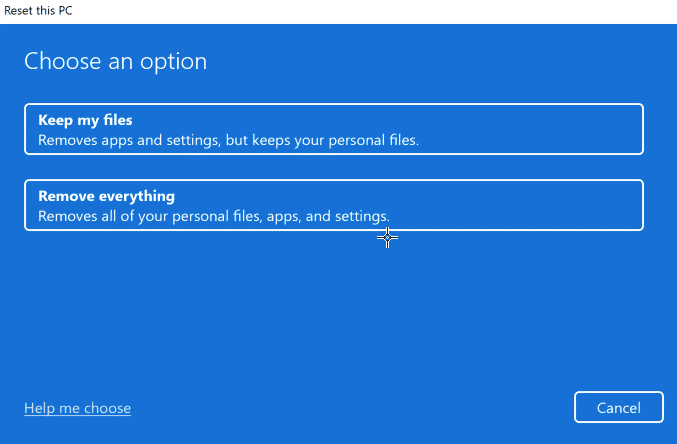
- This option allows you to keep your current files or remove them completely. Choose either of them according to your requirements.
- In the next screen, you can choose either Cloud download (most updated versions of Windows 11 will be installed) or Local reinstall (reinstall the Windows 11 version that came with your system or that is currently installed). Choose any one of them that suits you the best.

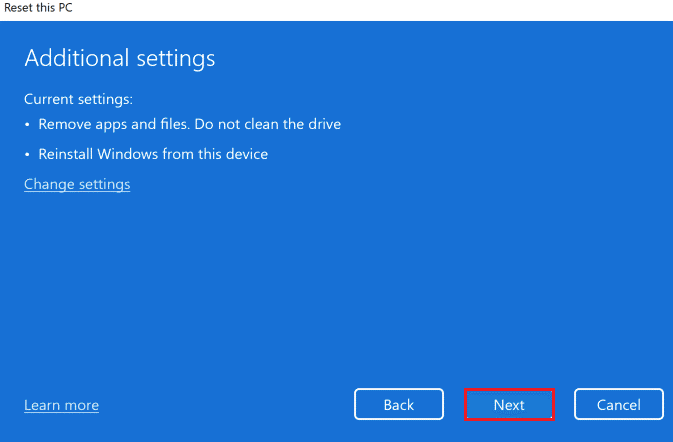
- Confirm your choices in the next window and when you are ready, click Next.
Note: The Rollback option will not be available if you have recently upgraded your system from a previous version.
- Finally, click on Reset to begin the reinstall process.
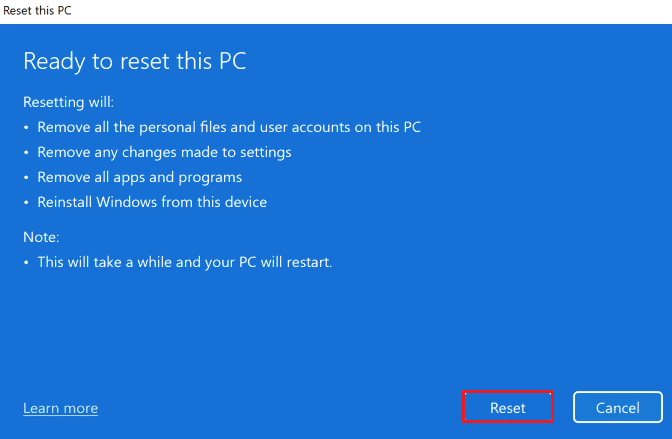
- Once the PC restarts, you will now have a clean installation of Windows 11 which will not throw any errors.
Frequently Asked Questions
Yes, the memory integrity feature is important as it protects your OS from any malicious code, isolating a few processes in the system memory.
You may not be able to turn on your memory integrity if there are any corrupt files, folders, or cache in your system, the hardware virtualization feature is turned off, and the device drivers & operating system are not updated to their latest versions. 1: Is memory integrity important?
2: Why cant I turn on my memory integrity?
Recommended Solution- Fix Various PC Issues & Errors
If your Windows PC/laptop system is running slow or showing various issues and errors, then scan your system with the PC Repair Tool. This is a powerful repair tool that, just by scanning once, detects and fixes various Windows issues and errors.
The tool fixes common PC errors like system file corruption and protects from file loss, malware, hardware failure, BSOD error, and more.
Well, this not only fixes errors but also enhances Windows PC performance.
Get PC Repair Tool to Fix Various PC Issues and Errors
Conclusion:
Memory integrity is a crucial security feature; if not enabled, it can compromise system security.
It is estimated the fixes given work for you to fix memory integrity can’t be turned on Windows 11 problem, and you are able to turn on the Memory Integrity feature.
Make sure to follow the step-by-step instructions listed carefully and solve the problem.
If there is anything I missed out, or you have any suggestions or queries, then feel free to share with us on our social media handles – Facebook and Twitter page.
Good Luck!!!
Hardeep has always been a Windows lover ever since she got her hands on her first Windows XP PC. She has always been enthusiastic about technological stuff, especially Artificial Intelligence (AI) computing. Before joining PC Error Fix, she worked as a freelancer and worked on numerous technical projects.