Is your Game crashes after overclocking CPU or GPU? Then rest assured as you are not alone, this is a common problem claimed by many users.
Well, many of them managed to fix game crashing by resetting the overclock to default or reducing the overclock values.
Gamers are overclocking their CPU and GPU for getting better gaming performance. But some of them reported on the forums that overclocking causes game crashing.
To fix game crashing/freezing problem , we recommend Advanced System Repair:
This software is your one stop solution to fix Windows errors, protect you from malware, clean junks and optimize your PC for maximum performance in 3 easy steps:
- Download Advanaced System Repair rated Excellent on Trustpilot.
- Click Install & Scan Now to install & scan issues causing the PC problems.
- Next, click on Click Here to Fix All Issues Now to fix, clean, protect and optimize your PC effectively.
So, keep reading the article to solve game crashing after overclocking CPU and GPU.
What is Overclocking?
Overclocking is a process of making the computer hardware or its components to operate fast than the frequency stated by the manufacturer by changing system parameters.
Well, this is one of the most convenient ways for increasing the game’s performance and can be done just by performing some quick tweaks in the settings.
Gamers generally overlock their PC, GPU, CPU and other devices for getting fast and better performance.
But, many gamers claimed the overclocking process is loaded with more failure than that of a success.
Anyways, if you are also unable to run the game properly as it is crashing or freezing very frequently. Then try the below-given solutions to fix the problem.
What to do When Game Crashes after Overclocking CPU?
Trick 1 – Increase the CPU voltage
Well, to fix CPU overclock crashing game problem, try to increase the CPU voltage and check if this works for you.
Please Note: Make sure to utilize the suggested voltages values and increase them slowly, or else you may cause serious damage to the CPU.
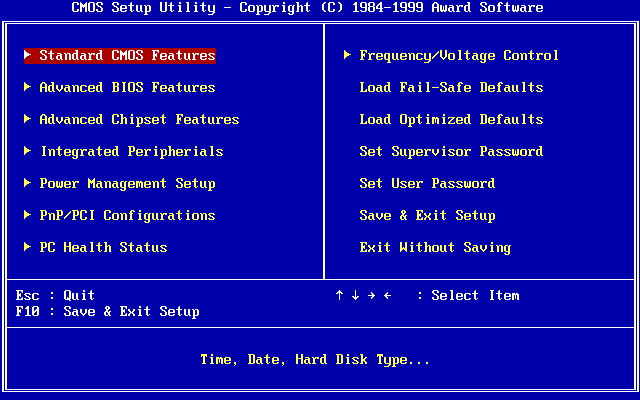
First on your PC enter BIOS, by following the steps given
- Completely shut down your PC > hit the Power button to turn it on again. And just after pressing the power key > hit the right key to start the BIOS or UEFI menu. Well, the key might differ as per your system, however, generally, the F1, F2, F10, F12 or Delete keys are used. If you are not sure which key to use then check your PC or CPU user guide.
- Start the overclock settings.

- Now find the voltage setting.
- And slowly increase the voltage value.
And after doing so, try playing your game and check if it crashes or not.
Trick 2 – Lessen the Overclock Settings
If the above trick won’t work for you then here it is suggested to reduce your overclock settings. Also, many users confirmed the fixes the problem just by fairly reducing the overclock settings.
Follow the given instructions:
- Well to do so, first, you need to enter BIOS on your system. (As discussed in the above steps.)
- Now start your Overclock settings
- Reduce the CPU speed
- And save the modifications.
Trick 3 – Uninstall Overclocking & Monitoring Software
It is found that different and overclocking software conflicts and cause various issues. So, check if you have installed any software then uninstall it.
Follow the steps to do so:
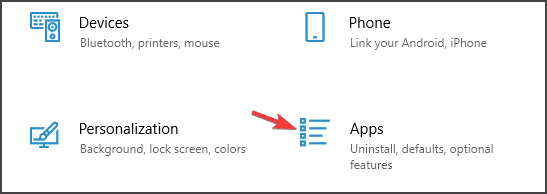
- Press Windows + I key > and open the Settings app.
- Then click on the Apps section.
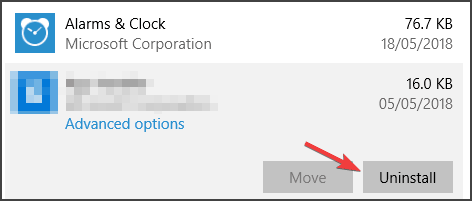
- Choose your overclocking/monitoring software > click on Uninstall
Well, manually removing any software won’t remove it completely as some of its junk files, registry entries are left behind and cause conflict with others. To uninstall the software using the 3rd party uninstaller.
Get Revo Uninstaller to uninstall any program completely
Trick 4 – Examine Your Overclock is Constant
If still, your game crashes after CPU overclock then there is a possibility that your overclock is unstable. So, you need to confirm whether it is stable or not.
Well to do so, use consistent overclocking testing software. And begin the stress test but first confirm that the PC or laptop handle the test.
There is a lot of software available on the web, so make sure to choose the liable one. Also, confirm everything is running perfectly by using dedicated PC fan controller software for changing and controlling the fan speed and cool down your CPU appropriately.
Moreover, if you find the overclock is not stable, then you need to change the settings and locate the stable values for use.
Trick 5 – Disable Overclock Settings
Well, you can also disable the overclock settings as this causes overheating and as a result game crashes after overclocking CPU and GPU.
So, disabling the overclock settings indeed works for you to fix game stuttering and crashing problem.
Here follow the steps to disable overclock settings:
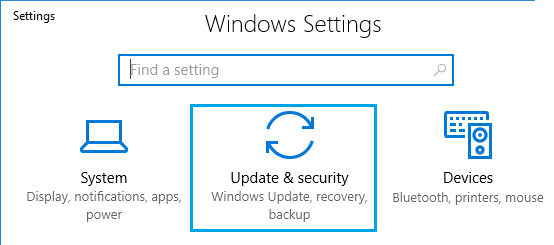
- Click on the Start Menu > open Settings > click on Update and Security > Recovery
- And in the Advanced startup,> click Restart now > wait till the computer reboots.
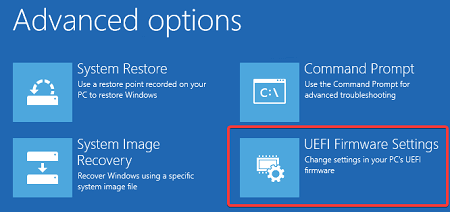
- On Advanced startup,> click on Troubleshoot, > then on Advanced Options > and click on the UEFI Firmware Settings.
- Now click Restart
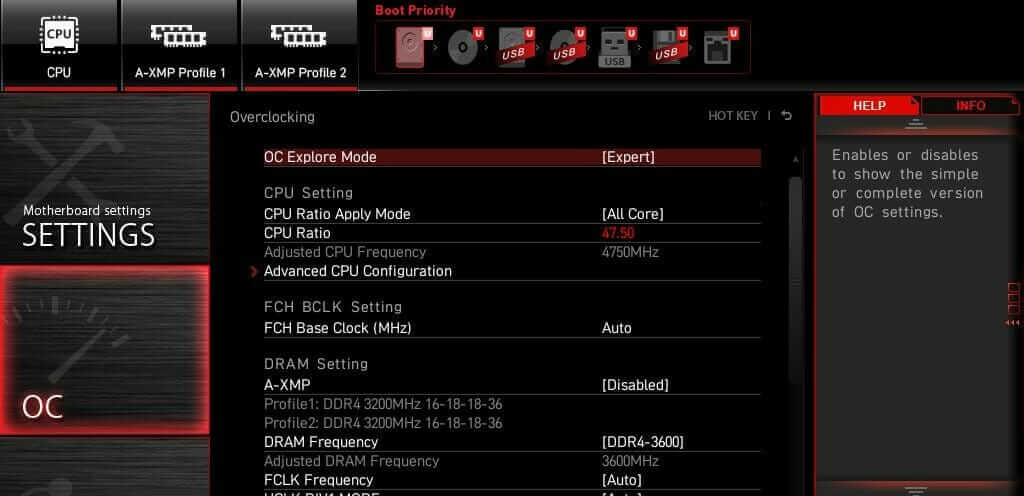
- Once the system restarts > open BIOS > click on Advanced Tab.
- Head to the Performance > and find Overclocking
- Disable the overclocking option
- And press the F10 key to save changes to BIOS > and restart your system normally.
Trick 6 – Delete the Overclock Settings
If none of the above-listed fixes works for you then try resetting your BIOS to default. If this won’t work for you then remove overclock settings.
Follow the steps to do so:
- First, access BIOS.
- Then head to the Overclock page.
- Now reset the overclock settings to the default values.
Hope this works for you but if you don’t know the original overclock values, then you need to reset your BIOS to the default settings.
However, if the overclock is not constant, then you need to reset it and utilize your CPU with default clock values.
Recommended Solution to Optimize Windows 10 PC Performance
If your Windows 10 PC is running slow or crashing while playing the game, then here it is suggested to scan your system with the PC Repair Tool.
This is an advanced, multifunction tool, which just by scanning once, detect and fix various PC problems. With this you can clean the registry entries, repair system files, remove virus or malware infection, and prevent file loss.
Not only this, it is capable to fix various PC stubborn errors and optimize the Windows PC performance. So, download the tool and the rest work will be done automatically.
Get a PC Repair Tool, to Optimize your Windows PC Performance
Conclusion:
Overclocking is done by many gamers to optimize their PC for the best gaming performance.
Well, this is an action for speeding up the processor clock rate above normal running for some interval of time and increase processing.
However many gamers encounter problems like game crashing after overclocking CPU and GPU.
So, in this case, try the given tricks as this help you to fix CPU overclock crashing game problem. Additionally, you can also optimize your gaming performance by running Game Booster. It boosts the game by optimizing the system resources and offers better gameplay.
Hope the article works for you to fix Game crashes after overclocking CPU or GPU.
We love to hear from you, feel free to share your thoughts with us or if there is anything I missed out share with us on our Facebook page. Also, don’t forget to hit the like button.
Good Luck..!
Hardeep has always been a Windows lover ever since she got her hands on her first Windows XP PC. She has always been enthusiastic about technological stuff, especially Artificial Intelligence (AI) computing. Before joining PC Error Fix, she worked as a freelancer and worked on numerous technical projects.