Does your Chromebook frequently show DHCP lookup failed errors? If you don’t have any clue why you are getting a DHCP lookup failed error on Chromebook or how to fix it then you are at the right place.
As this blog cover complete detail on how to fix DHCP lookup failed error and other essential aspects related to this error.
To fix DHCP lookup failed Chromebook error you can start with some simple fixes like restarting the Router, Renew IP, extend DHCP range in the router, etc.
So without wasting any more time let’s know in detail what are the best fixes available to resolve DHCP lookup failed on Chromebook.
How To Fix DHCP Lookup Failed Chromebook Error?
1# Restart The Router
Sometimes big issues can also be fixed with some simple solution. So you must try restarting your router to fix DHCP lookup failed on Chromebook error.
No needs to reset it just restart your device by turning it off for 10 seconds. So, that all the conductors get completely discharged.
- Turn off the PC or Chromebook or PC.
- After that switch off the modem/router and then disconnect the power cable.
- Wait for at least 10 seconds.
- Connect the plug again and switch it on.
- Wait until the router starts completely.
- Start the device to check whether the problem is been fixed or still persists.
2# Several Devices Connected With Same DHCP Server
Each DHCP server contains a SUBNET configuration that essentially decides the capability of the device it can manage.
Usually, 255.255.255.0 Subnet mask is used with the IP address as 192.168.X.Y. If there are multiple devices connected with the server then it will be better if you switch to the Class B or Class A subnet.
The best option will be to ask your IT admin about the best network out of these two:
- Class A networks use a default subnet mask of 255.0.0.0
- Class B networks use a default subnet mask of 255.255.0.0
If you are having basic knowledge about router configuration then after login setting must need to be available as the first option. This type of issue was majorly reported by organizations which Chromebooks in bulk but the network was not ready to manage all these things together.
3# Extend DHCP Range Of The Router
The DHCP range defines the number of devices that will get IP addresses through the router.
If you are using a home network then you can easily get connected to 250 devices in which the router is also included.
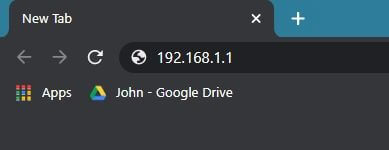
- To modify the DHCP settings you have to sign in to your router.
- Open the browser and search for the router’s IP Address.
- Go to the DHCP settings present within the Network or LAN tab.
- Now you have to set the range of DHCP from 192.168.x.10 to 192.168.x.253.
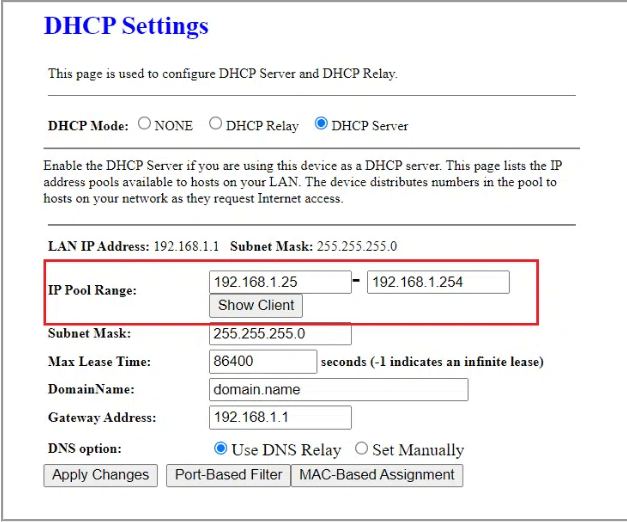
Now it’s time to save all the setting changes you have done and then again try to connect again with the network. Check whether the problem of DHCP lookup failed Chromebook error is fixed or not.
4# Renew IP
Chances are also that your router is facing some kind of issues in assigning an IP address to the entire device and thus you are getting the DHCP lookup failed on Chromebook error.
So you need to execute the following command on your command prompt window.
ipconfig /renew
This command forces your PC to get connected with the DHCP to achieve a new IP address.
Users of Chromebook can use the OS settings of Chrome to fix it. Go to the Chrome OS Settings and then tap the Internet Connection option.
Either you can manually assign the IP. Or you can toggle the switch which will start the IP renewal request.
5# Update Your Router
Before resetting the router get to ensure whether the firmware update is available or not.
Firmware updates fix the patch security problem and device bugs. So it’s very important to keep the network updated always.
Now sign in to the router and then check whether the firmware update is available or not. Usually, it is present within the system or management tab.
Restart the Routers after the installation of new firmware. When your router gets online again doesn’t forget to restart the device.
Now check whether you have successfully overcome the DHCP lookup failed error.
6# Reset Your Router
If simple fixes like router restarting, firmware update won’t help you out to fix DHCP lookup failed Chromebook error. In that case, try resetting the router.
Check whether you have the default router credentials or not. Also, get ensure that if in case you need a username or password for network connection.
You can easily get all these details from the sticker present on the backside of your router. Once you get all such detail reset your router device by 10 seconds of pressing the reset button.
Sign in again to your router and then carefully follow the instruction of the setup wizard for easy configuration of the router. Check whether the DHCP lookup error gets fixed or not.
7# Shutdown The Chromebook Completely
Chromebooks encounter several issues mainly at the time of receiving the IP address from your DHCP server.
So whenever the Chromebook faces a problem in getting one new IP address then it will show the DHCP Lookup failed error.
The very first thing to fix this problem of Chromebook is to turn off Chromebook completely and then restart it again.
In most cases, restarting the device resolves most of the issues. But when you close the Chromebook it enters into the sleep mode but won’t go shutdown.
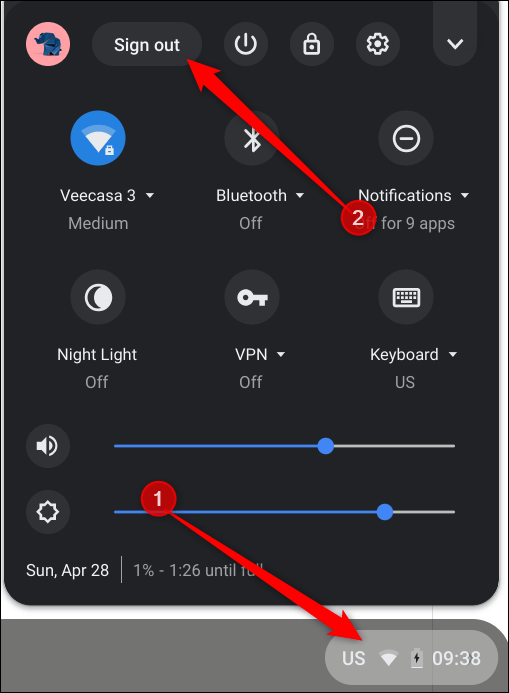
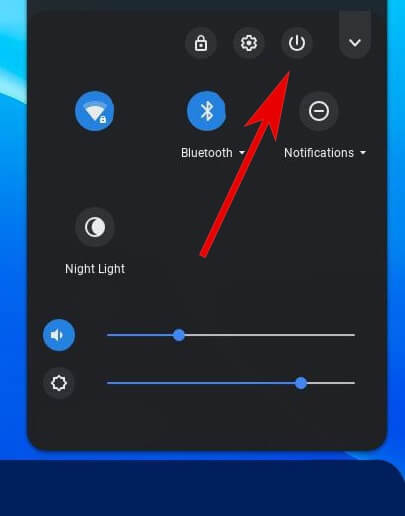
- Tap to the notification or clock area.
- Shut down the Chromebook.
- Turn on the Chromebook after it gets completely shut down.
8# Update Chrome OS of Your Chromebook
OS of any device continuously releases updates to safeguard the ever-developing technological advancements and patches the known bugs.
So if your Chrome OS is gone outdated then this could be the root cause of the DHCP lookup failed Chromebook issue.
By updating the device OS with the latest build you can fix the problem.
- Connect the device with the internet either using Wi-Fi or Ethernet cable.
- Open your Chromebook Settings.
- On the left pane of your window, there is an option About Chrome OS, you have to make a tap over it.
- Now hit the Check for Updates option.
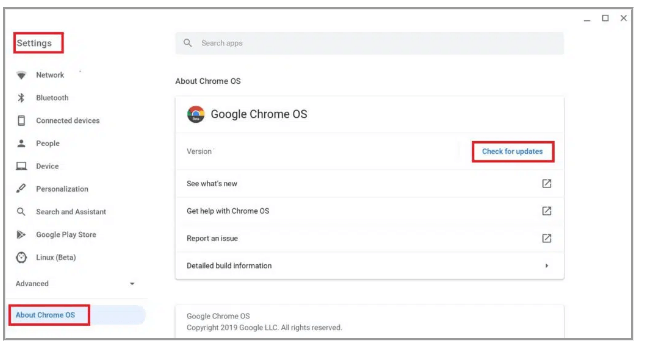
- After the completion of an operating system, the update doesn‘t forget to restart the device.
Try to reconnect to the same network to check whether the device is free from the dhcp lookup failed error.
9# Change The Sleep Settings Of Chromebook
Chromebook contains a popular bug, as per which when the device comes out from the sleep mode it denies to get connected with the network. This result in the occurrence of the following error message DHCP lookup failed on Chromebook.
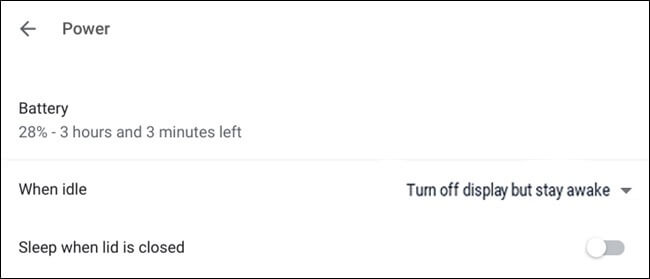
In such a situation, modifying the Chromebook sleep settings is the best option to try. After making these changes your Chromebook won’t get into sleep mode even when the lid is closed.
- Open your Chromebook Settings.
- Tap to the Device and then on the Power option.
- Hit the drop-down sign present next to the When Idle option. After that from the listed option choose “Turn off Display but Stay Awake”.
- Now hit the drop-down sign present next to “When Lid is Closed” After that from the listed option choose “Stay Awake”.
- Save all the changes you have done and take an easy exit from the Settings option.
- Now restart the Chromebook and try to connect again with the network to check whether it is free from the error now or not.
Note: This step will obstruct your Chromebook from getting into sleeping mode completely even after closing the complete lid. You will see that only your screen will get turn off.
10# Run Network Troubleshooter
Windows OS comes with the built-in Network troubleshooter feature. You can find this feature by following this path:
- Open the Windows Settings by pressing WIN + I.
- Tap to the Update and Security tab and then hit the Advanced Troubleshoot option.
- Locate the internet connection, choose and execute it.
Or else you can just type network troubleshooter in the search box of your system start menu. Now you can run the Internet Connections troubleshooter instantly.
In Windows 10, you can get this option in Network Reset.
11# Change The DNS Server Of Your Chromebook
Another possibility is that some problem has occurred with the DNS Server on Chromebook. DNS server changes the domain name to the server’s IP address.
So if your DNS server is not responding then internet accessing is not possible at all.
In that case, you should make use of the Google DNS servers on your Chrome OS.
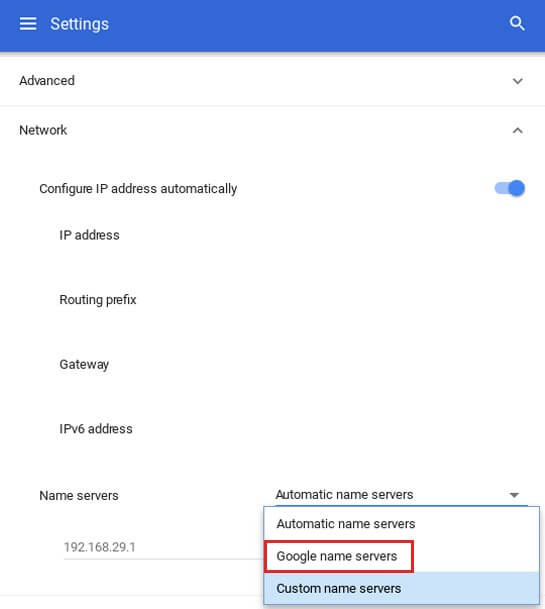
- Open the Settings and choose the Network option.
- Tap to network connection i.e Wi-Fi or Ethernet.
- Move down to the Name Servers section and then choose the Google name servers.
- Restart the Chromebook device.
If still, the problem persists then chances are high that there is some network problem. So make sure to restart the router.
You can also try connecting your Chromebook with the mobile hotspot to check whether the problem is with the router or Chromebook.
12# Check The Network Connection Settings
PC restarting is the easiest option to fix network connection error. But even after doing this still if you are facing the same DHCP lookup failed Chromebook ethernet error.
In that case, you have to check your network connection settings.
- Hit the Windows + X key.
- Choose Network Connections.
- After that select the Change Adapter Options.
- Now choose the network adapter i.e Ethernet or Wi-Fi.
- Make a tap over the Properties tab and then double click the Internet Protocol version 4 (TCP/IPv4).
- Ensure that both the settings are perfectly set for receiving the IP Address automatically.
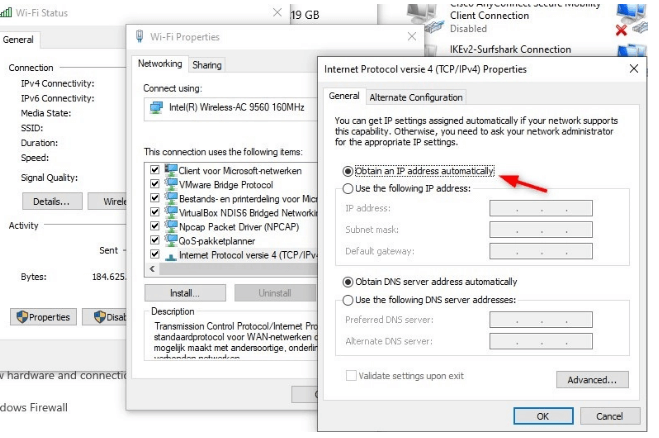
Now close the opened properties windows to check whether the problem is been resolved or not.
13# Reconnect Wi-Fi Network
Chances are also that connection between the devices and router is not stable because of the network malfunctioning.
To clear this out, it’s better to forget the network first and then try to reconnect it one more time. Remember that you have to re-enter the password.
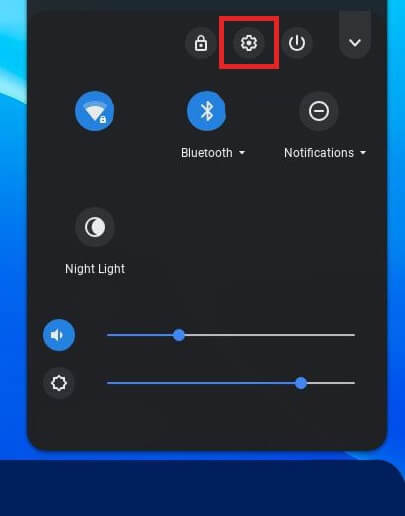
- From the bottom right section of your PC screen, tap the Wi-Fi icon and then tap the network name.
- Hit the gear icon to open the window of Network Settings.
- Now hit the Wi-Fi option.
- If you are connected with the internet then immediately disconnect it.
- Tap to the right arrow of the network you want to forget.
- Hit the Forget button.
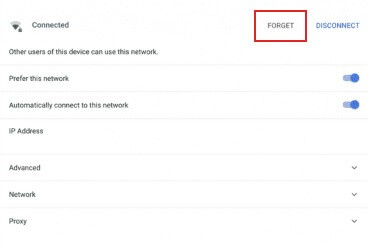
- After that restart your Chromebook device and re-connect the network to check whether everything is working fine or not.
14# Switch To Guest Mode
Guest mode helps you to run chrome without installing any app. So by getting into this mode it becomes too easy to identify whether any corrupted app is screwing up your Chromebook device or there is some other issue.
- You need to log out before entering with the guest account.
- Go to the login screen and tap the browse as guest option which is present at the screen bottom.
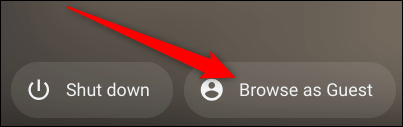
After this, you will see that you are now logged in as a Guest and no chrome apps are available here to bother you.
If in case you are still facing the DHCP Lookup Failed ethernet error then go with the recommended solution.
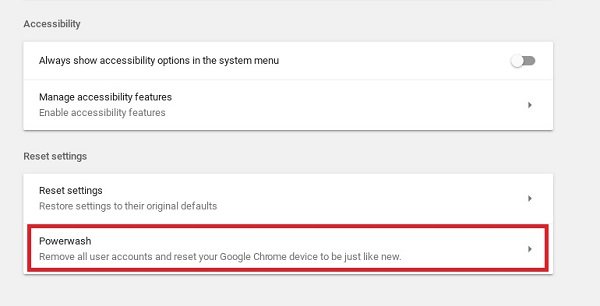
15# Powerwash Chromebook From the Login Screen
If you are frequently facing this DHCP failed error on Chromebook then maybe some problem has occurred in the Chromebook. So by using the Powerwash feature of Chromebook you can bring back your Chrome OS to the original state.
Here is how to reset the Chromebook from the login screen by taking the following steps:
- Open the login screen of your Chrome OS and then from the keyboard press the following button: Shift+Ctrl+Alt+R.
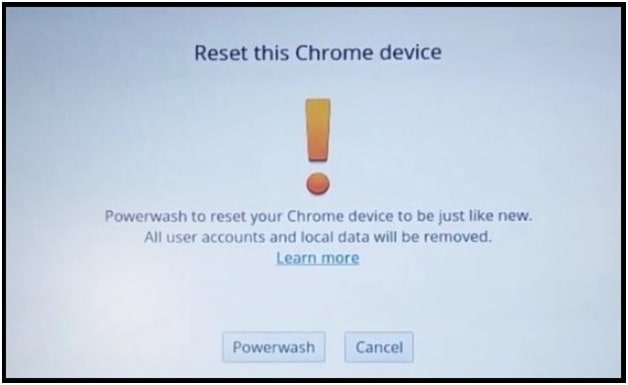
- This will open the window of “Reset this Chrome device”. Hit the Restart button to start.
- Now you will see Chromebook will get restarted. After getting back to the login screen, you will notice a completely new version of the window. Hit the Powerwash button.
Note: it’s recommended to select the option of “Update firmware for added security” before starting up this Powerwash process. This will, add extra security to your device.
- Now you are asked to make confirmation about preceding the Powerwash process. Tap to the “powerwash” option.
- After completing all this, you have to sign in with the Google Account. Following on-screen instructions to set up this newly-restored version of Chromebook.
FAQ: Learn More About DHCP Lookup Failed Problem
What Does DHCP Lookup Failed Mean On Chromebook?
DHCP lookup failed error signifies that your Chromebook is unable to achieve IP Address from DHCP server.
When the device is been connected to the network it requires IP address to communicate with the internet and router. Whether you are using an office or home network mainly the router is responsible for assigning the IP address to the device. But if your devices like Chromebook, phone, PC won’t receive an IP address then it gets impossible to access the Internet.
Why Does My Chromebook Keep Disconnecting From Wi-Fi?
If frequently your Chromebook keeps disconnecting from Wi-Fi then the following reasons are highly responsible for it.
VPN– VPN is masking your IP address and thus you are facing this DHCP Failed error.
Wi-Fi extenders –It’s not matching perfectly with the Chromebooks.
Modem/Router Settings – Wrong or improper settings of modem/router can also result in DHCP Lookup failed error.
Outdated Chrome OS– Outdated chrome OS version can also be the reason for DHCP error on associated device.
What Do You Do If Your Chromebook Won't Connect To Wifi?
To fix Chromebook won't connect Wi-Fi issue here are the following quick fixes that you can try.
- Try Using a Wired Connection
- Check if any Chrome OS Update is available Chrome connectivity diagnostics to the Rescue
- Try some Different Connection Reconnect to the Network
- Hard-Reset the Device and disable the Wi-Fi Router
- Powerwash (reset) Your Chromebook
How Do I Enable DHCP On Chromebook?
Well, there are two ways to enable DHCP On Chromebook:
Method 1: Enable DHCP Through Router:
1: On your browser open your router’s web portal and then login by entering the credentials.
2: Now on the settings, you have to look for the DHCP tab.
3: In the opened DHCP window you will see the option of DHCP server.
4: Within which Enable and disable option is present.
5: So choose the enable option and save your changes. After that take exit from this portal.
Method 2: Enable DHCP Through Chromebook Settings
1: Turn on the Chromebook.
2: Hit the Gear icon present at the bottom left corner of your desktop screen.
3: keep your mouse pointer over the Administration menu.
4: Now from the displayed expanded submenu choose Network Settings.
5: In the opened “password needed” box enter the password.
6: Tap the Continue button as this will take you to the Network Settings window.
7: Now in the Network Settings window you need to go to the Overview tab. Here you can get an overview of the installed network cards.
8: From this list choose the DHCP network card and hit the Edit button which is present at the bottom.
9: In the opened windows of Network Card Setup choose the dynamic address option.
10. Once done, hit the Next button present at the bottom-right corner to enable DHCP on Chromebook.
Wrapping Up:
Even by trying the above-listed solution if still, you are unable to fix DHCP Lookup failed on Chromebook error. In that case, you should contact Chromebook customer support. You will surely get help from the Chromebook Help centre.
If you have any more queries regarding DHCP Lookup failed Chromebook error then share it with us on our social media Facebook and Twitter page.
Hardeep has always been a Windows lover ever since she got her hands on her first Windows XP PC. She has always been enthusiastic about technological stuff, especially Artificial Intelligence (AI) computing. Before joining PC Error Fix, she worked as a freelancer and worked on numerous technical projects.