![[7 Tested Solutions] Complete Guide to Fix 0xc000017 Error on Windows 10](http://www.pcerror-fix.com/wp-content/uploads/2018/10/error-code-0xc0000017-copy.png)
Is the error code 0xc0000017 appear on your system while trying to start your PC/laptop then keep reading the article to learn how to fix error 0xc0000017 on Windows 10?
I was trying to upgrade my Windows 10 through Windows Update. And when I started to perform the process I have been asked to reboot the computer and then start the upgrade.
After the update process when I rebooted my PC it starts to display error 0xc0000017, with the message “This PC doesn’t have enough RAM” Error during Windows 10 Upgrade.
However, my computer hard drive has enough unused memory space. So, how do I fix 0xc0000017 Error and complete Windows 10 upgrade?”
The error code 0xc0000017 is very irritating as when it appears users are unable to enter the operating system normally. Despite this, some users also encounter other BSOD errors on startup
Even though your system has plenty of RAM unused, you are likely to get an error in Windows 10 upgrade due to insufficient hard drive memory space.
So, here find out what are the reasons behind the occurrence of error code 0xc0000017? And the possible fixes to resolve error 0xc0000017.
Error code 0xc0000017 – What Caused this Problem?
The reasons behind the error code 0xc0000017 stem from the areas of memory having been marked as bad by Windows built-in Boot Configuration Data (BCD), and this interferes with Windows 10 installer’s ability to make use of RAM as a temporary store for data.
It might be possible that there could be real memory issues, the chances that you can simply overlook the problem and install Windows 10 – it can easily fix the error.
Because this is not a practical memory issue, it can be fixed by following the below steps.
How do I Fix Error Code 0xc0000017 On Windows 10
There are plenty of solutions that are available over the internet, some of them are nonsensical “solutions” – from unplugging hardware, solving registry errors, and disabling antivirus to disabling integrated graphics. Apply the given solutions one by one and check for the error each time after applying the solution:
Method 1: Check and Clean bad memory entries in the BCD store
- Boot your PC into Windows
- Now right click on the START button and choose Command Prompt (Admin)
- Then type bcdedit/enum all and press ENTER
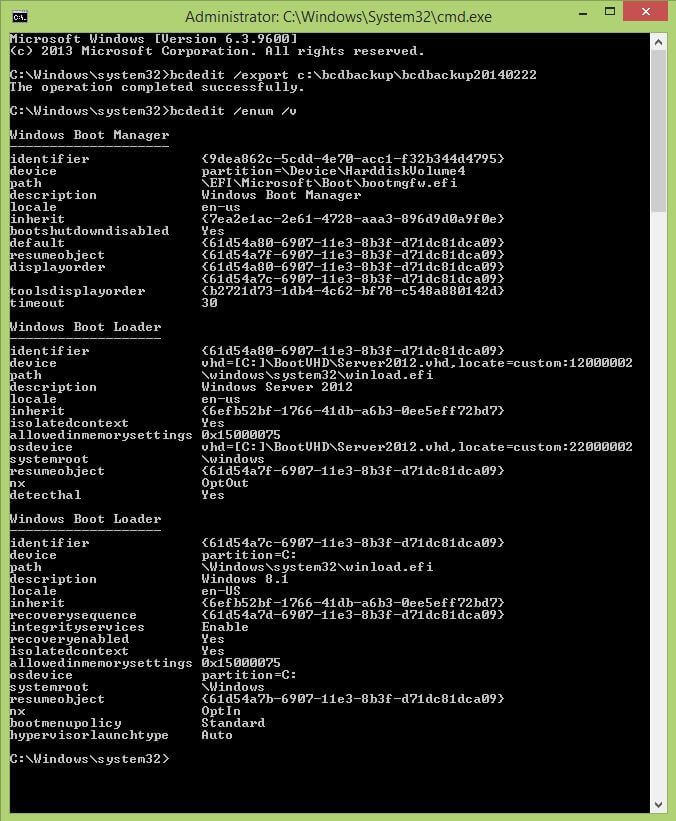
- After this, you will see the list of all the memory locations that have been marked as ‘bad’. Now clear the list that has been deemed as ‘bad’.
- Type bcdedit /deletevalue {badmemory} badmemorylist and press Enter (type this verbatim, {badmemory} is not a placeholder for anything).

- Finally, close the Command Prompt Windows and Restart your PC.
Method 2: Run Deployment Image Servicing and Management tool (DISM)
1: Press the Windows key + X and select Command Prompt (Admin).
2: After opening the command prompt, type the below-given command, and press the Enter key to run ‘DISM’ command.
DISM /Online /Cleanup-Image /RestoreHealth
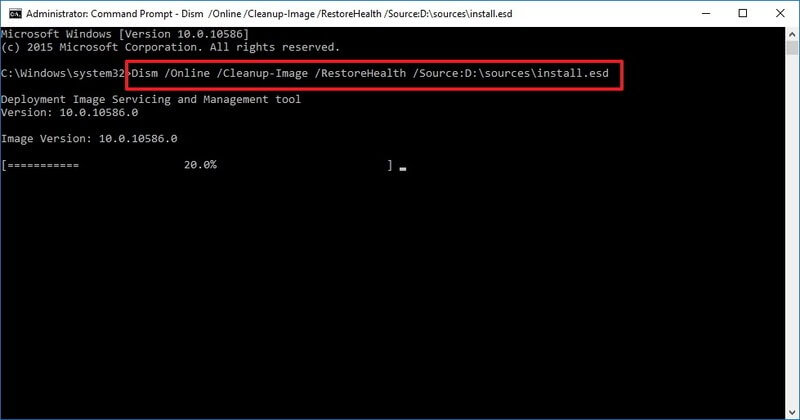
This command will run the Deployment Image Servicing and Management tool, after the completion of the DISM tool, restart your computer or laptop.
Method 3: Use Windows Installation Media
In this method, we will try to fix the 0xc0000017 error with the help of Windows Installation Media.
If you don’t have a Windows Installation Media then first you have to create it.
To create Windows Installation Media, follow the given link: https://support.microsoft.com/en-us/help/15088/windows-10-create-installation-media
After creating the Windows Installation Media, insert it to your computer and reboot your system.
- Open the Command Prompt (Admin).
- Then, run the below-given commands in the Command Prompt window.
You have to run these commands separately. To do this, press the Enter key after each of them.
- dism /online /cleanup-image /scanhealth
- dism /online /cleanup-image /restorehealth
- DISM /Online /Cleanup-Image /RestoreHealth /source:WIM:X:SourcesInstall.wim:1 /LimitAccess
Note: In the last command, X belongs to the drive having Windows 10 installation.
At last, wait to accomplish the whole process.
Method 4: Reset Windows Update Components
If you are unable to get rid of 0xc0000017 error then you should follow the below-given steps carefully and reset Windows crucial update components.
1: Press the Windows key + X and select Command Prompt (Admin).
2: After opening the command prompt, run the below-given commands one by one (press the Enter key after each of the commands by hitting the Enter key):
- net stop wuauserv
- net stop cryptSvc
- net stop msiserver
- ren C:\Windows\SoftwareDistribution SoftwareDistribution.old
- ren C:\Windows\System32\catroot2 Catroot2.old
- net start wuauserv
- net start cryptSvc
- net start msiserver
Method 5: Make sure the Windows Update Service is Running
You need to confirm that the PC’s Windows Update service is running properly or not.
1: Go to your System’s search option and then, type services.msc then press the Enter key. This command will open the Services window.

2: Find the Windows Update service. Right-click and open Properties.
3: Go to the General tab and then find the Startup type and select Automatic.
4: If the service is not in the execution mode then, right-click on it and select to Start.
5: At last, you have to confirm the selection and exit from the Window.
Method 6: Confirm that the BITS service is Running
BITS or Background Intelligent Transfer Service is another part of service for getting the Windows updates.
Make sure that the ‘BITS’ is running properly, to do this follow the below-given steps:
1: First you have to open the Service Window with the help of step 1 of the previous method.
2: Find the Background Intelligent Transfer Service (BITS) and then open its properties (double-click on it)
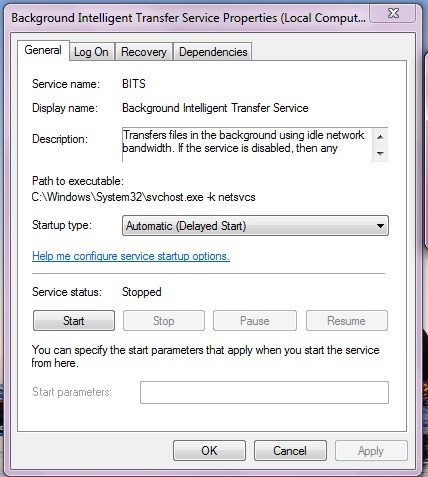
3: In case the service isn’t in the execution mode then, click on the Start button.
4: Select the Recovery tab and confirm that the First failure and the Second failure are set to the Restart service.
5: Confirm the selection and check for the updates.
Method 7: Change DNS settings
If you are still unable to repair the 0xc0000017 then, follow the below-given steps and change the DNS settings.
1: First, you have to open the Windows Control Panel. To do this, go to the search option and search for the Control Panel and select the first result from the search result.
2: Navigate to the Network and Sharing Center, and click on the Change adapter settings option.
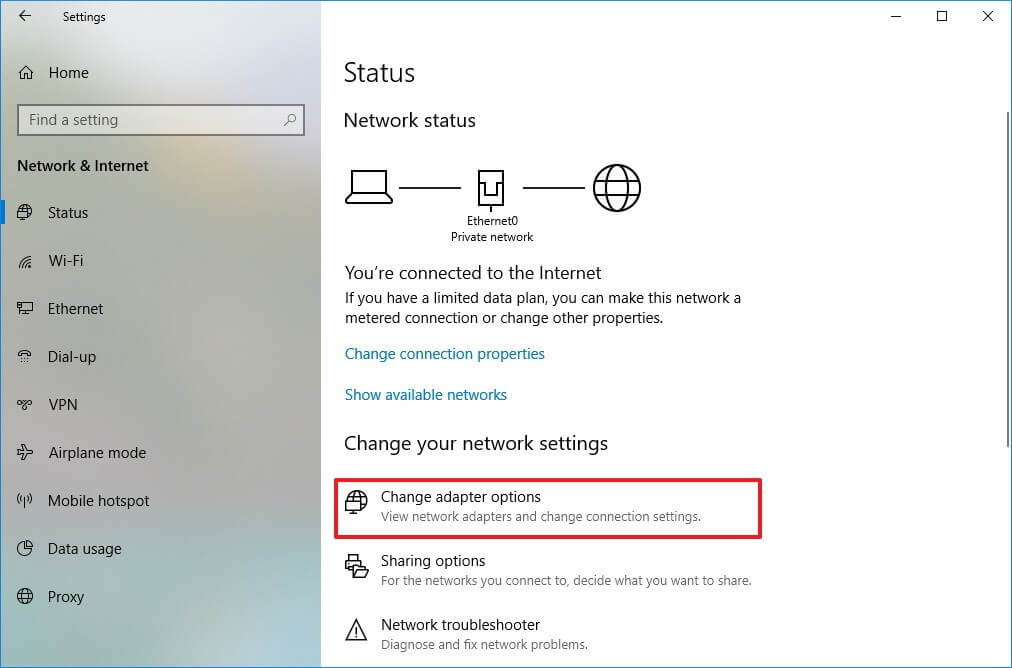
3: Again, select the network that you are currently using, right-click on it, and select Properties.
4: Find out the Internet Protocol version 4 (TCP/IPv4), and select the Properties.
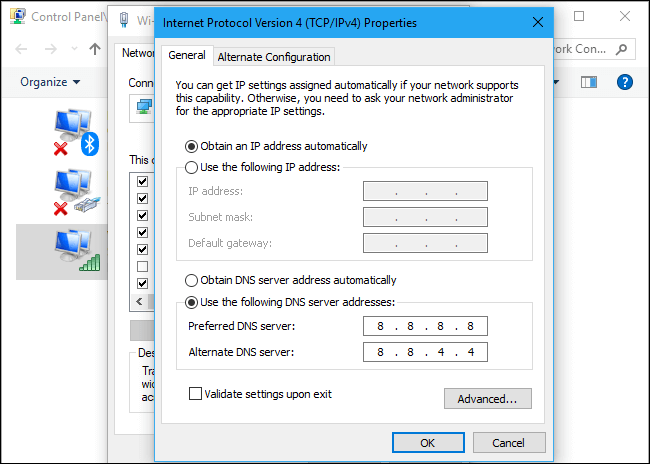
5: Select the Use the following DNS server addresses
6: Type the following values: DNS Server – 8.8.8.8 and Alternate DNS Server – 8.8.4.4
7: Save all the modifications and restart your computer
It is estimated the solutions given works for you to fix 0xc0000017 in Windows 10.
Easy Solution To Fix Error Code 0xc0000017
After performing the above steps you will be able to fix 0xc0000017 error while you perform Windows 10 update or while you install Windows 10 and you will be able to start your PC without any errors.
But if in case the manual solutions won’t work for you, then here is an easy solution to fix error code 0xc0000017, try running the PC Repair Tool. It will allow you to deal with all types of issues related to the Windows system without doing anything manually.
This application is packed with a very user-friendly interface, and allow you to fix various PC errors like BSOD error, DLL error, Runtime error, Registry corruption, and much more.
Get PC Repair Tool to fix error code 0xc0000017 on startup
Conclusion
It is expected the specified solutions provided to you will solve the 0xc0000017 error code.
I tried my best to provide the possible fixes to resolve the error code 0xc0000017 on startup in Windows 10 or during an upgrade.
Hope the article works for you.
Good Luck..!
Hardeep has always been a Windows lover ever since she got her hands on her first Windows XP PC. She has always been enthusiastic about technological stuff, especially Artificial Intelligence (AI) computing. Before joining PC Error Fix, she worked as a freelancer and worked on numerous technical projects.