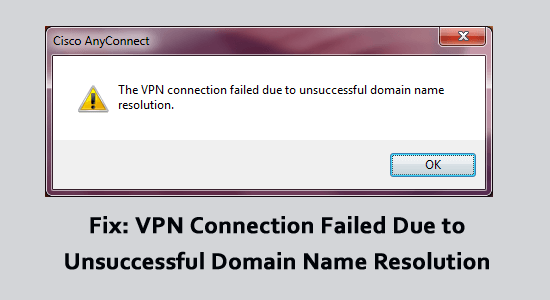
When you attempt to connect to a VPN, you may encounter the message “VPN connection failed due to unsuccessful domain name resolution.”
This message indicates that the VPN client was unable to connect to the VPN server using its domain name. The VPN client needs to be able to resolve the domain name of the VPN server to connect to it.
If the domain name of the VPN server cannot be resolved, the VPN client will not be able to establish a connection. This leads to the discussed error. If you are trying to resolve it, then follow the fixes shown in the article.
To repair corrupted Windows system files, we recommend Advanced System Repair:
This software is your one stop solution to fix Windows errors, protect you from malware, clean junks and optimize your PC for maximum performance in 3 easy steps:
- Download Advanaced System Repair rated Excellent on Trustpilot.
- Click Install & Scan Now to install & scan issues causing the PC problems.
- Next, click on Click Here to Fix All Issues Now to fix, clean, protect and optimize your PC effectively.
What is Domain Name Resolution in VPN?
Domain name resolution plays a vital role in the functioning of a Virtual Private Network (VPN). The resolution of a domain name is a crucial step in the process of connecting to a website or a network resource.
In terms of VPNs, the domain name resolution process works by first sending a request to a DNS server. The DNS server then looks up the domain name in its database and returns the corresponding IP address. This address is then used to establish a connection between the VPN client and the VPN server.
What Causes a “VPN connection Failed Due to Unsuccessful Domain Name Resolution?
There are several reasons why a VPN connection may fail due to the issues in domain name resolution.
- The most common cause is a misconfigured DNS server. When a computer is connected to a network, it is usually configured to use the DNS server provided by the network.
- Another common cause is incorrect DNS settings on the VPN client. The VPN client needs to be configured to use the correct DNS server in order to resolve the domain name of the VPN server.
- In some cases, the network firewall may be blocking DNS requests. If the network firewall is configured to block DNS requests, the VPN client will not be able to resolve the domain name of the VPN server.
- Finally, the domain name of the VPN server may not be properly configured. The domain name of the VPN server needs to be registered with a domain registrar and the DNS settings for the domain name need to be properly configured. If the domain name is not properly registered or the DNS settings are incorrect, the VPN client will not be able to resolve the domain name.
How to Fix “VPN Connection Failed Due to Unsuccessful Domain Name Resolution?
Solution 1: Preliminary Solutions
Before starting with the detailed fixes here it is suggested to follow the quick tricks and check if the VPN connection failed due to unsuccessful domain name resolution is resolved.
- To troubleshoot a VPN connection failure issue, the network administrator needs to check the DNS settings of the network and the VPN client.
- Ensure that the domain name of the VPN server is properly registered and configured.
If all of these steps are taken and the problem still persists, they should contact their VPN provider for assistance.
Solution 2: Change DNS Address
Here it is suggested to review the DNS settings provided by your particular VPN service provider. You may have accidentally entered the wrong DNS address or perhaps the server’s IP address has changed due to other technical issues.
If that’s the case, then simply update the DNS address in your network settings and try connecting again. Additionally, if you’re using a public DNS server, it might be worth trying out some of the alternative offerings from Google or OpenDNS as they tend to be much more reliable than other options.
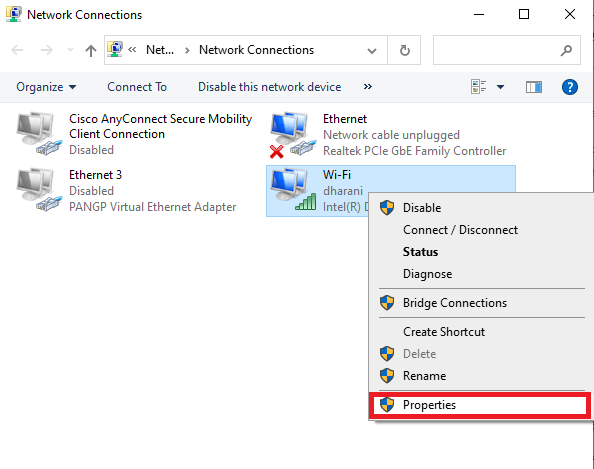
- Go to the Run dialog box (press Windows + R keys), enter ncpa.cpl and click on OK.

- Now, right-click on your active network adapter and tap on the Properties option from the drop-down list.
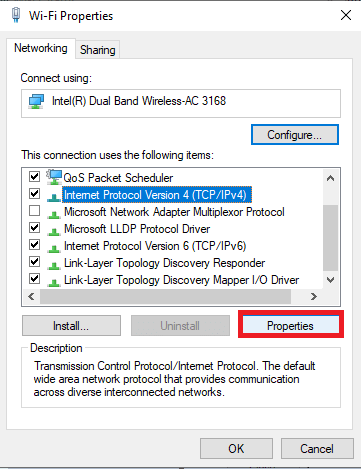
- In the next screen, tap on Internet Protocol Version 4(TCP/IPv4)
- Now, click on the Properties Now, double-click on Internet Protocol Version 4(TCP/IPv4) to launch the Properties window.
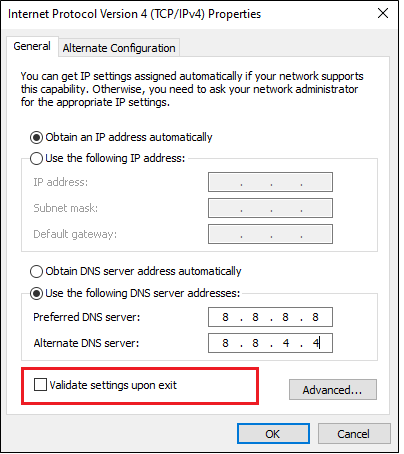
- In the next Properties screen, click on the radio button next to ‘Use the following DNS server addresses.’
- Now, enter the following numerical values in the respective fields of the Preferred DNS server and Alternate DNS server.
- 8.8.8.8
- 8.8.4.4
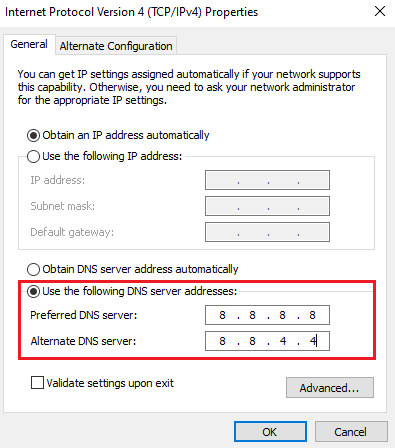
- Finally, click on the box Validate settings upon exit and then tap on the OK
These modified DNS addresses will configure a new network connection and will fix the VPN connection failed issue on your PC.
Solution 3: Try a Different VPN Network
When it comes to online security, using a VPN (Virtual Private Network) can be a great option. It helps protect your data and browsing activities from potential hackers or anyone who is trying to access your information. Unfortunately, sometimes the VPN connection can fail due to VPN isn’t working properly due to DNS issues. This can be incredibly frustrating, especially if you rely on the extra layer of protection that a VPN provides.
First of all, check that your internet connection is working properly by restarting your router/ modem. Next, you need to try a different VPN network if nothing works to help you.
Get ExpressVPN for uninterrupted internet access
Solution 4: Repair the anyconnect.xml File
When attempting to use a Virtual Private Network (VPN), users may encounter issues with their connection if the anyconnect.xml file is not properly configured. If a user is experiencing DNS-related issues preventing them from connecting, they should first check to make sure the anyconnect.xml file has been correctly set up.
The best way to repair the anyconnect.xml file is to delete the Cisco AnyConnect Client completely from your system and restart the computer. Then, you have to install a fresh copy of the software as instructed below.
- Open the Run dialog box and type appwiz.cpl. Hit Enter.
- In the Programs and Features menu, scroll down the screen and find the AnyConnect
- Now, right-click on the AnyConnectoption and tap on Uninstall from the context menu.
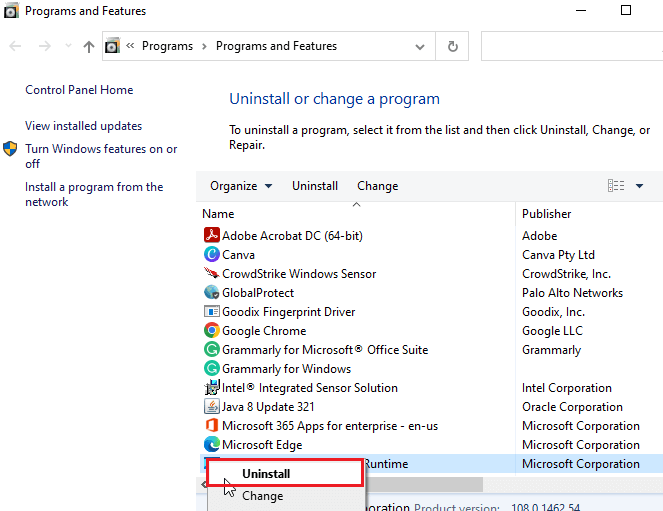
- Follow the on-screen instructions to complete the uninstallation process and restart your PC.
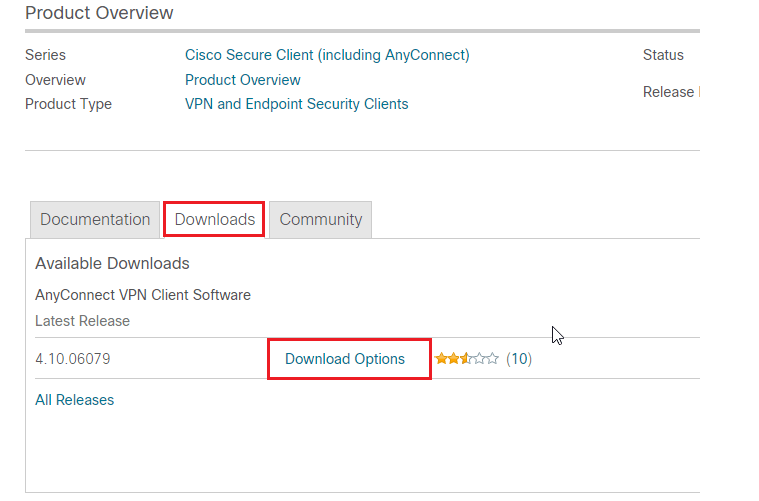
- Upon the next startup, open your browser and navigate to the official download page of AnyConnect Security Mobility Client.
- Scroll down the screen, in the Downloads tab, click on Download Options.
Note: To begin the Download process, you must be logged in to the Cisco client successfully.
- Once the file is downloaded successfully, run the executable file with admin access and follow the on-screen instructions to reinstall the AnyConnect Secure Mobility Client.
- Now, try to connect to a remote machine using this freshly installed software and check if the issue is resolved now or not.
Still, if you face the same problem, move to the next method.
Also Read: 7 Common Avast SecureLine VPN Problems & Its Fixes
Solution 5: Disable Firewall Protection & Antivirus Suite
Disabling the firewall can help you fix VPN connections that are not working properly due to DNS issues. Doing this will allow you to connect directly to the server with no interference from other programs or services.
Before disabling a firewall & antivirus, it is important to ensure that it won’t interfere with any other programs or services running on your machine. Once disabled, try reconnecting your VPN again and see if this resolves any DNS issues that were causing connection problems in the first place.
Note: If you are able to connect to the VPN client without any issues after disabling the Windows protection suites, always remember to re-enable the antivirus/firewall program on your PC to avoid any malware attacks.
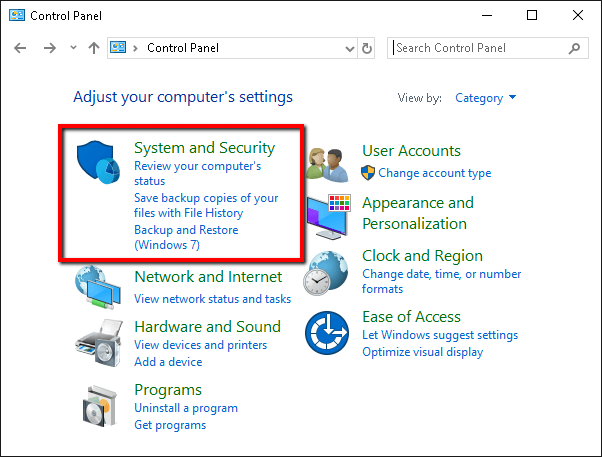
- Go to the Windows Search box, type control panel, and select the Open
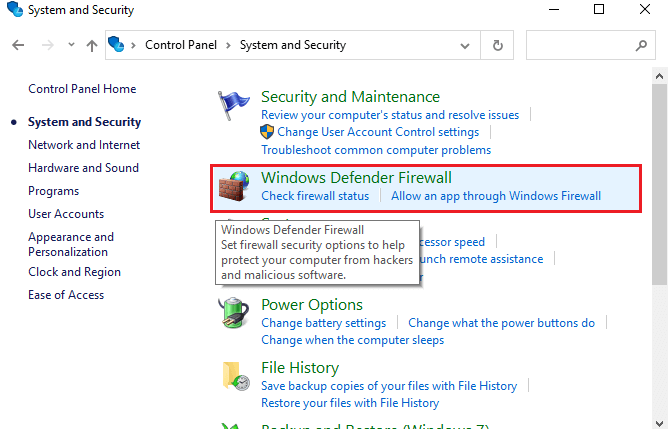
- On the Control Panel window, tap on the System and Security
- Now, tap on Windows Defender Firewall.
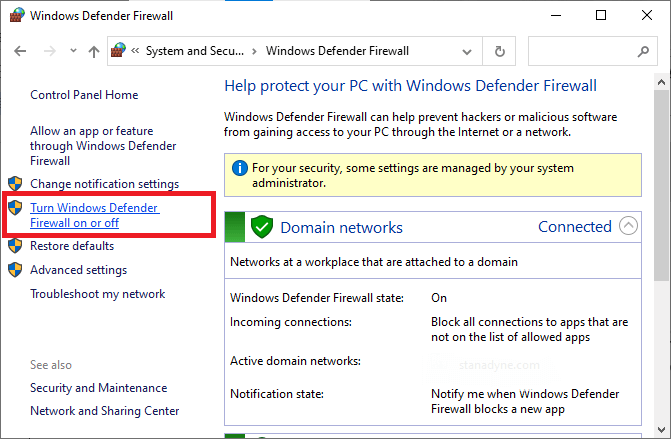
- Next, select the Turn Windows Firewall on or off option at the left pane as shown.
- Next, tap on the Turn off Windows Firewall (not recommended)option under both the Private network settings and Public network settings menus as shown.
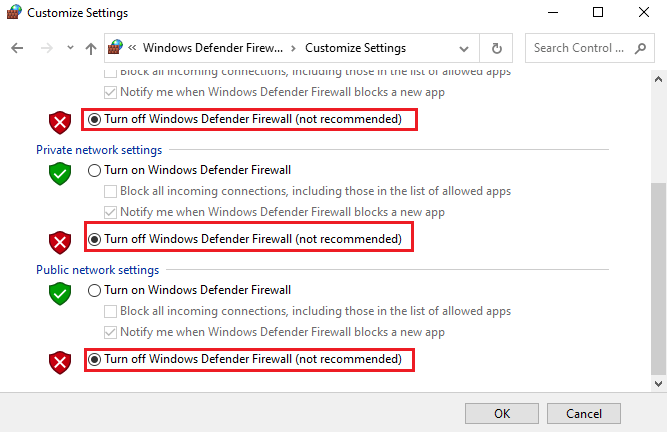
- Finally, tap on the OK button to save the recent changes.
Likewise, disable the antivirus suite on your by following these steps: Open up the settings menu on your computer and select the Programs option. From here you will be able to locate your existing antivirus program and disable it by uninstalling or deactivating it.
Solution 6: Disable VPN
The VPN isn’t working properly due to DNS issues is a common cause of VPN connection failure. When trying to connect to a virtual private network (VPN), the first step is for your computer or device to resolve the hostname of the server. If you are unable to do this, the connection will not be established.
By disabling your existing VPN, you can reset any incorrect settings that may have been causing problems with DNS resolution. Disabling and then re-enabling a VPN will also force your computer or device to download a new copy of the configuration file which should contain correct data about the remote server’s domain name and IP address in case there were any changes made since you last connected.
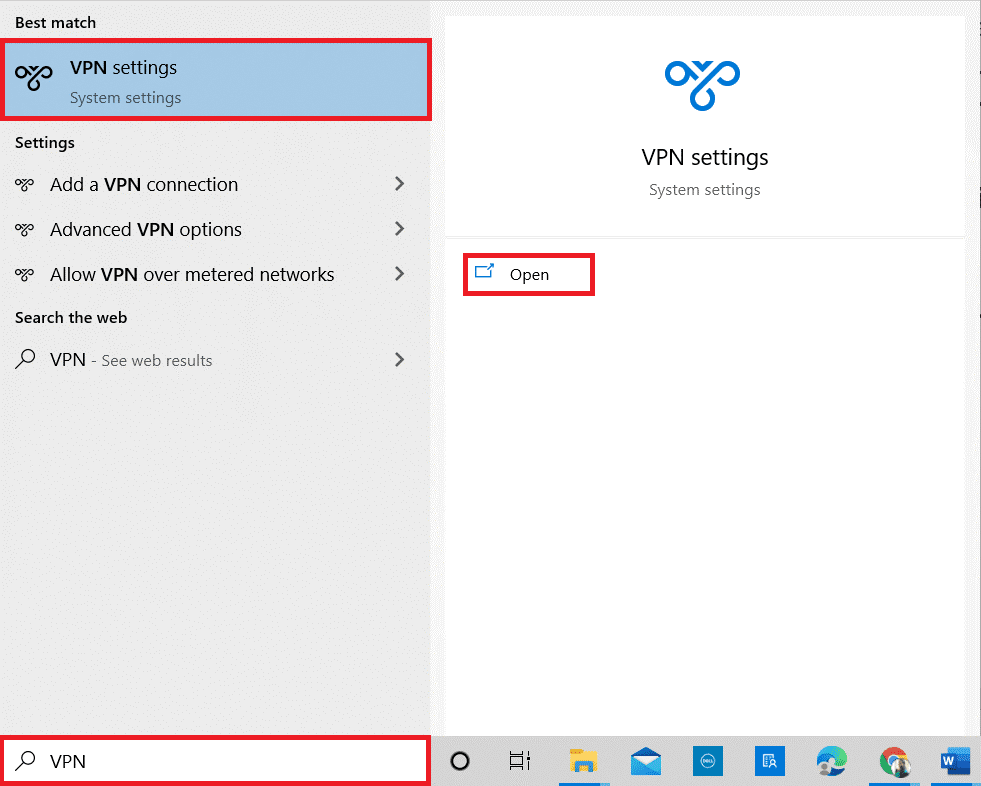
- Press the Windows key and type VPN settings in the search bar. Then, click Open to launch it.
- Go to the left pane in the Settings window, tap on the VPN
- Turn off the below-listed VPN options under Advanced Options:
- Allow VPN over metered networks
- Allow VPN while roaming

Solution 7: Disable the Proxy
This error is often caused by a proxy server as it may interfere with the network. If a proxy server is enabled on your computer or router, this could be preventing the successful establishment of your VPN connection. In order for the connection to be established properly, any proxy settings must first be disabled before attempting to establish the connection again.
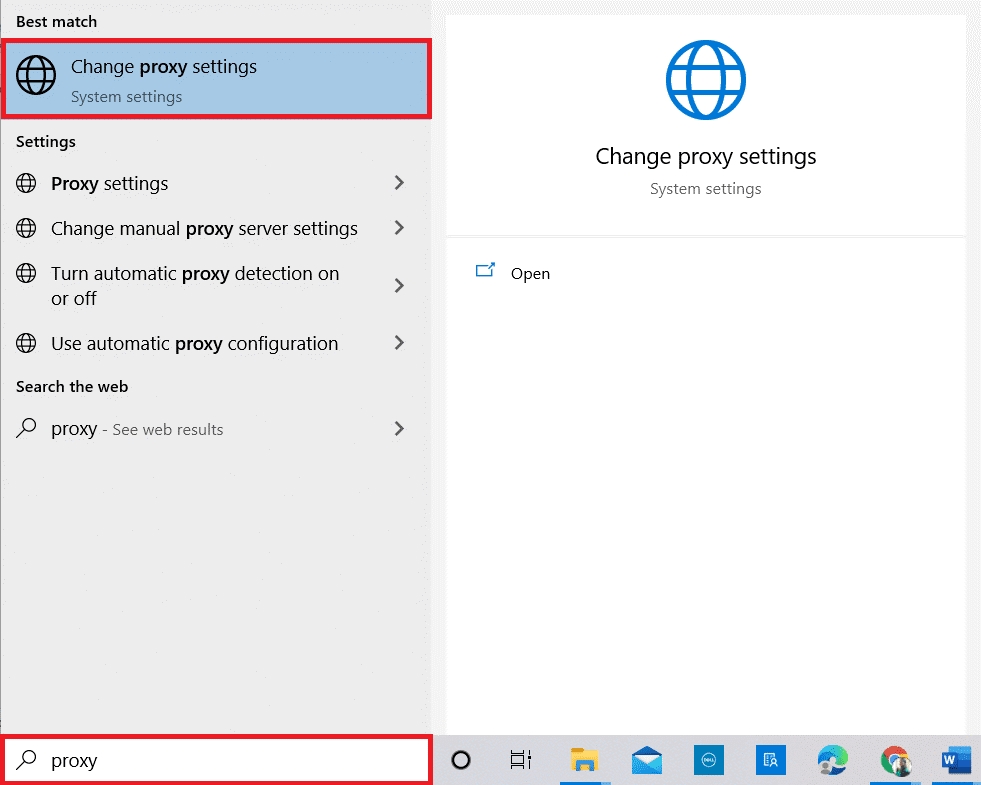
- Press the Windows button and enter Proxy as shown below. Then, tap on Change proxy settings from the search results.
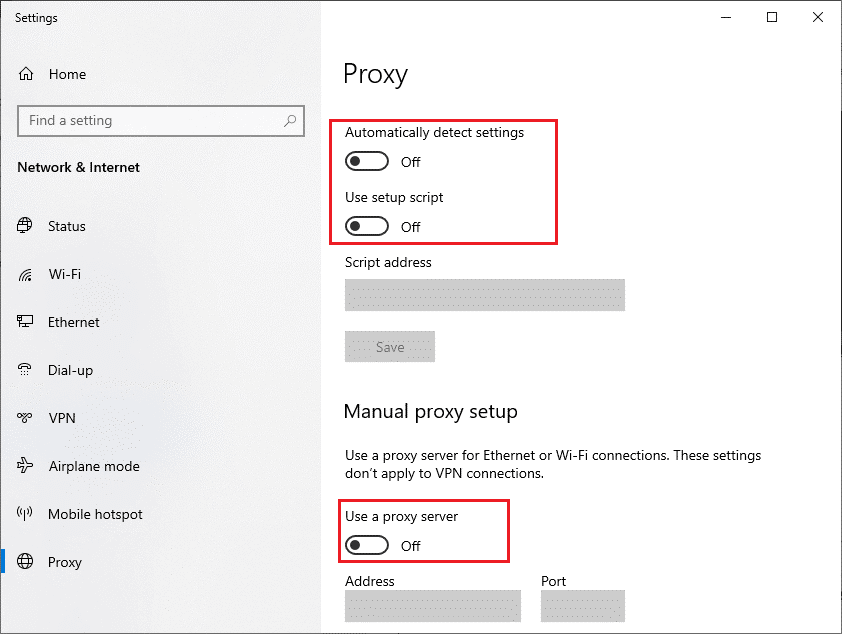
- Now, turn off the below-listed settings:
- Automatically detect settings
- Use setup script
- Use a proxy server
Solution 8: Disable DNS Error Assist (if applicable)
The DNS Error Assist function may trigger the discussed issue on your PC when you are attempting to connect from an AT&T network. To fix this issue, you have to enter the AT&T account and tweak the Privacy Settings to disable the DNS Error Assist feature.
- Open your browser and navigate to the home page of AT&T.
- Now, tap on My AT&T from the top right corner of the screen and tap on Sign In.
- Then, type in your account credentials to log in to your account.

- Once you have logged in successfully, tap on View Profile.
- Then, switch to the Communication Preferences tab and press the Privacy Settings
- Now, choose the DNS Error Assist option and turn it off.
- Restart your computer and connect with AnyConnect again. Check if the problem is resolved now.
Solution 9: Reinstall Windows
If you have been unable to establish a successful VPN connection due to an unsuccessful domain name, reinstalling Windows may be necessary. Reinstalling Windows can help resolve various issues that are preventing a successful connection and will restore the necessary files needed for your system to run properly.
Note: Before reinstalling your operating system, it is important to back up any important data or files on your computer as they may be lost while the process occurs. It is also advised that users research compatible changes or updates that may need to be made before beginning the process of reinstalling Windows.
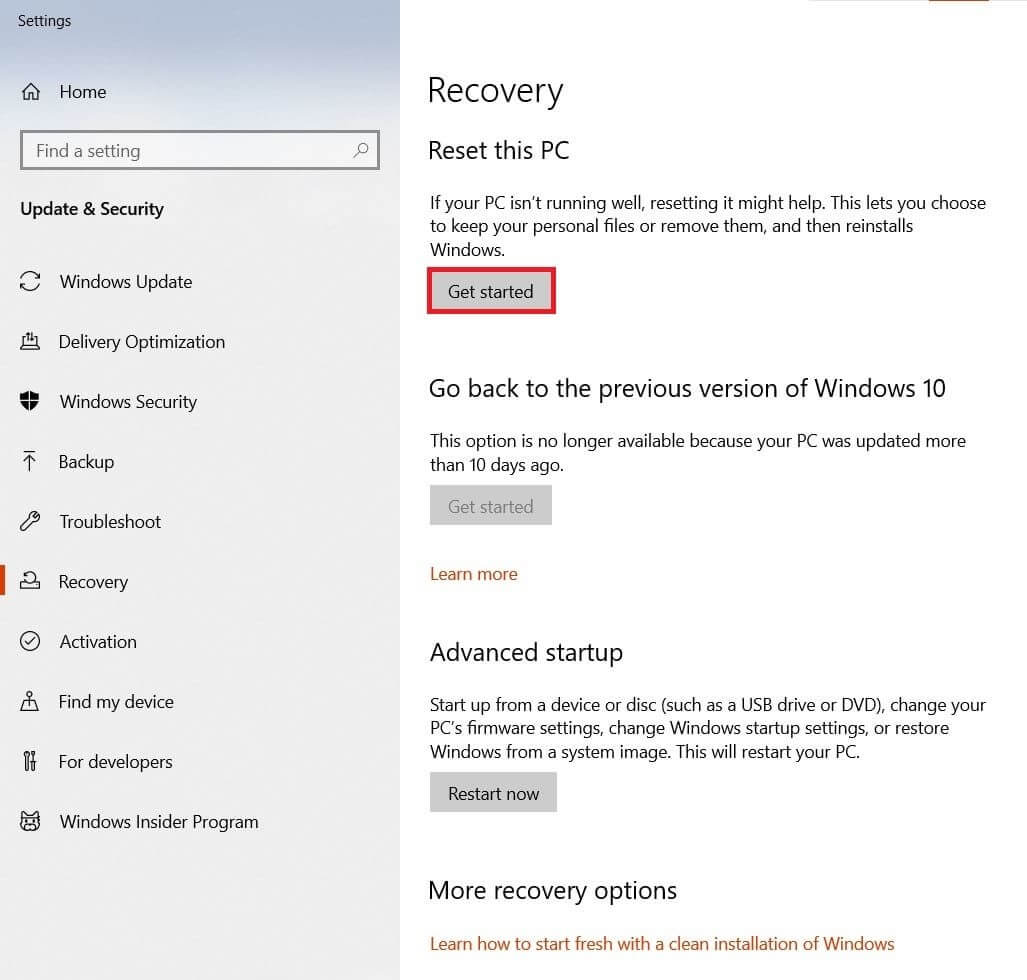
- Go to the Windows settings by clicking on the Windows + I keys
- Then, tap on the Recovery > Get started option found below the Reset this PC as shown.
- You can either keep your current files or delete them completely. Select any one of them based on your requirements.
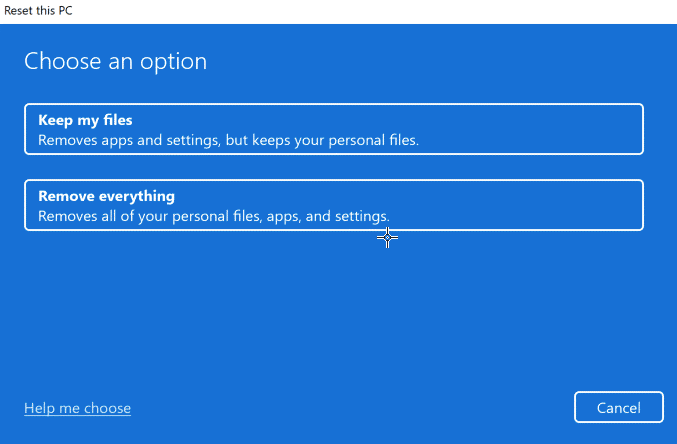
- Confirm your choices in the next window and proceed with the on-screen instructions.
- Finally, tap on Reset to start the reinstall process.
- Once the PC reboots, now you will have a clean installation of Windows which will not throw you any errors when you connect to the VPN.
Recommended Solution- Fix Various PC Issues & Errors
If your Windows PC/laptop system is running slow or showing various issues and errors, then scan your system with the PC Repair Tool. This is a powerful repair tool that, just by scanning once, detects and fixes various Windows issues and errors.
The tool fixes common PC errors like system file corruption and protects from file loss, malware, hardware failure, BSOD error, and more.
Well, this not only fixes errors but also enhances Windows PC performance.
Get PC Repair Tool to Fix Various PC Issues and Errors
Conclusion
In this guide, I have covered all possible solutions to fix the VPN connection failed due to unsuccessful domain name resolution issue on your Windows PC.
Here I tried my best to list down the potential fixes that worked for users to get past the issue. So, try the fixes given one by one till you find the one that works for you.
If there is anything I missed out or you have any queries, then please drop them on our Facebook Page. Also, don’t forget to follow us on our social media handles to get more interesting guides and helpful tips to keep your computer safe from errors and issues.
Good Luck..!
Hardeep has always been a Windows lover ever since she got her hands on her first Windows XP PC. She has always been enthusiastic about technological stuff, especially Artificial Intelligence (AI) computing. Before joining PC Error Fix, she worked as a freelancer and worked on numerous technical projects.