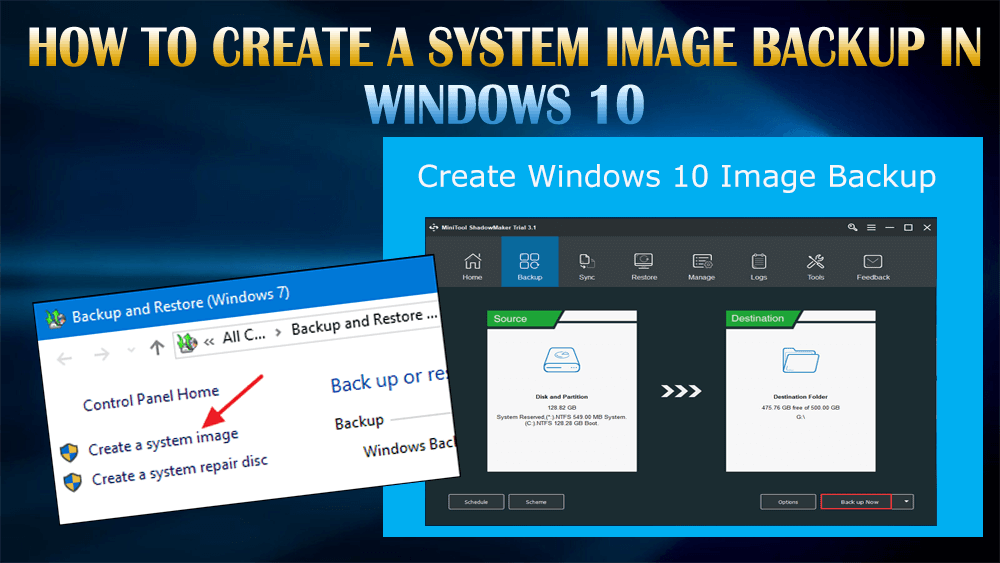
Creating system image backup of any Windows system is good practice to deal with any unexpected system crash, loss of data and more.
Errors and troubles can affect the entire operating system, doesn’t matter which latest operating system is installed on your computer/laptop.
So, to keep your data safe you should create a full system image backup Windows 10. There is an in-built backup utility in Windows that is pretty solid for backup.
If you are also willing to create a full system backup Windows 10 then go through this article and know how to make an image backup of Windows 10 step by step.
What Is A System Image Backup Windows 10?
The system image backup Windows 10 is the snapshot or the exact copy of a hard drive. This system image can be used to restore your PC, settings and others, the same when it was before if in case the hard drive crashes.
Now, perform the steps one after the other to create a full system image backup in Windows 10.
How to Create A System Image Backup in Windows 10?
Below given are the steps that will guide you in creating the full system image backup in Windows 10 to keep your data from any PC disaster.
- Press the Windows key and type “File History”, hit Enter key.
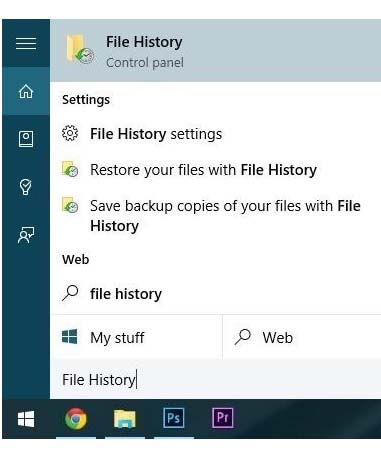
- A window will appear, click the “System Image Backup” option present in the bottom-left corner.
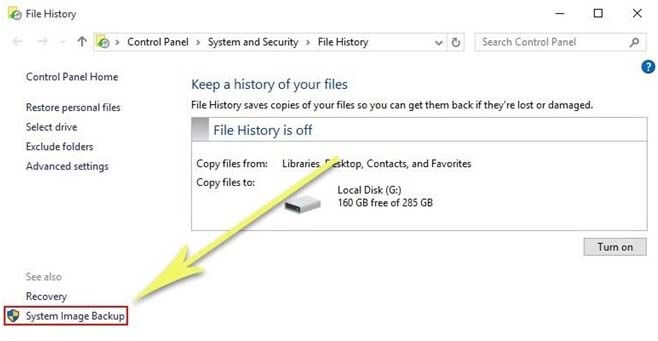
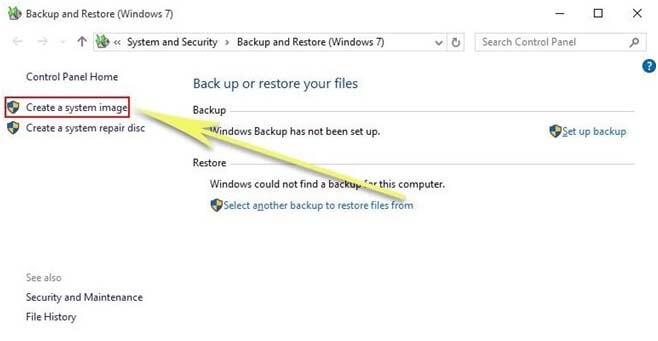
- Again, look in the left-hand pane, and choose the option “Create a system image.”
- System image utility will come into view. At this, you have to give the path where you want to save your system image.
- Choose the storage location for your system image.
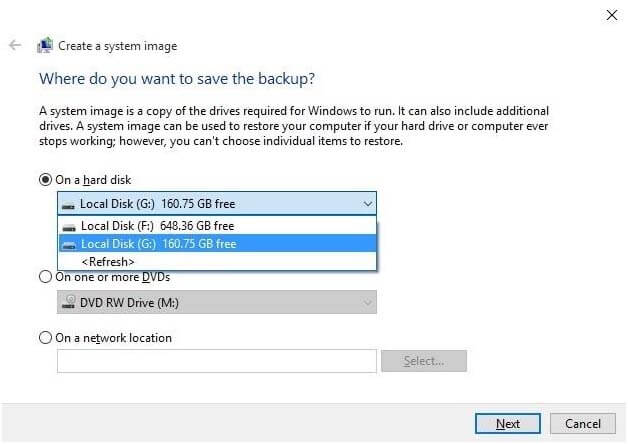
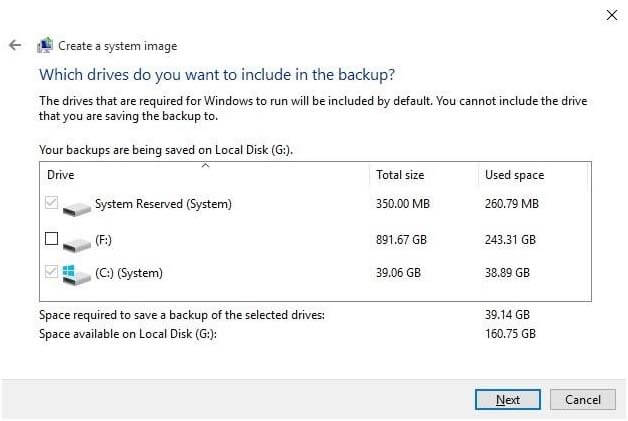
- Click on the “Next” and your primary Windows drive and boot sector will already be selected, but if you want to create the backup of any other hard drives then you have to select them here, then click “Next” again.
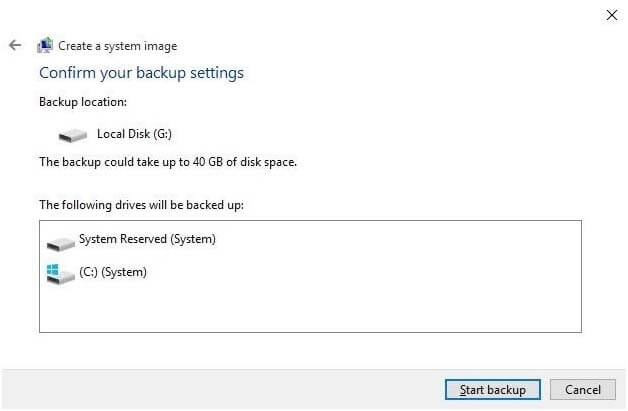
- At this step, you’ll get an option to review your selections. If everything is according to your requirement then go ahead and click “Start backup.”
- The entire backup process will take time, it depends on how many files and drives you selected for the backup process.
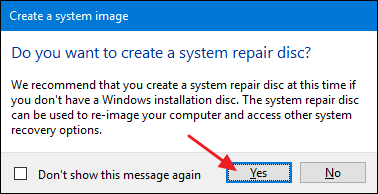
- After the completion of the backup process, a pop-up will appear asking for “you’d like to create a system repair disc or not”.
- This is completely optional, so you can skip this step if you don’t want to create a system repair disc.
But if you want to create a system repair disc then here are the steps to do so.
Steps to Create System Repair Disc
After the backup process is completed, select the option to create a system repair disc. The disc can be used to start your Windows if you are unable to start it, restore the image backup if you want to replace the hard drive.
Follow the steps to create a disc:
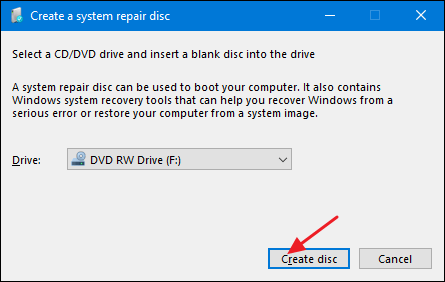
- First of all, a pop-up message will appear that says Do you want to create a system repair disc? Click Yes
- Now, choose the drive from the list and click on create disc
- You can now start your computer from the disc to restore the image and get the access to tools including the system image recovery
Perform the steps carefully to create a system repair disc.
Steps to Restore from a System Image Backup
A piece of additional information that might help you further regarding backup in Windows 10. Below given are the steps to restore from a system image backup.
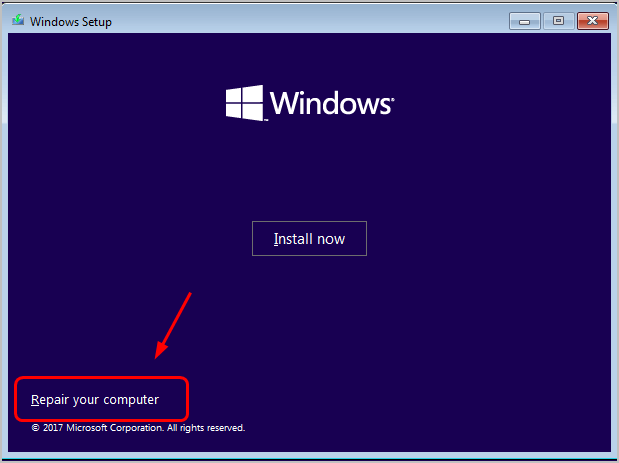
- Insert a Windows installation disc or bootable disc and boot into setup.
- At the Windows setup window, you have to click on the Next and select the Repair your computer option present at the lower-left corner.
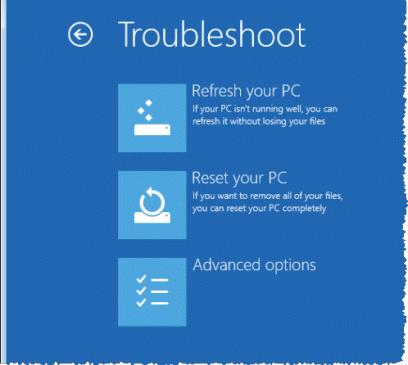
- After it, click Troubleshoot then Advanced Options
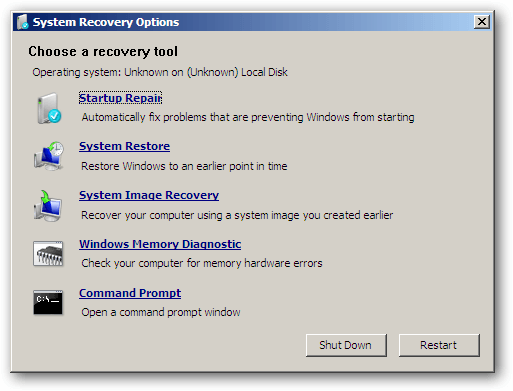
- Choose System Image Recovery from the Advanced option
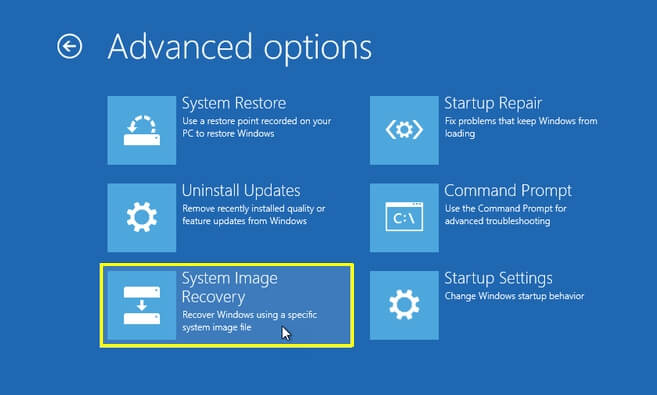
- At this point, choose the system image backup you created, then simply follow the prompts.
This will completely restore your computer/laptop and take your system to the exact state it was in when you created the backup.
Make your Windows PC/Laptop Error-Free
Before starting to create a system image backup it is suggested to scan your computer with the PC Repair Tool.
Scanning your PC with this tool will decrease a load of data by deleting junk files, removing unwanted registry keys, solving the Windows errors such as DLL, BSOD, update, game, registry, and also repairs damaged or corrupt files.
This repair tool will speed up your slow PC by optimizing its performance for better and smooth working.
Get PC Repair Tool to Make your Windows PC/Laptop Error-Free
Conclusion
Creating a full system image backup might take some time, therefore it is suggested to do this backup process overnight or when you don’t need your PC.
Well, I have provided the steps to create a full system image backup Windows 10 as well as the system repair disc and restore an image backup.
It is expected that you liked this article and it turns out to be knowledgeable in guiding you and solving your queries if any.
Hardeep has always been a Windows lover ever since she got her hands on her first Windows XP PC. She has always been enthusiastic about technological stuff, especially Artificial Intelligence (AI) computing. Before joining PC Error Fix, she worked as a freelancer and worked on numerous technical projects.