
Have you accidentally closed Microsoft Word without saving the document you are editing on Mac or mistakenly close the Word document by clicking Don’t Save? Do you want to view your Word document only to find it is lost owing to a virus infection, or it is deleted because of your wrong operation? If you are beset by unsaved, deleted or lost Word document recovery, or have no idea how to recover a Word document on Mac, you are landing in the right place.
There are different reasons for unsaved, deleted, or lost Words documents. As for different data loss scenarios, various solutions can be used to troubleshoot different issues. In this article, we will introduce some possible methods to you to help you perform unsaved, deleted, or lost Word recovery on your Mac computer.
How to Regain Unsaved Word Documents on Mac? (Two Effective Solutions)
Method 1 – The AutoRecovery Function
The Word for Mac program is equipped with the AutoRecovery function, which can automatically save open Word documents at regular intervals. When the Word for Mac app freezes, your Mac crashes or abruptly shuts down for power failure, the AutoRecovery function will come in handy. To recover unsaved Word documents with AutoRecovery on Mac, here are the necessary steps you need to go through.
Step 1 Go to Finder > the Go menu > Go to Folder, and then type the right path to find the AutoRecover file according to your Word versions.
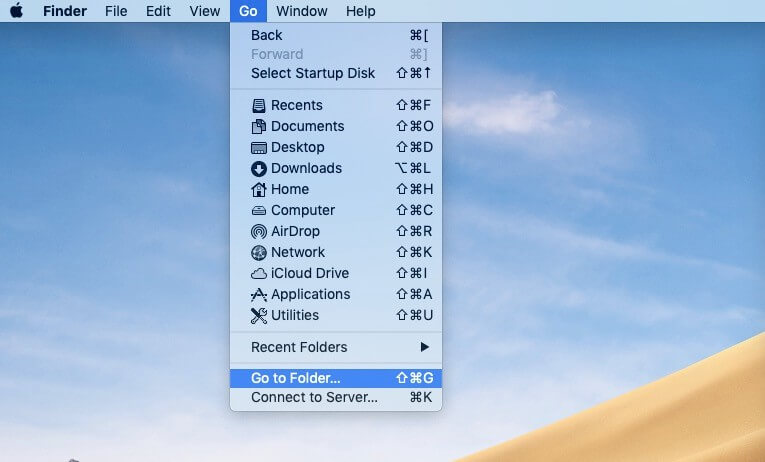
If you are using Office Word 2016/2019/Office 365 in 2020/2021, then you need to input the following path:
/Users//Library/Containers/com.Microsoft.Word/Data/Library/Preferences/AutoRecovery
If you are using Office Word 2011, then you need to type the path below:
/Users//Library/Application Support/Microsoft/Office/Office 2011 AutoRecovery
Step 3 – Double-click the AutoRecover file to open it with Office Word on Mac when you have successfully found it.

Step 4 – Hit the File menu, and then click Save As to save the AutoRecover file.
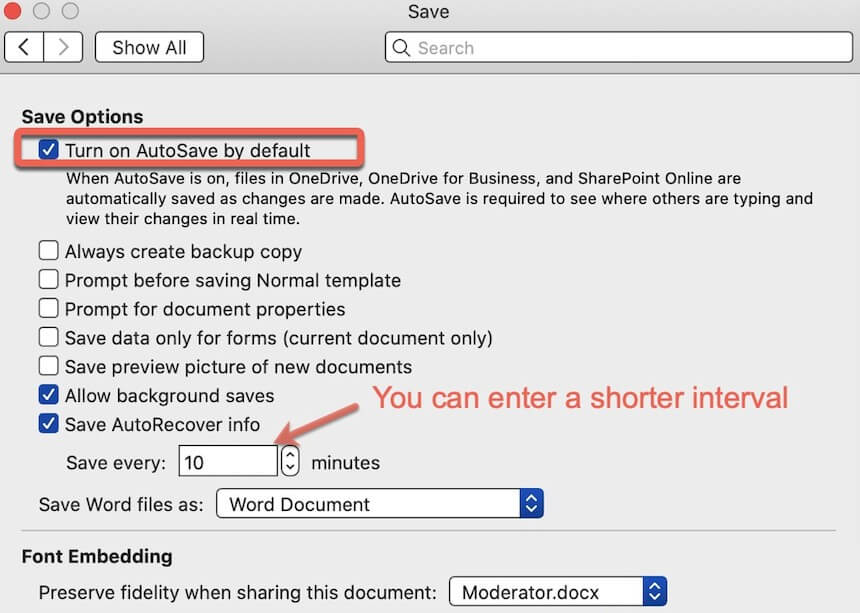
To use the AutoRecovery function, you need to make sure that AutoRecover has been enabled. To achieve the goal, you need to switch to Word > Preferences > Output and Sharing > Save. Then, you need to Tick the Turn on AutoSave by default box and the Save AutoRecover infobox, and then you can set an interval in Save every: XXX minutes section based on your needs.
Method 2 – the Temporary Folder
If the AutoRecovery function fails to help you get unsaved Word documents back, you can try to check your Temporary files and implement unsaved Word documents recovery from the TMP folder. Here is the step-by-step guide for you to retrieve the Word doc with the Temporary folder.
Step 1 Hit the Finder icon at the lower menu bar of your Mac.
Step 2 Click Applications and then choose Utilities to launch the Terminal window.
Step 3 Input open $TMPDIR and press the Enter button. Then, you will jump to the TMP folder where your unsaved data is located.
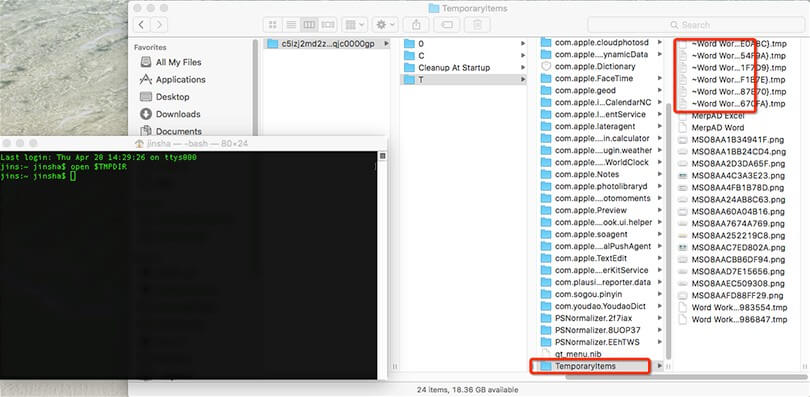
Step 4 Open the Temporaryitems folder and hunt for the files named ~Word Word using the TextEdit tool. Next, you need to copy and paste the text to Word. You can also drag the Word doc that is not saved to your Mac desktop and open it in Word to look for the wanted file.
Step 5 Save the desirable file you have found by clicking the File menu and selecting Save As.
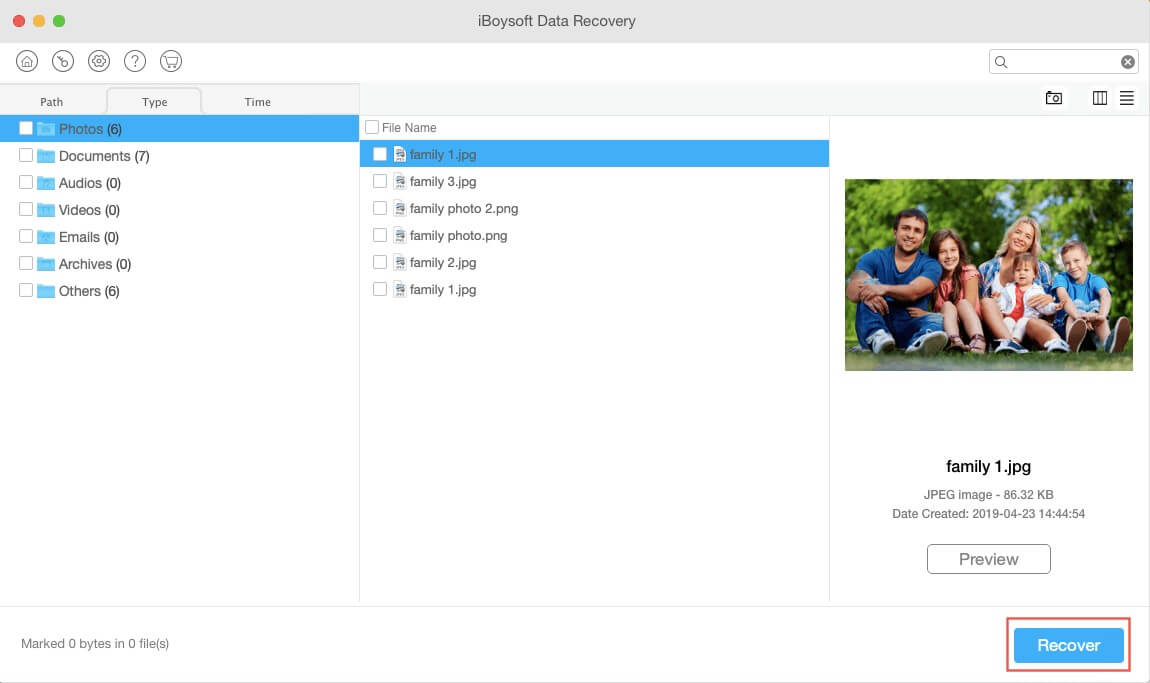
Recover Deleted or Lost Word Document on Mac with iBoysoft Mac Data Recovery Software
Sometimes, your Word document may be deleted by chance, or your saved Word doc gets lost due to file corruption or virus attacks. Under such a case, it’s time for you to ask iBoysoft Data Recovery for Mac for help.
As its name suggested, iBoysoft Data Recovery for Mac is a data recovery utility that is designed to recover deleted or lost Office documents(including Word, Excel, or PowerPoint), videos, audios, pictures, archives, and more on Mac computers. If you are using a Mac that runs with Mac OX 10.9 and later operating systems, you are able to run the software smoothly. To get the deleted or lost Word documents back, just follow the below-mentioned tutorial.
Step 1 Access the official site to free download iBoysoft Data Recovery for Mac.
Step 2 Follow the on-screen wizard to install this program on your Mac and then launch it.
Step 3 Select the drive that keeps your deleted or lost Word doc from all the listed drives on the software interface.
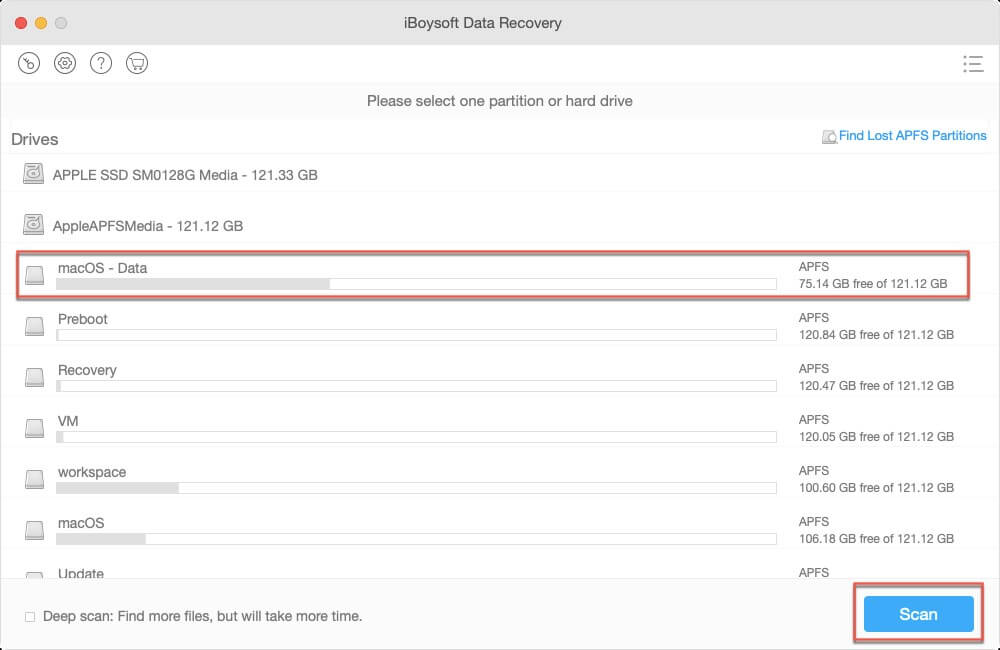
Step 4 Tick the Deep Scan option to search for lost Word documents. If you desire to find the deleted Word doc, just keep the Deep scan option unchecked.
Step 5 Hit the Scan button, and this Word file recovery tool will begin to search for the deleted or lost files.

Step 6 Find the wanted Word file through the Preview feature provided by iBoysoft Data Recovery for Mac, select it, and hit the Recover button to implement Word document recovery.
Useful Tips for Preventing Word File Loss
Word file loss may not happen to everyone, but if it is so unlucky of you to lose your important Word documents, is there any effective measure that can be taken to avoid Word file loss?
- Develop a regular habit of backing up significant Word files.
- Remember to save your Word documents after editing them.
- Make sure that you have turned the AutoRecovery function on. It is better for you to reduce the backup interval.
- Choose a powerful anti-virus program to prevent data loss caused by virus attacks.
- Keep a Mac data recovery tool just like iBoysoft Data Recovery for Mac downloaded on your Mac to deal with the Word file loss issue owing to mistaken deletion, accidental formatting, system crashes, and more.
- Check if there are vital Word files in Mac Trash when you decide to empty it.
Final Thoughts
This article elaborates on how to retrieve unsaved, deleted, or lost Word documents. According to your data loss scenarios, choose a suitable solution from the above-mentioned methods to get your missing Word files back.
Hardeep has always been a Windows lover ever since she got her hands on her first Windows XP PC. She has always been enthusiastic about technological stuff, especially Artificial Intelligence (AI) computing. Before joining PC Error Fix, she worked as a freelancer and worked on numerous technical projects.