NVENC error is one of those errors that users of the Open Broadcaster Software (OBS) encounter when streaming or recording video content. The error is caused by a number of factors, including hardware and software incompatibility, hardware limitations, and incorrect settings on OBS.
This article will focus more on the NVENC error OBS, exploring its root causes and how to solve it. We’ll also look at different ways of troubleshooting this common issue and offer advice on improving your video streaming speed and quality.
To repair corrupted Windows system files, we recommend Advanced System Repair:
This software is your one stop solution to fix Windows errors, protect you from malware, clean junks and optimize your PC for maximum performance in 3 easy steps:
- Download Advanaced System Repair rated Excellent on Trustpilot.
- Click Install & Scan Now to install & scan issues causing the PC problems.
- Next, click on Click Here to Fix All Issues Now to fix, clean, protect and optimize your PC effectively.
What is NVENC Encoder OBS?
NVENC encoder OBS, or NVIDIA Encoder OBS, is a video encoding technology developed by NVIDIA that enables users to stream or record high-quality video on their computer without sacrificing performance or frame rate. It is used by many streamers, gamers, and video content creators to capture and stream their content.
NVENC encoder OBS is available in both free and paid versions. The free version allows users to encode up to 1080p video at 60 frames per second (FPS), while the paid version supports up to 4K video at 120 FPS. The paid version also offers additional features, such as custom profiles and advanced settings.
What Causes OBS NVENC error?
It is one of the most common errors faced by gamers and streamers alike when using Open Broadcast Software (OBS). It usually appears when you are trying to stream or record with OBS, and is caused by a problem with your computer’s hardware or software.
- The most common cause of the NVENC error is an outdated version of your graphics drive
- Another potential cause of the OBS NVENC issue is a conflict between the OBS application and other applications or services running on your computer.
- Any overlay settings and conflicting Microsoft Visual C++ components also lead to the discussed error.
- Finally, the error can be caused by a faulty or outdated version of the NVIDIA Encoder library, which is used by OBS for hardware-accelerated video encoding.
How to Fix OBS NVENC Error?
Before you start with the troubleshooting methods issue, you should open the Task Manager and end any tasks that are not related to OBS. Additionally, you should disable any antivirus or firewall software that you have installed on your computer, as these can interfere with OBS.
Also, to resolve this issue, you should make sure that your hardware meets the minimum system requirements for running OBS. You can find these requirements on the OBS website.
Still, if you face the same error, proceed with the below solutions.
Solution 1: Restart your PC
Restarting your computer can help reset any misconfigured settings or glitches in the system. This will not only clear up any memory being used by applications and processes, but it will also refresh services and drivers which could be causing the NVENC error in OBS. Allowing your PC to fully power off, rather than putting it into sleep mode or hibernation, is recommended if you are experiencing this issue with OBS’s NVENC feature.
- Press the Windows + D keys to navigate to Desktop. Then, tap on the Alt +F4 keys and choose the Restart

- Then, click on OK.
Solution 2: Update your GPU Driver
Updating your drivers can help ensure that all of the components of your computer are running smoothly and efficiently. But before updating, make sure that other components like sound cards and monitors also have their drivers updated so that everything works together properly.
- Click on the Windows key and type Device Manager. Click on Open.
- Double-click on Display adapters to expand the driver.
- Right-click on the graphics driver and select the Update driver option.
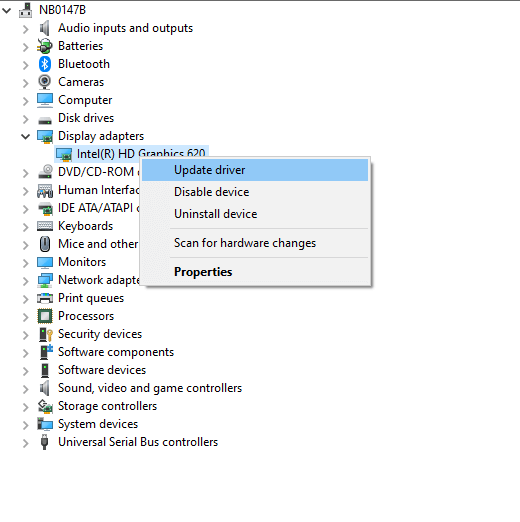
- Now click on Search automatically for the updated driver software option.
- Follow the on-screen instructions to complete the update process, exit the window and reboot your PC once you have installed the latest drivers.
Moreover, you can also update the driver automatically using the Driver Updater tool. This is an advanced tool that just by scanning once updates the entire system drivers.
Get Driver Updater tool, to update drivers automatically
Solution 3: Reduce Output Resolution in OBS
Reducing the output resolution lowers the amount of data needed to be processed by your hardware, allowing for more consistent performance with minimal interruption. It also helps save on bandwidth when streaming live broadcasts, reducing latency during playback. Here are a few instructions to reduce the resolution in OBS in order to fix failed to open NVENC codec on your PC.
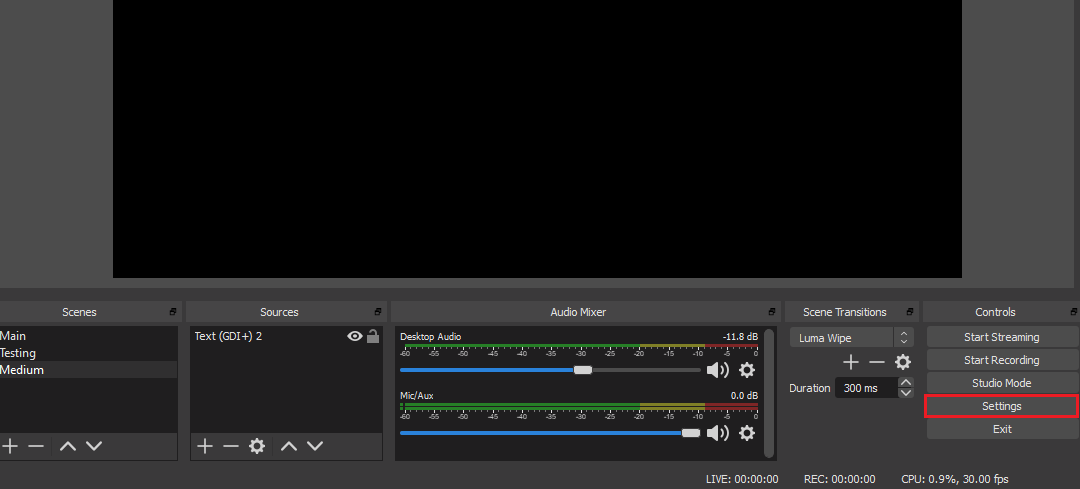
- Go to the OBS Studio app and tap on the Settings button at the bottom right corner of the screen.
- Navigate to the left pane, switch to the Video tab, and scroll down the right pane, click on the Output (Scaled) Resolution
- Now, choose any lower resolution values from the drop-down list.
Note: These changes will not modify the layout of the encoded videos.
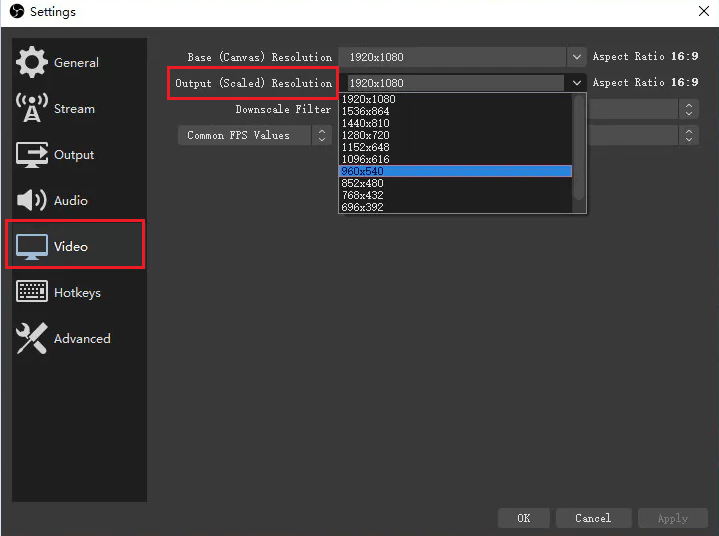
- Click on the Apply and OK buttons to make the recent changes effective.
Relaunch the app now, it will not give any error.
Also Read: 9 Easy Fixes for OBS Encoding Overloaded
Solution 4: Disabling the In-Game Overlay (NVIDIA & Discord)
When the OBS failed to start recording NVENC error occurs, it is likely due to the in-game overlay being enabled. This feature can conflict with OBS’s ability to record with NVENC, leading to the discussed NVENC error.
If the in-game overlay is already disabled, the next step is to check to see if any other overlay is enabled. Some games or applications may have multiple overlays, so it is important to make sure that all of them are disabled.
If your PC makes use of Discord or NVIDIA experience, follow these sub-guides below to fix the problem.
4A. Disable the Overlay settings on Nvidia Experience
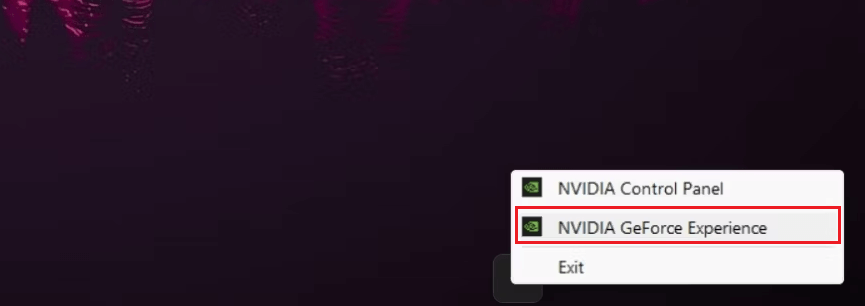
- Go to the desktop and hover over your mouse to the taskbar. Click on the arrow icon to launch the hidden icons.
- Now, right-click on the NVIDIA icon and click on the Nvidia GeForce Experience option from the available list.
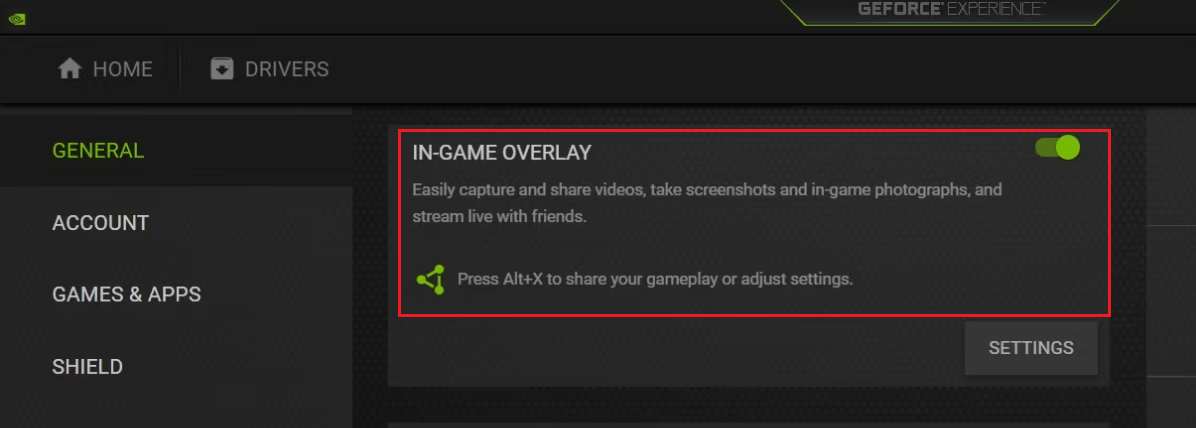
- Now, in the Nvidia GeForce Experience app, find the gear icon on the menu bar and tap on it to open Settings.
- Go to the GENERAL settings menu, move to the right screen and tap on the IN-GAME OVERLAY If you see a green toggle next to it, tap on it to disable it.
- Finally, the overlay settings are disabled in NVIDIA. Launch the OBS app now and ensure that you do not face the error now.
4B. Disable the Overlay settings on Discord
- Go to the Discord
- Now, tap on the Cog-wheel icon on the Discord home screen to launch the User Settings in the platform.
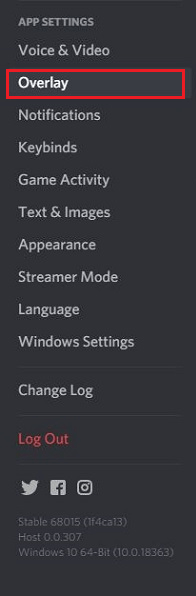
- From the left screen, move down to the App Settings and click on it.
- Now, tap on Overlay.
- Now, turn off the Enable in-game overlay This setting will be greyed out once you have turned off it.
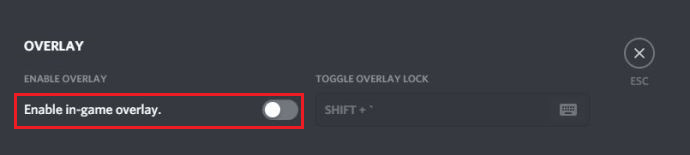
- Relaunch the OBS now and check if you can use it without any errors.
Solution 5: Switch to QuickSync to Use Hardware Encoding
If you are a video streamer, you know that having a reliable video streaming solution is essential. Unfortunately, OBS’s NVENC encoding can sometimes be unreliable, leading to dropped frames, stuttering videos, and other issues. Fortunately, there is an easy fix: switch to QuickSync!
QuickSync is Intel’s hardware-accelerated encoding technology. It is more reliable than NVENC, and it also uses fewer CPU resources, meaning that your computer will be able to handle more tasks without stuttering or dropping frames.
Note: The first step in switching to QuickSync is to make sure that your computer meets the system requirements. QuickSync requires an Intel Core i3, i5, or i7 processor with Intel HD Graphics 4000 or better. If your computer doesn’t meet these requirements, then you won’t be able to use QuickSync.
- Launch the OBS app and tap on File > Settings.
- Now, move to the Output tab, and click on QuickSync H.264 in the Encoder
Note: If you cannot see the aforementioned settings, you have to ensure that you are in the advanced output mode or not.
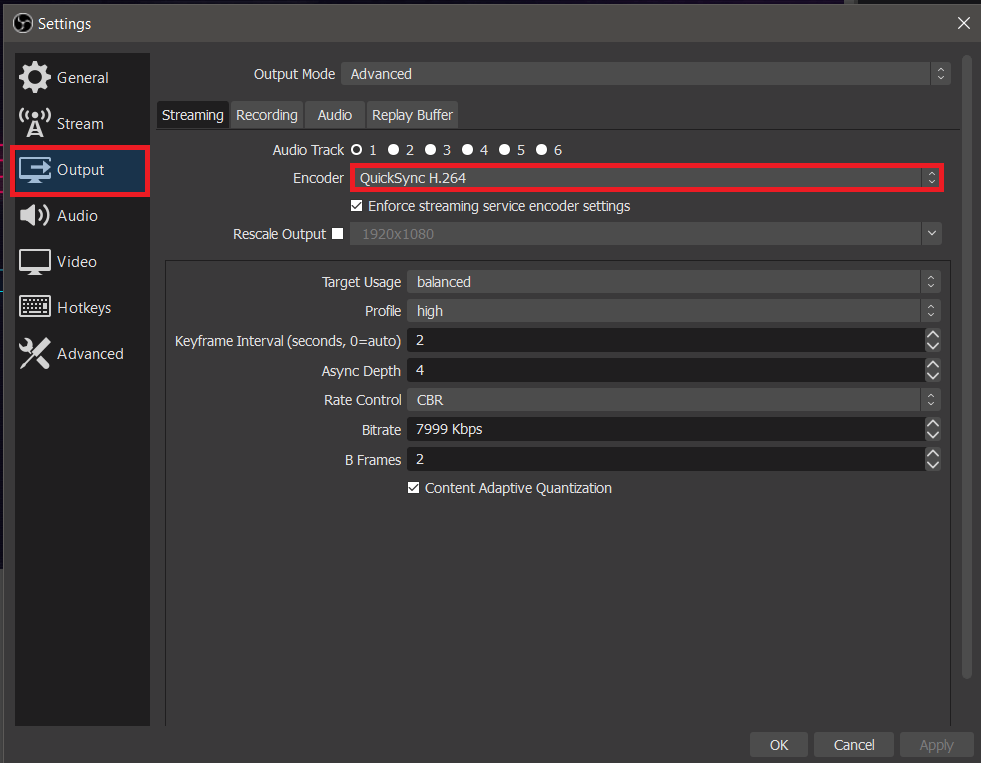
- Save the most recent changes by pressing the Apply> OK buttons and the OBS app will work without any errors now.
Solution 6: Switch to Software (x264) to Use Software Encoding
To fix the NVENC error to switch to software encoding. This is a method of encoding that uses the CPU, rather than hardware-based encoding. Software encoding is more reliable and provides better results than hardware encoding, as it doesn’t suffer from the same performance issues.
Firstly, make sure you have a powerful enough computer to handle software encoding. If your computer is too slow, the encoding process can take a long time, and you may experience poor video quality. Secondly, make sure you have the latest version of OBS installed. Then, follow the below-listed instructions to switch to software encoding.
- Again, navigate to OBS Settings > Output tab in the left pane. When you do so, the Streaming section will appear in the right pane.
- Modify the Encoder settings to Software (x264) and ensure you choose the Enforce streaming service encoder settings option as shown.
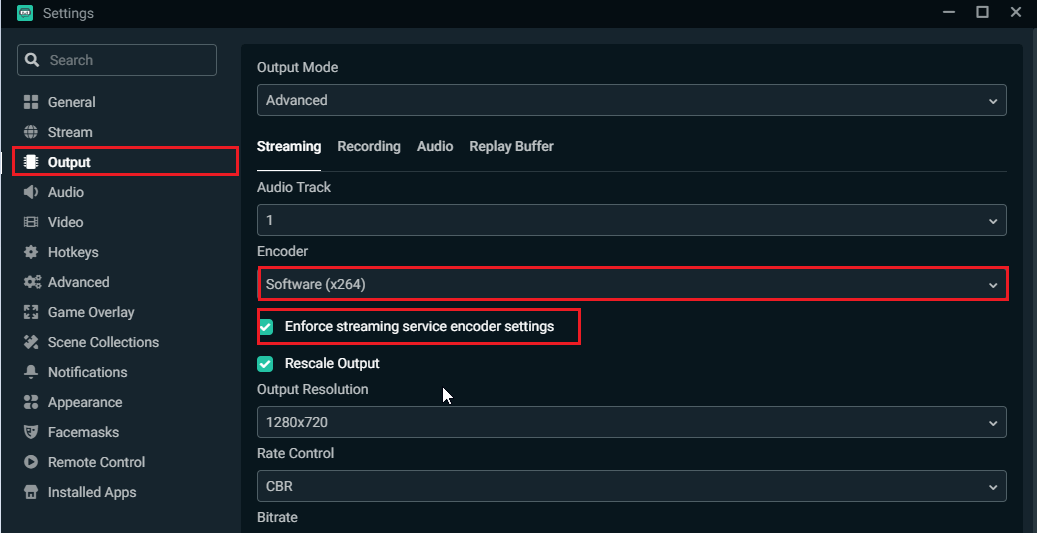
- Click on Apply and OK to save the changes.
- Restart the computer, launch the OBS app again, and check if the NVENC error OBS is resolved for you.
Solution 7: Reinstall Microsoft C++ Redistributables
Reinstalling Microsoft C++ Redistributables is a quick and easy way to fix the NVENC error in OBC. As the Microsoft Visual C++ compiler is used to write many programs and applications in OBS, it is important to ensure that the latest version of the Microsoft C++ Redistributables is installed.
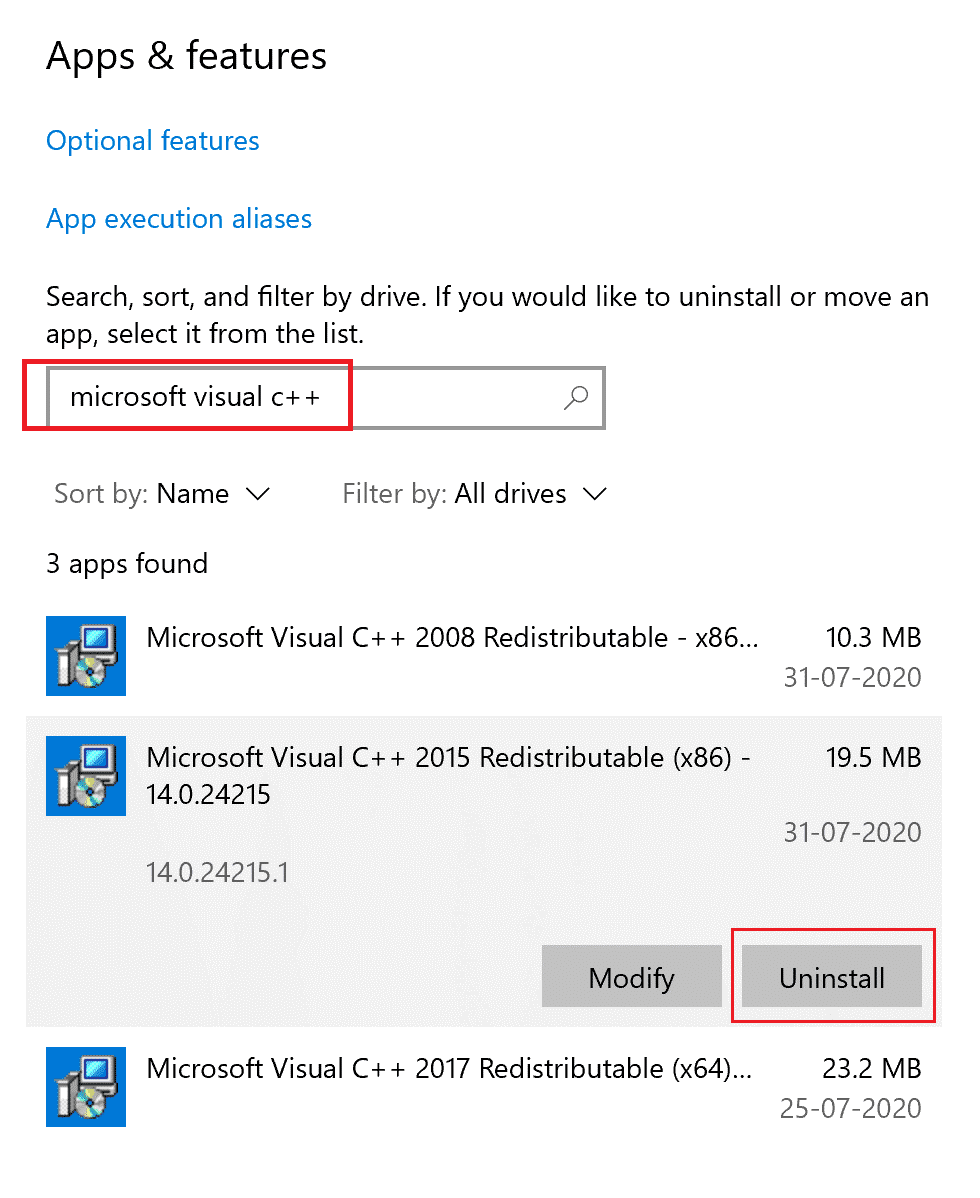
- Go to the search menu and type Apps & features. Now, tap on Open.
- Now, enter and search for Microsoft Visual C++
- Tap on any one package at a time and tap on Uninstall.
- Follow these steps for all the packages on your system and continue with the upcoming prompts to uninstall all of them.
- When you find the packages are uninstalled successfully, click on the Start key and type the command prompt.
- Click on Run as administrator to launch the command window.
- Then, type the following commands and click on the Enter
- Dism.exe /online /Cleanup-Image /StartComponentCleanup
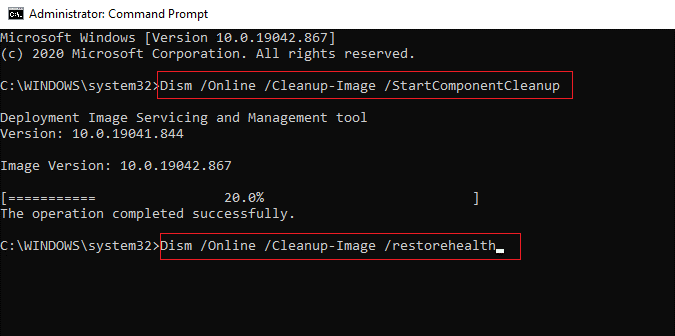
- Wait until the DISM scan is complete and reboot your Windows PC.
- Now, go to your browser and navigate to the official Microsoft website.
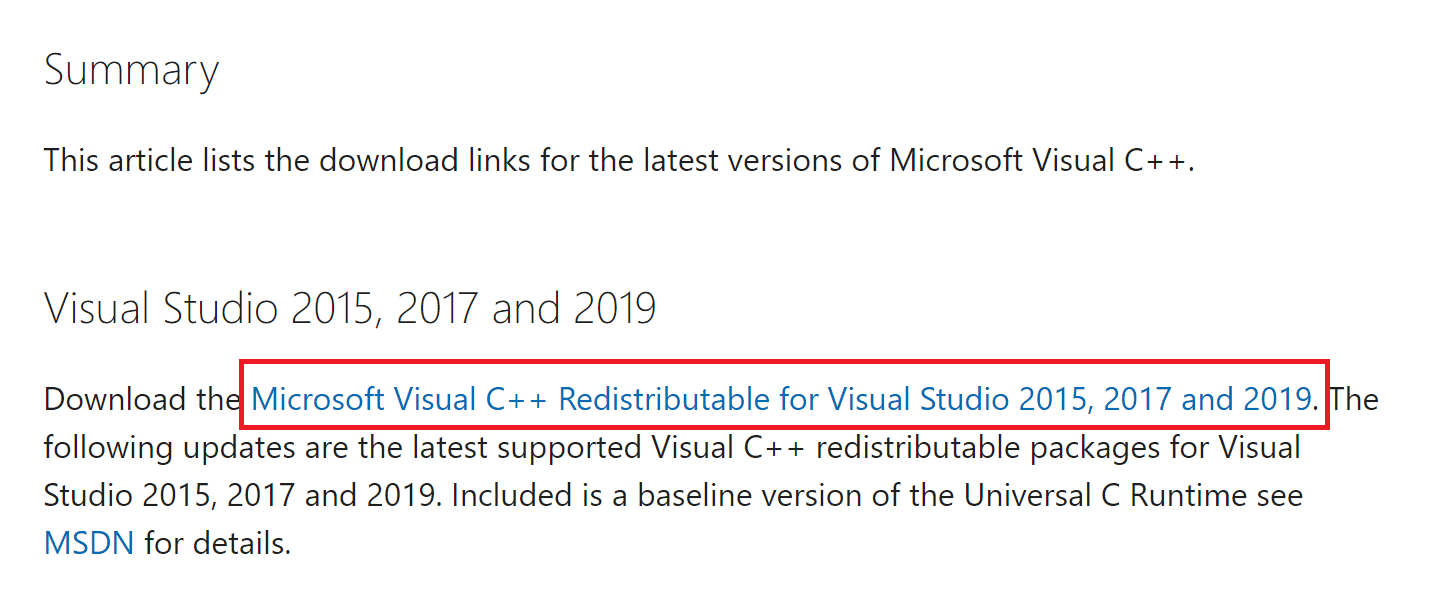
- Scroll down the screen and download the latest Visual C++ Redistributable files for Visual Studio 2015, 2017, and 2019.
- Wait until all the Visual C++ Redistributable files are downloaded successfully on your PC.
- Install all the packages in My downloads by following the on-screen instructions.
- Finally, reboot your computer
Once your PC restarts, relaunch the OBS app again. It will not give you any error now.
Recommended Solution- Fix Various PC Issues & Errors
If your Windows PC/laptop system is running slow or showing various issues and errors, then scan your system with the PC Repair Tool. This is a powerful repair tool that, just by scanning once, detects and fixes various Windows issues and errors.
The tool fixes common PC errors like system file corruption and protects from file loss, malware, hardware failure, BSOD error, and more.
Well, this not only fixes errors but also enhances Windows PC performance.
Get PC Repair Tool to Fix Various PC Issues and Errors
Conclusion
So, this is all about the NVENC error OBS.
Here we have listed the entire potential troubleshooting solutions to fix the error and start streaming or recording the video content.
It is estimated the fixes given work for you to resolve the error completely make sure to follow the fixes given one by one carefully.
Hope our guide works for you. If you have any queries then feel free to share them with us on our Facebook Page.
Good Luck..!
Hardeep has always been a Windows lover ever since she got her hands on her first Windows XP PC. She has always been enthusiastic about technological stuff, especially Artificial Intelligence (AI) computing. Before joining PC Error Fix, she worked as a freelancer and worked on numerous technical projects.