Many users reported they see “the program can’t start because libcef.dll is missing” error message on their PC. The error message occurs when the user tries to run an application on their Windows system.
Some applications require the libcef.dll file for running properly but when this file goes missing or gets accidentally deleted it starts showing Libcef.dll is missing or not found error.
Free DLL Repair Tool
Fix Libcef.dll error by repairing corrupted or missing system files, & install the latest DLL file by replacing the damaged/corrupted DLL file.
There are many different reasons why the error appears on the Windows system. So, here we have provided easy and quick solutions to fix the error completely, but before heading to the fixes find out the common reasons responsible for the error.
What is Libcef.dll?
Libcef.dll is a Chromium Embedded Framework DLL file. Some applications, to function properly, need this file. If libcef.dll is missing, many errors can be found while running this application. We have put forward some of the common errors you may face while running the applications.
What Causes Libcef.dll Missing Error?
- The libcef.dll file gets deleted or corrupted and restoring the file or downloading it again might work for you.
- Virus and malware infection in the computer might corrupt the DLL file.
- Outdated drivers can also corrupt the libcef.dll file
- The corrupt or missing Visual Studio 2015 files can also cause the error.
- Missing or corrupted Windows system files cause conflict with the application and cause the libcef.dll missing or not found error.
Common Libcef.dll Error Messages
Here are some of the common libcef.dll messages you may encounter:
- The program can’t start because libcef.dll is missing from your system.
- Can’t run a program because libcef.dll is missing.
- Error loading libcef.dll. The system could not find the specified module.
- The libcef.dll could not be located
- libcef.dll Access Violation
- The entry point to the procedure libcef.dll error
- Cannot find libcef.dll
- Failed to register libcef.dll
- The system has a problem starting libcef.dll.
- Code execution cannot continue because libcef.dll was not found.
The above messages indicate that libcef.dll is missing from the system. To fix this problem, you can follow the solutions below.
How to Fix Libcef.dll Missing Error in Windows 10?
Here are a few solutions that can help you fix libcef.dll error:
Solution 1 – Update Windows Operating System
Even a Windows update can fix the problem. When you update your OS to the latest version, the libcef.dll error can disappear. Follow the steps provided below:
- Open Settings from the Start or press Windows + I.
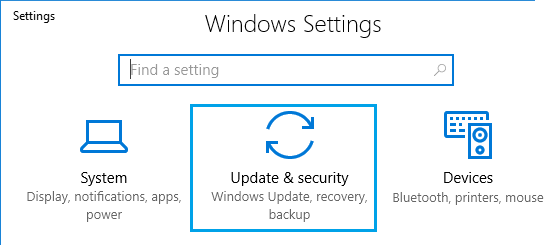
- Access update and security option
- On the Windows Update tab, click Check for updates.

- If the new update is found, install it.
Check if your issue is resolved. If this method did not help you, use the next one.
Solution 2 – Re-register libcef.dll
You cannot run some applications because the libcef.dll file is corrupt. So, first, replace libcef.dll and register it again manually to resolve this problem. First, check the system type of your computer to proceed. The system type (which can be 32 bit or 64 bit) is different in a computer.
- Press Windows + I key together on a keyboard to open the Settings on Windows and go to System.
- On the left side, you can find the About option and click on it.
- Check the System Type on the right side of the pane.
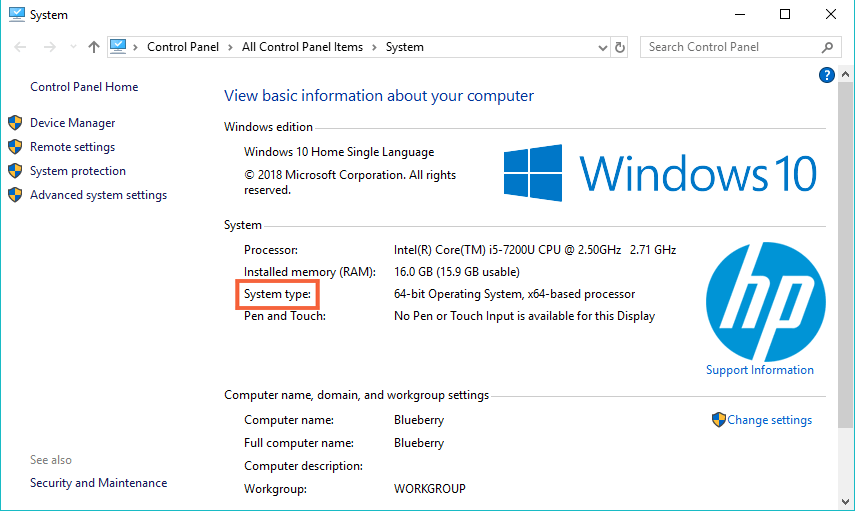
- Here you will find the system type of your PC. If your system type is 64 bit then follow the steps below to replace and register the libcef.dll error.
For 64 bit system
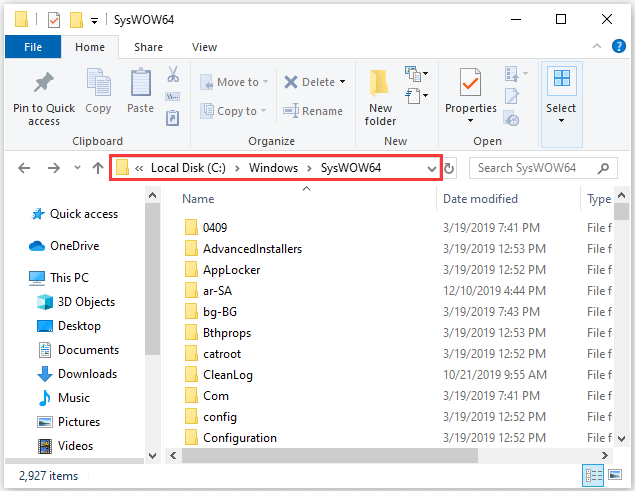
- Press the Windows + E keys together to open file Explorer.
- Locate the path C:\Windows\SysWOW64. In that, if you cannot find the libcef.dll file, you can download the file with the system type.
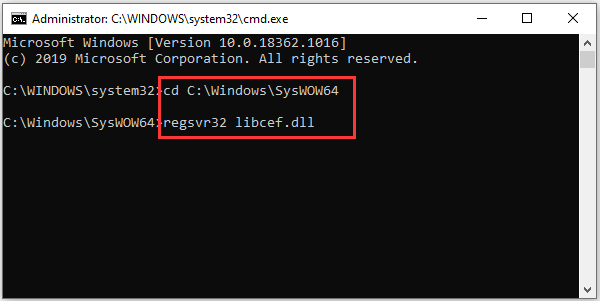
- Make sure of the file location. Press Windows + R keys together to implore the Run window. Type cmd in the search bar, then press the CTRL + SHIFT + Enter keys simultaneously to run Command Prompt as administrator.
- Type the command cd C:\Windows\SysWOW64 and hit Enter
- Next type regsvr32 libcef.dll command and press Enter to register the libcef.dll file on your computer.
After following the above mentioned steps and successfully saving the file, restart your system and check if the libcef.dll is missing error message still persists.
For 32 bit system
The process of registering the libcef.dll file for 32 bit is a little different to the 64-bit OS version. The location of this file is different in the type of system.
- Open the File Explorer, and go to C:\Windows\System32. Copy the downloaded libcef.dll to System32.
- After that, run the Command Prompt as administrator, type the command cd C:\Windows\System32, and press Enter.
- Now to re-register type regsvr32 libcef.dll and hit Enter
After successfully registering the libcef.dll, restart your PC. Open the problematic application again and check if the program running with libcef.dll is missing the error code.
Solution 3 – Run SFC Scan
System File Checker (SFC scan) is an inbuilt available on Windows. It is considered to be the easiest and fastest way to repair the corrupted system files automatically. To perform SFC, you need to follow these steps:
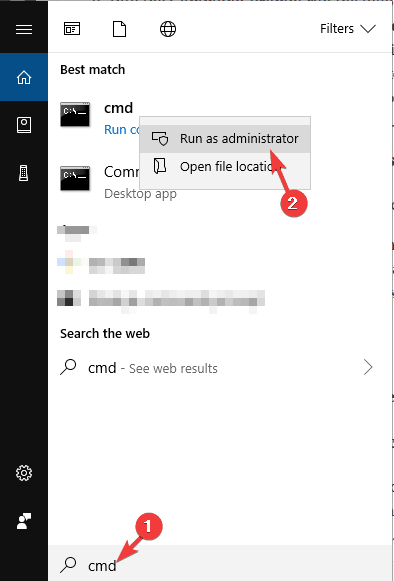
- Press Windows + R on your keyboard to open the run dialogue box type cmd in that and press Ctrl + Shift + Enter to open the command prompt as an administrator.
- When prompted, you must allow the command line to make changes. Now, in the command prompt type sfc/scannow and press Enter.
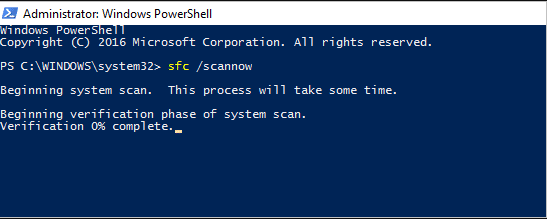
- System File Checker scans your computer, waits for the scanning process to complete and solves all errors automatically.
If this method did not help you, use the next one.
Solution 4 – Update Drivers
The driver updates software and applications for the Windows OS as well as network adapters, printers, monitors, etc. In addition, you can independently download and install from the Windows Update Center or use some specialized programs.
You have two options that you choose either driver software for automatically updating the drives, or manually updating the drives using the driver device. Here is how you can manually update your system drivers:
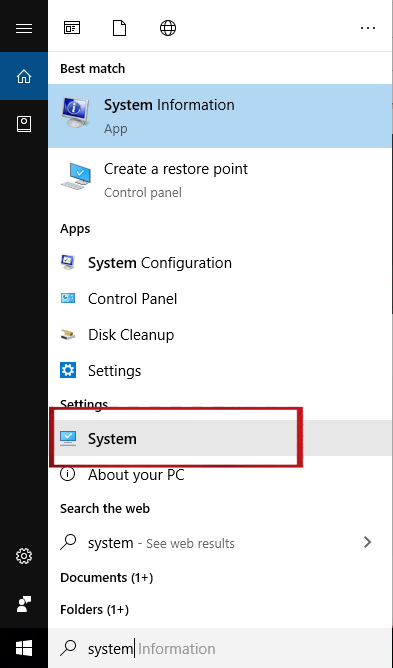
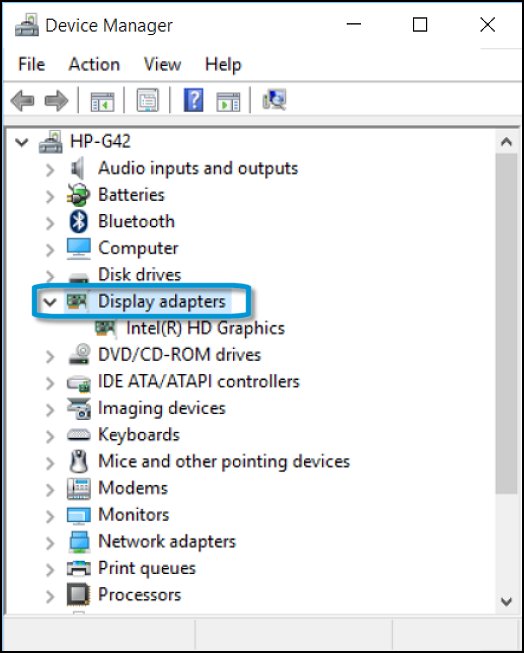
- Go to the Start menu and type Device Manager in the search bar.
- Open Device Manager and click on the Display Adapter to look for the outdated drivers
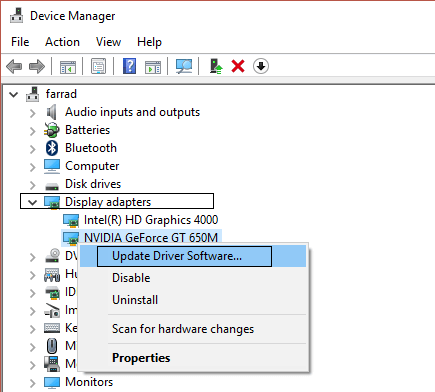
- Then right-click on the outdated driver and choose Update driver
- Click on Search automatically for the updated driver software option.
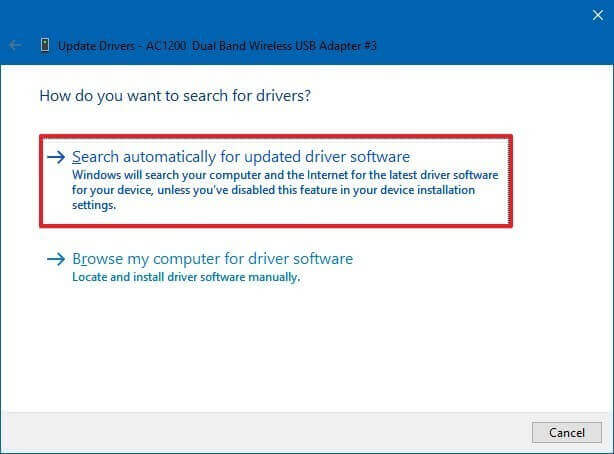
- Find the updated driver and click on it.
- Windows may not locate the new driver. In such a case, you can find the driver on the manufacturer’s website, where you will find all the necessary instructions.
Manually updating the driver is very time consuming and many times you won’t find the compatible driver update so it is suggested to update the driver using the automatic Driver Updater tool. This is an advanced tool that just by scanning once detects and updates the entire system drivers.
Get Driver Updater to update drivers automatically
Solution 5 – Reinstall Visual C++ Redistributable
Reinstalling the Visual C++ Redistributable for Visual Studio 2015 worked for many users to solve the error so try reinstalling it correctly and fix the error. It is recommended to download it from the Microsoft official website:
- First, check out the System version of your system (32-bit or 64-bit)
- You have to download Microsoft Visual C++ Redistributable from Microsoft’s official website.
- Select the File corresponding to your version of Windows. For the 64-bit OS version: vc_redist.x64.exe and for the 32-bit OS version: vc_redist.x86.exe.
- Now, checkmark the box and click Next.
- Open the file and read the Microsoft software license terms and conditions. Accept it and choose Install.
Solution 6 – Uninstall Application Showing libcef.dll is Missing Error
Sometimes installing an application gets corrupted and causes conflict with other files and shows the libcef.dll error on Windows 10. Uninstall such an application and see if your system works fine.
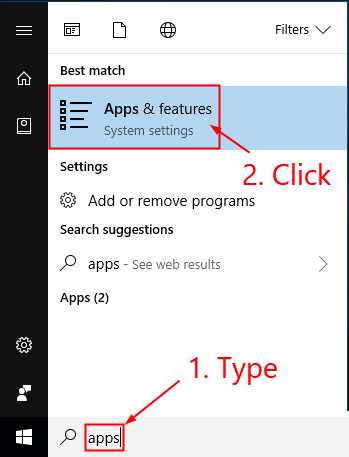
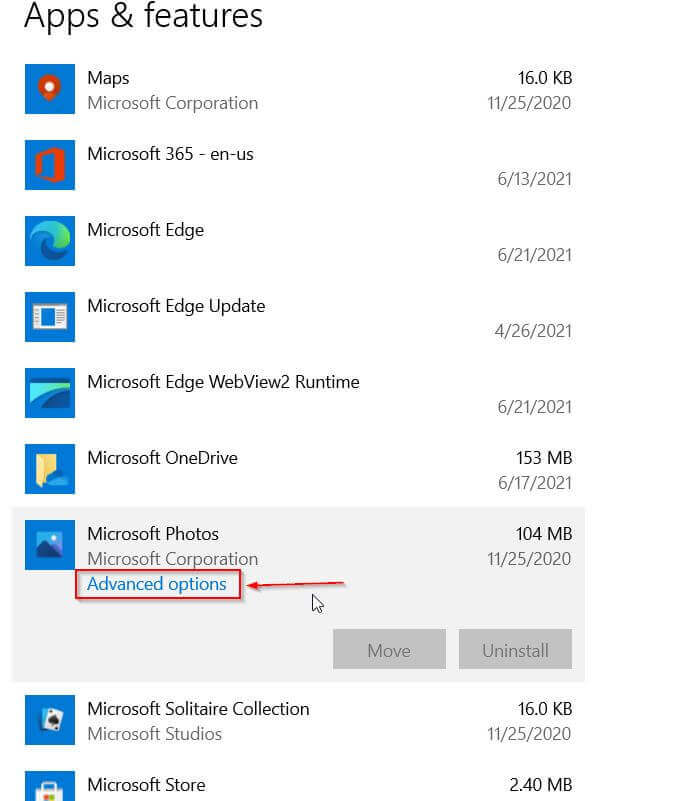
- Open the Settings app by pressing Windows + I keys
- Navigate to Apps and in that choose Apps & Features
- Select the application causing the error, then right-click on it and choose Uninstall to uninstall the program.
- Once uninstalled, restart your PC and check if it works for you.
Here it is suggested to uninstall the program using the third-party uninstaller as this completely removes the program without leaving any registry entries and traces behind.
Get Revo Uninstaller to Uninstall a Program Completely
Solution 7 – Disable Antivirus Program
In many cases, the third-party antivirus program installed on your system detects the libcef.dll files as junk files and isolates them. It prevents the file from responding to the system. So, check if you are running an antivirus program then disable it and check if the error is resolved.
If disabling the antivirus program works in your case to fix the error then uninstall the antivirus program from your Windows system by following the steps listed above.
Solution 8 – Perform System Restore
System restore is a very beneficial method if you are trying to fix an error. Therefore, to fix the missing libcef.dll, you can try this and restore Windows to the date when there is no error. However, when you restore Windows to a date when there was no error, it will remove all new system changes.
So, follow the steps to do so:
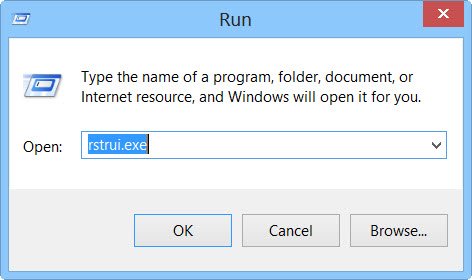
- Press the Windows + R keys simultaneously on the keyboard to open the Run box.
- Type rstrui in the dialogue box, then click the OK button and press Enter.
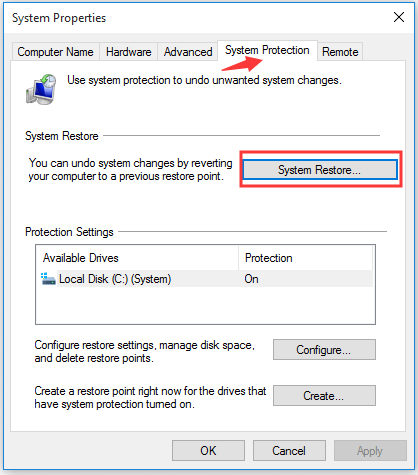
- Find the choose different restore point in the System Restore and click on it. After that, click on the show more restorations to see the full list of dates.
- Now choose the date you want to restore Windows. Remember to choose the recovery date when the libcef.dll file has not been corrupted.
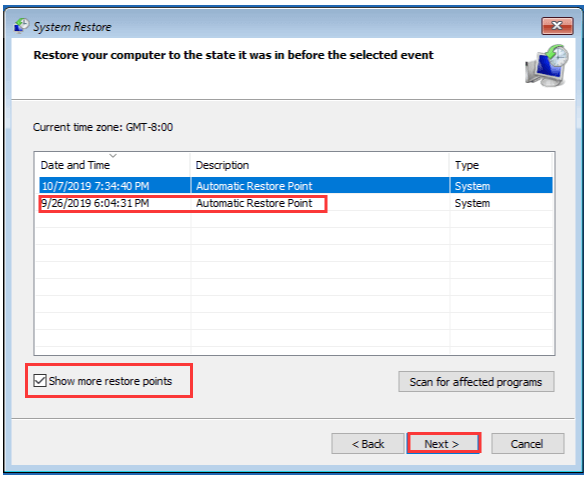
- Click on the Next, then click on the Finish button to continue the process.
After following all the steps, your PC will restart and restore data and files to the date you choose. This will resolve the libcef.dll missing error.
Best & Easy Solution to Fix Libcef.dll is Missing Error
If the above manual solutions won’t work for you to solve libcef.dll missing or not found error on Windows then scan your system with the trusted DLL Repair Tool.
This is an advanced, multifunctional tool that detects and fixes DLL-related errors just by scanning. It is a highly advanced and trusted tool, that repairs corrupted Windows system files, prevents your PC from file loss, removes virus or malware infection and much more.
So feel free to run this automatic utility and make your Windows PC error-free.
Get DLL Repair Tool, to fix libcef.dll is missing error
Conclusion
That’s all about the libcef.dll is missing application error on the Windows system.
Try the fixes mentioned in the article one by one till you find the workable solution for you. It is estimated one of our solutions managed to solve the error. Hope the article works for you.
If there is anything that I missed out on, or you have any queries or suggestions then you can write to us on our Facebook Page. Also, don’t forget to shoot the like button.
Good Luck..!
Hardeep has always been a Windows lover ever since she got her hands on her first Windows XP PC. She has always been enthusiastic about technological stuff, especially Artificial Intelligence (AI) computing. Before joining PC Error Fix, she worked as a freelancer and worked on numerous technical projects.