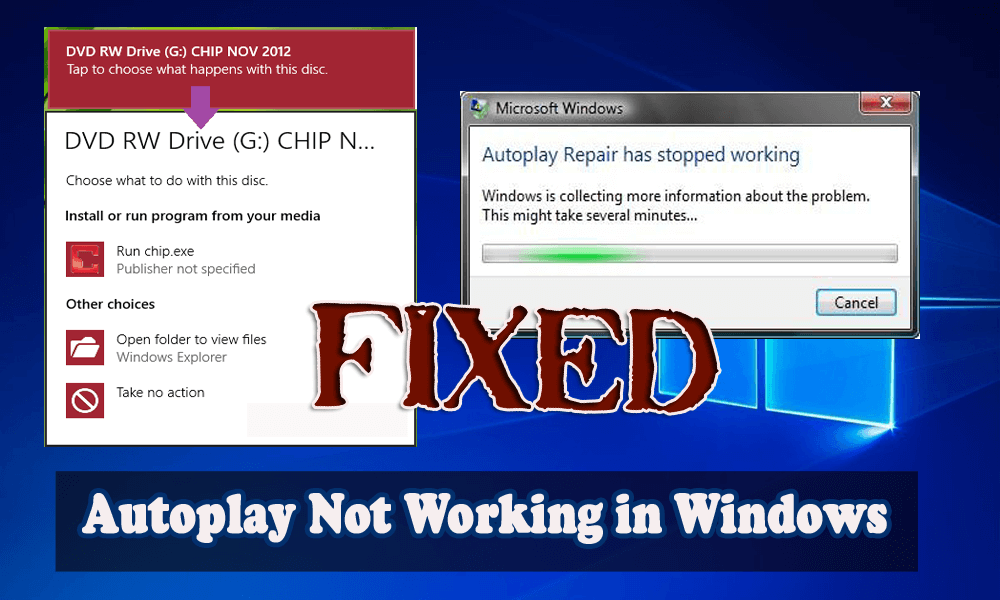
Autoplay is an option that appears on the screen when the user plugs a removable device such as a USB device or hard drive into your computer. It examines new devices and removable media based on pictures, video and audio files that launch an application to play them. This feature is similar to Autorun OS.
But recently;y Windows users are encountering Autoplay not working issue. There are lots of reasons that affect the Autoplay option in Windows systems and some of them are:
- Autoplay not working when an external device is connected
- Autoplay is enabled but not working
- USB autoplay not working windows 10
- DVD ROM autoplay not working
Now, to fix AutoPlay not working in Windows problem try the solutions given in the article based on the Operating System.
Apply them one by one and get rid of autoplay not working in Windows PC/laptop.
How to Fix Autoplay Not Working in Windows?
For Windows 10:
1: Set AutoPlay defaults
In Windows 10 you can enable or disable and set AutoPlay defaults easily with the help of Settings app.
- Go to the Settings app -> click on Devices -> Choose AutoPlay from the left side.
- To enable AutoPlay option you have to set the Use AutoPlay for all media and devices button to on.
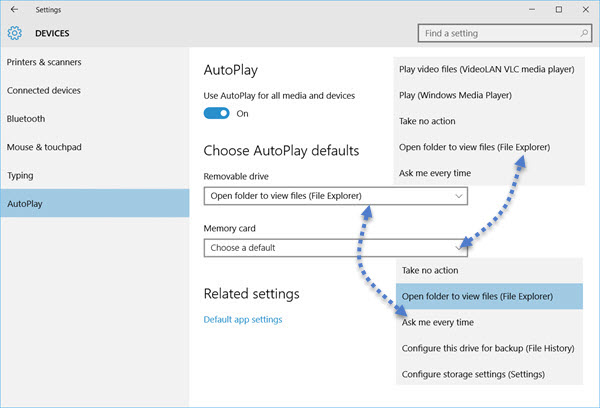
After it, you can select and set your AutoPlay defaults.
For Removable drives, the following options are available from the drop-down menu:
- Take no action
- Open folder to view files
- Ask me every time
- Configure this drive for backup (File History)
- Configure storage settings (Settings).
For Memory Cards, the available options are:
- Play video files using alternate software
- Play using Windows Media Player
- Take no action
- Open folder to view files
- Ask me every time.
After selecting your desired option, exit from the window. The above-given solution is effective and can make you able to fix Windows 10 autoplay not working issue.
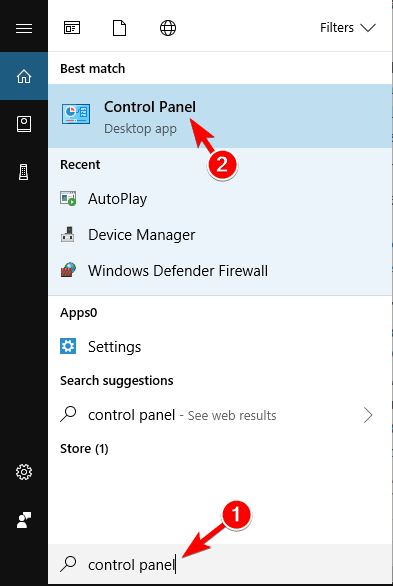
2: Reset the Autoplay settings
Follow these steps to reset Autoplay settings:
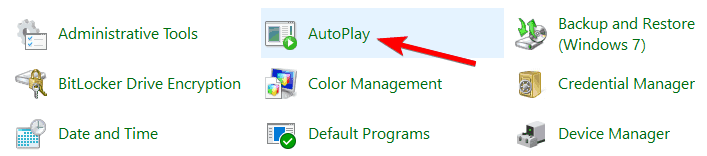
- Open the control panel. To do this, go to the search option (press the Windows Key + S) and search for the control panel. After it, choose Control Panel from the result.
- After it, click on the AutoPlay.
- In the AutoPlay settings, you have to check Use AutoPlay for all media and devices.
- After it, click on the Reset all defaults button. It is suggested that Autoplay settings must be reset to the default.
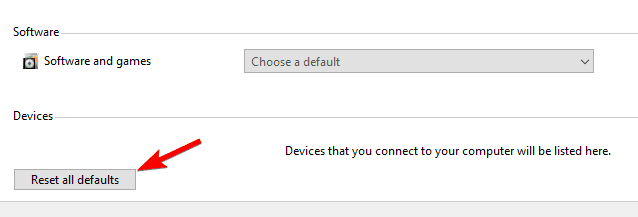
After it, check if Autoplay not working Windows 10 is solved or not.
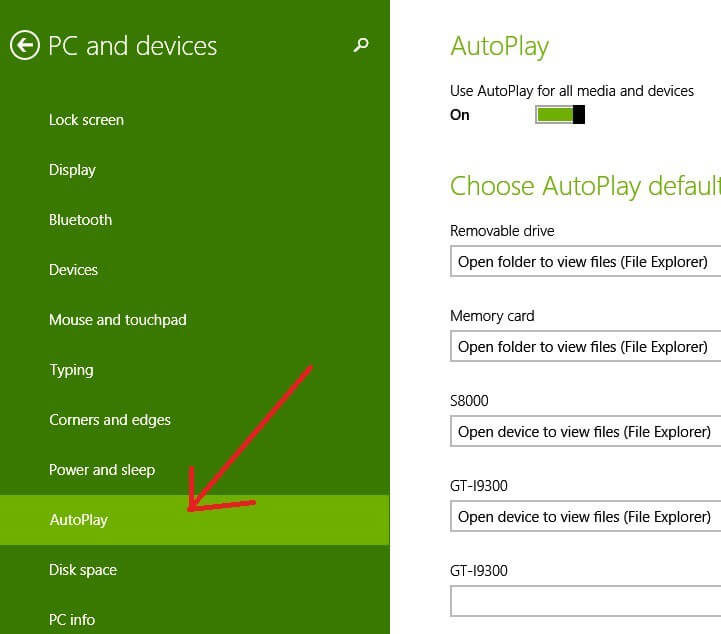
3: AutoPlay options in Settings
- Open the Settings, to do this, press the Windows Key + I and then click on the Devices.
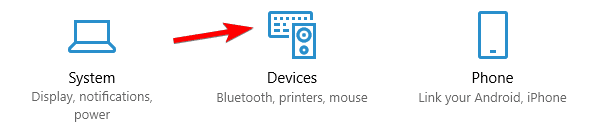
- Here, on the side menu, you have to select AutoPlay.
- Turn on the toggle present under Autoplay to enable it.
- Now, you have to alter the value of the Choose AutoPlay defaults according to your requirement and exit from the window.
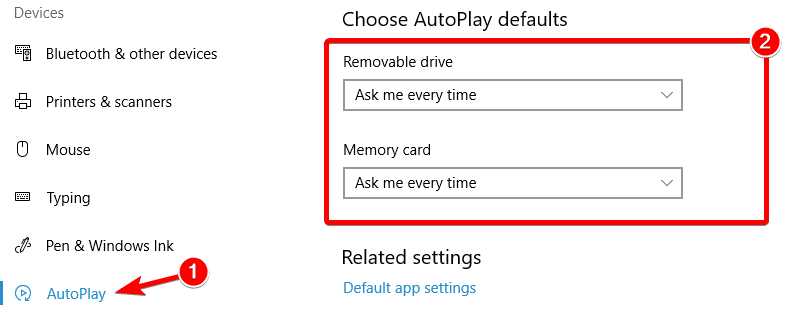
Restart your PC to save these changes.
4: Registry Fix
- First, you have to open the registry editor window, to do this press the Windows Key + R and in the run dialogue box type regedit and press the Enter key. This will open up the Registry Editor.
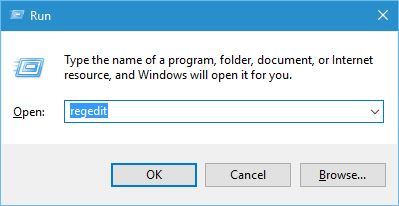
- Now, you have to navigate to the below given Registry Key:
HKEY_LOCAL_MACHINE\SOFTWARE\Microsoft\Windows\CurrentVersion\Policies\Explorer
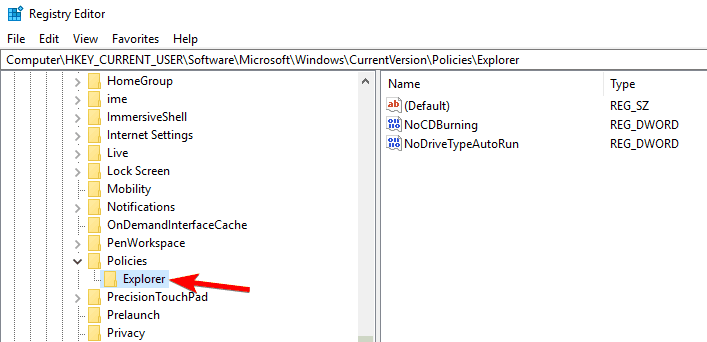
- You need to confirm that the Explorer is highlighted in the left window pane and then click on the NoDriveTypeAutoRun which is present in the right window pane.
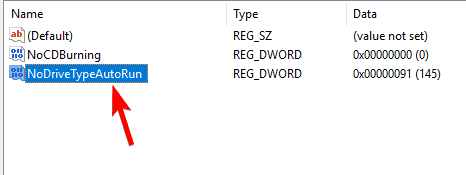
- In case, the above-given value doesn’t exist then you have to create one. To do this, move the mouse pointer to the right window pane and then, right-click on the empty area and choose New > DWORD (32-bit) value.
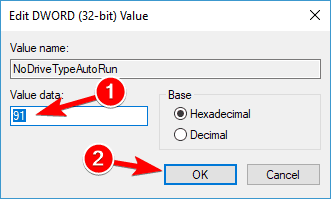
- You have to name the newly created key as NoDriveTypeAutoRun and then double-click on it to alter its value.
- Here, you need to confirm that the hexadecimal is selected and in Value data field enter 91 then click OK.
- Now, navigate to the given registry key and follow the steps 3 to Step 6.
HKEY_CURRENT_USER\Software\Microsoft\Windows\CurrentVersion\Policies\Explorer
- Close the Registry Editor and reboot your PC to save changes.
5: Run the Shell Hardware Detection Service
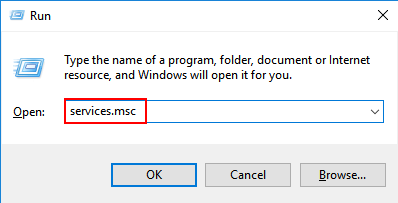
- Open the run dialogue box (press Windows + R) and in the run box type services.msc then click ok.
- In the Service Window, you have to scroll down till you find Shell Hardware Detection service. After finding, right-click on it and choose Properties.

- Set the Startup type to Automatic and if the service is not running, click Start.
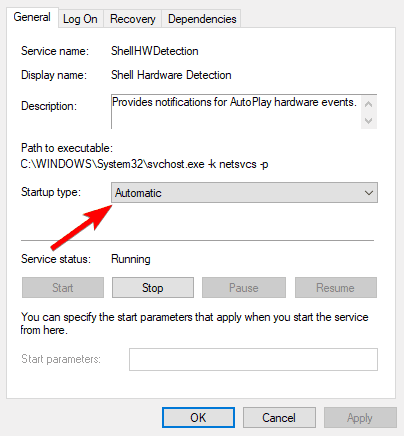
- Click on the Apply and then OK.
Restart your PC to save changes.
For Windows 8:
Turn On or Off AutoPlay in Control Panel
- Open the Control Panel -> click on the AutoPlay icon.
- If you want to Turn Off AutoPlay completely: Uncheck the Use AutoPlay for all media and devices box present at the top.
- If you want to Turn off AutoPlay for Only One Device, Media, or Content: From the drop-down list next to the device, type of media, or content that you want to disable, click on the Take no action option.

After it, click on the Save button to apply. Now, check whether the Autoplay not Working Windows 8 issue is fixed or not.
For Windows Vista/7:
Reset the Standard Autoplay Settings
Reset the Autoplay options can be reset from the Control Panel.
- Open Control Panel -> Hardware and Sound -> AutoPlay or just Autoplay (for the classic view).
- Make sure that “Use Autoplay for media and devices” option is checked and also press the “Reset all defaults” button at the bottom
- Click Save.
For Windows XP:
Reset the Standard Autoplay Settings
A reset can be done on each drive letter itself and the Autoplay prompt may have been simply set to off for that drive.
- Remove all the Autoplaying device is plugged in -> Right-click on My Computer click on the drive letter used by it -> Properties -> AutoPlay tab.
- Choose “Prompt me each time to choose an action” and click OK, or you can also click on the Restore Defaults button if present.
Best and Easy Solution to Fix Autoplay Not Working
The above-mentioned solutions are a bit tricky and if you do not have technical knowledge of computer then it might be difficult for you to perform the manual methods. There is an easy solution for you, run the PC Repair Tool.
This tool will automatically scan your system detects the errors and fix them. It will not only fixes Windows autoplay not working issue but also repairs corrupt files, DLL errors, update error and more.
This repairing tool also improves the performances of your PC making it error-free and smooth running.
Get PC Repair Tool to Fix Autoplay not working in Windows
Conclusion
Well, my work is done here and now it’s time for you to apply the given solutions to overcome Autoplay not working issue.
Carefully perform the above-stated manuals one by one according to your Windows version and it will work for you. It is hoped that this article helped you to solve your issue and your Autoplay starts working as before.
Despite this, if you are having any suggestions or questions regarding this article then do not hesitate, share it with us in the below comment section.
Hardeep has always been a Windows lover ever since she got her hands on her first Windows XP PC. She has always been enthusiastic about technological stuff, especially Artificial Intelligence (AI) computing. Before joining PC Error Fix, she worked as a freelancer and worked on numerous technical projects.