Seeing vertical or horizontal lines on your laptop or desktop screen is not a good sign. This certainly means that your monitor is facing some serious issues.
If you are seeing blue, red, green or black vertical lines on the laptop screen, then this article is for you. In this guide, you’ll learn the troubleshooting solutions to fix the vertical black line on laptop screen.
To repair corrupted Windows system files, we recommend Advanced System Repair:
This software is your one stop solution to fix Windows errors, protect you from malware, clean junks and optimize your PC for maximum performance in 3 easy steps:
- Download Advanaced System Repair rated Excellent on Trustpilot.
- Click Install & Scan Now to install & scan issues causing the PC problems.
- Next, click on Click Here to Fix All Issues Now to fix, clean, protect and optimize your PC effectively.
Why is There a Line on My Laptop Screen?
Whether it is vertical or horizontal, these lines are the result of several issues. Factors causing lines on the laptop screen often include overheating, physical damage to the monitor or the cables connecting it, conflicts between the screen and the selected screen resolution, incorrect refresh rate settings, or outdated device drivers and operating systems.
It can also occur due to a faulty HDMI or DisplayPort display driver issue, or even a system-wide error that is causing your laptop’s screen to malfunction.
How to Fix Vertical Black Lines on Laptop Screen?
In this section, we have covered the possible troubleshooting solutions that will help you to fix vertical lines on monitor.
Solution 1: Reconnect the Video Cable
If there are any loose or damaged connections, it can lead to distorted graphics, including vertical lines. When you reconnect the video cable, you ensure a proper connection between the display and the graphics card, potentially resolving the issue.
If reconnecting doesn’t help, replacing the cable with a different HDMI or DisplayPort cable can be a good idea to fix this issue.
Solution 2: Replace the Cable (HDMI, Ribbon, Display Port)
The ribbon cable is responsible for transmitting data from the system’s GPU to the screen. If there’s a problem with this cable, it can result in vertical lines on the screen. A damaged ribbon cable might have broken or short-circuited connections, leading to disruption in the information that’s sent to the screen.
By replacing the faulty ribbon cable with a new, undamaged one, you restore the proper connection between the motherboard and the screen, potentially removing vertical lines on laptop screen.
Solution 3: Use Display Quality Troubleshooter
The Display Quality Troubleshooter will automatically detect the issues related to display drivers, video cards, or screen settings that may cause vertical black lines. It is designed to work with various operating systems, ensuring compatibility and accuracy in diagnosing issues.
Follow these instructions to use a display-quality troubleshooter on your device.
- Go to the search menu and type control. Next, click the Control Panel from the result list.
- Then, set the View by option to Large icons on the right corner of the screen.
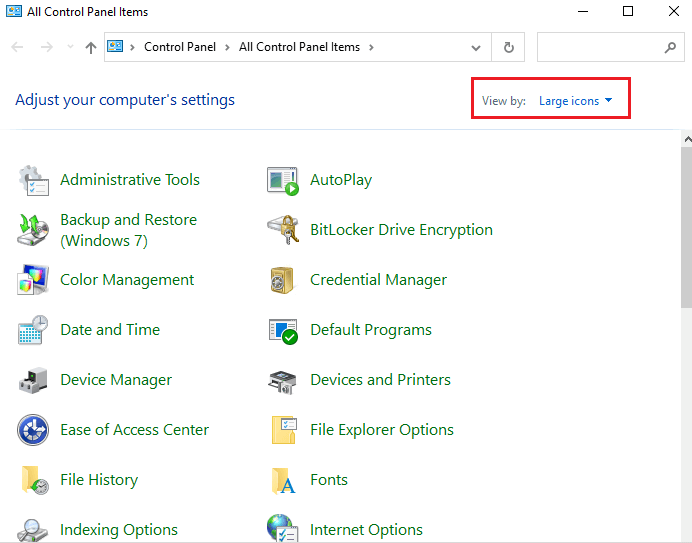
- Next, click on the Troubleshooting option.
- In the left window, click on View All.
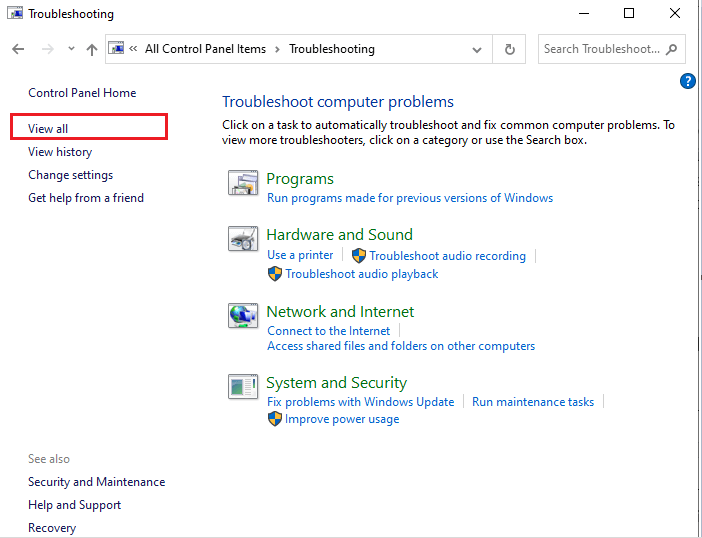
- Now, press the Display Quality
- Enter the password for admin, or give appropriate permissions when prompted.
Solution 4: Fix System File Corruption
If there are any problems with your Windows system files, using the System File Checker (SFC) and Deployment Image Servicing and Management (DISM) commands help you to repair corrupted system files.
First, try to use the SFC command on your PC and if it did not work, make use of DISM commands to repair all the corrupt system files.
- Press the Windows + R key to launch the Run dialog box.
- Then in the Run window, type cmd and hit Enter.
- When the command prompt opens type sfc/scannow and hit Enter
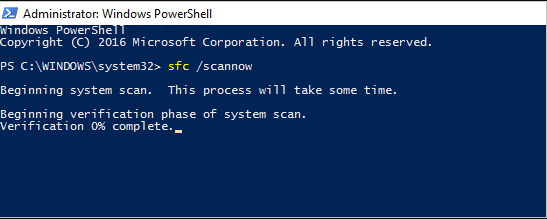
- Be patient until the scanning process to complete. It will take around 15 minutes approximately.
- Once the SFC scanning process is done, check if the vertical lines on monitor is resolved. If you still face the error, then run the DISM command in the command prompt.
- Launch the command prompt, type dism /online /cleanup-image /restorehealth, and hit Enter
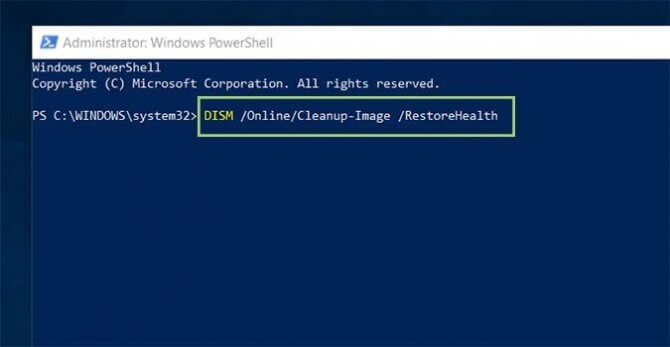
- Wait until the scanning process to complete. It takes around 30 minutes approximately.
- Check if the issue is resolved now after restarting your PC.
Solution 5: Update your Graphics Driver
An outdated or incompatible driver may cause conflicts or errors in displaying images and graphics, leading to the appearance of vertical lines.
Additionally, updating the graphics card driver improves system performance and resolves compatibility issues like vertical black lines on laptop screen.
Follow these instructions to update your graphics driver.
- Click on the Windows + X keys and open Device Manager from the menu.
- Double-click on the drivers, check if any drivers on your PC need any updates, and make a note of them.
- Then, navigate to the manufacturer’s website and download the driver that suits your computer’s specifications.
The .exe files will be downloaded to your PC. Run the files by double-clicking on them to install the drivers
Moreover, you can update the driver easily by running the Driver Updater tool. This software will automatically update outdated drivers and easily resolve other driver-related problems.
Get Driver Updater to Update the Drivers Automatically
Solution 6: Adjust the Screen Resolution
You can also adjust the screen resolution of your PC to check if any of the display settings on your laptop is causing the trouble.
Follow these instructions to adjust the screen resolution.
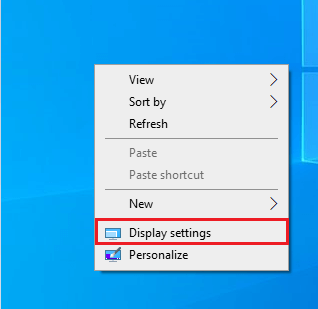
- Go to your Desktop by clicking on Windows + D keys. Now, right-click on the empty area and choose the Display settings.
- Go to the Display resolution in the right tab, expand the drop-down menu and select the recommended resolution as shown.
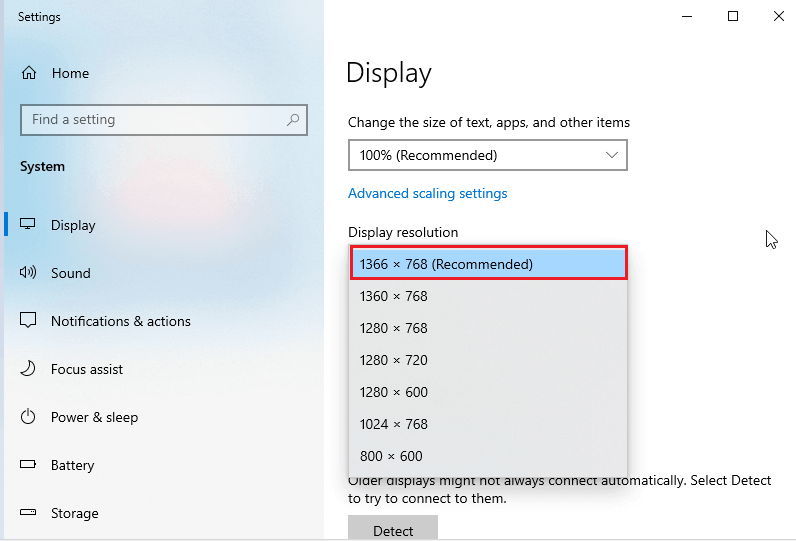
Now, check if the vertical lines on your PC have been fixed now.
Solution 7: Gently Wipe the Screen with Cotton Balls
Another reason is the accumulation of dust and debris on the screen and inside the frame, which a cotton ball can help to remove. Additionally, a cotton ball can absorb any trapped moisture within the frame that might lead to corrosion or electrical malfunctions causing those lines.
Lastly, this can realign any misaligned electrical connections inside the frame, which can also contribute to these vertical black lines. Thus, this simple step can often help in resolving such screen issues.
Recommended Solution – Fix Windows Error and Boost PC Performance
If you are looking for a one-stop solution to fix Windows errors and performance issues, then you must give a try to the PC Repair Tool.
This is an advanced repair tool developed by professionals in order to deal with various Windows PC errors and issues. Here are some of the issues that you can easily fix with the help of this tool – game errors, registry errors, BSOD errors, application errors, DLL errors.
Along with these, it can also repair damaged Windows system files, keeps the system secure from viruses/malware, and boosts the PC performance by resolving performance-related issues.
Get PC Repair Tool to Fix PC Errors and Boost Performance
Final Words
In conclusion, experiencing vertical lines on laptop screen can be frustrating, there are several steps as discussed in this article, you can take to try to fix the problem.
In this blog, I have tried the most simple solutions that worked for many PC users and I wish one of them helps you definitely.
If you like this post then do like and share the article. You can also connect and share your opinion with us on our Facebook page.
Good luck…!
Hardeep has always been a Windows lover ever since she got her hands on her first Windows XP PC. She has always been enthusiastic about technological stuff, especially Artificial Intelligence (AI) computing. Before joining PC Error Fix, she worked as a freelancer and worked on numerous technical projects.