 Now you can easily customize your Windows 10’s Start Menu, simply go with this tutorial and do what you want to do with the Windows 10 Start menu. By following this tutorial you can easily enable more tiles in start menu, Customize the far-left panel, Full-screen Start or not, Change the color, Pin and unpin tiles, Move and resize tiles and more.
These tips are for those users who aren’t happy with their default Start menu and want to make Windows 10 start menu more attractive without using any third party Start menu replacer. Under this tutorial, you will learn how to modify the default Start menu of Windows 10 to show more tiles.
No matter you are new with the Windows 10 or don’t have more knowledge. All the given tips and tricks are compatible with the latest TH2 update (Version 1511). Windows 10 has an option to add more tiles in the Start menu, if you want to add extra tiles on the start menu of this operating system then apply the below-given steps:
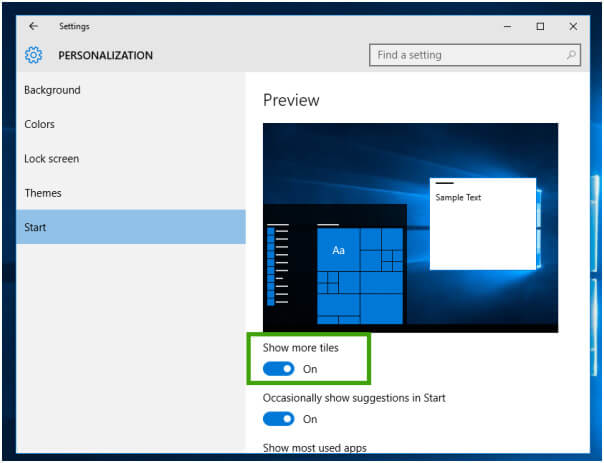
Step 1: Open the Settings app.
Step 2: Go to the Personalization -> Start.
Step 3: At here, you will see an option “Show more tiles”, simply enable it.
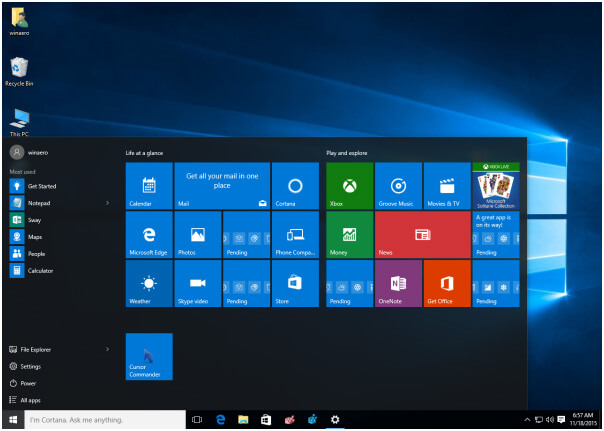
Here, the Start menu showing 4 columns of tiles. Earlier, it was displaying groups of 3 columns.
Before: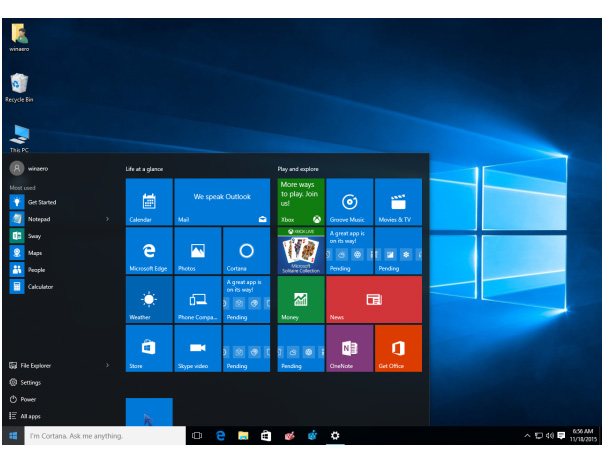
After:
After competition of above-given steps, the task is achieved. You don’t need to obey any extra steps like restarting or signing out. The modifications will take effect without delay.
Few More Tips to customize the Windows 10 Start menu
Full-screen Start or not
The full-screen Start menu is the default menu if you’re using a tablet, while the partial-screen Start menu is the default if you have a desktop or laptop.
In order to get full-screen experience on your Windows 10 PC or Laptop, navigate to the Settings > Personalization > Start and toggle on Use Start full screen.
Experience full-screen on a tablet or other portable devices, you have to navigate to the Settings > System > Tablet mode and select tablet more.
Also Read: How to secure your PC after First Windows 10 installation?
How to change the color?
If you want to modify the color of your Start menu then go to the Start screen, taskbar and window borders, then navigate to the Settings > Personalization > Colors > Show color on Start, taskbar, and action center.
You have to turn on this option and choose the accent color from the above-given options. You can also make your Start menu transparent, simply turn on the Make start, taskbar, and action center transparent.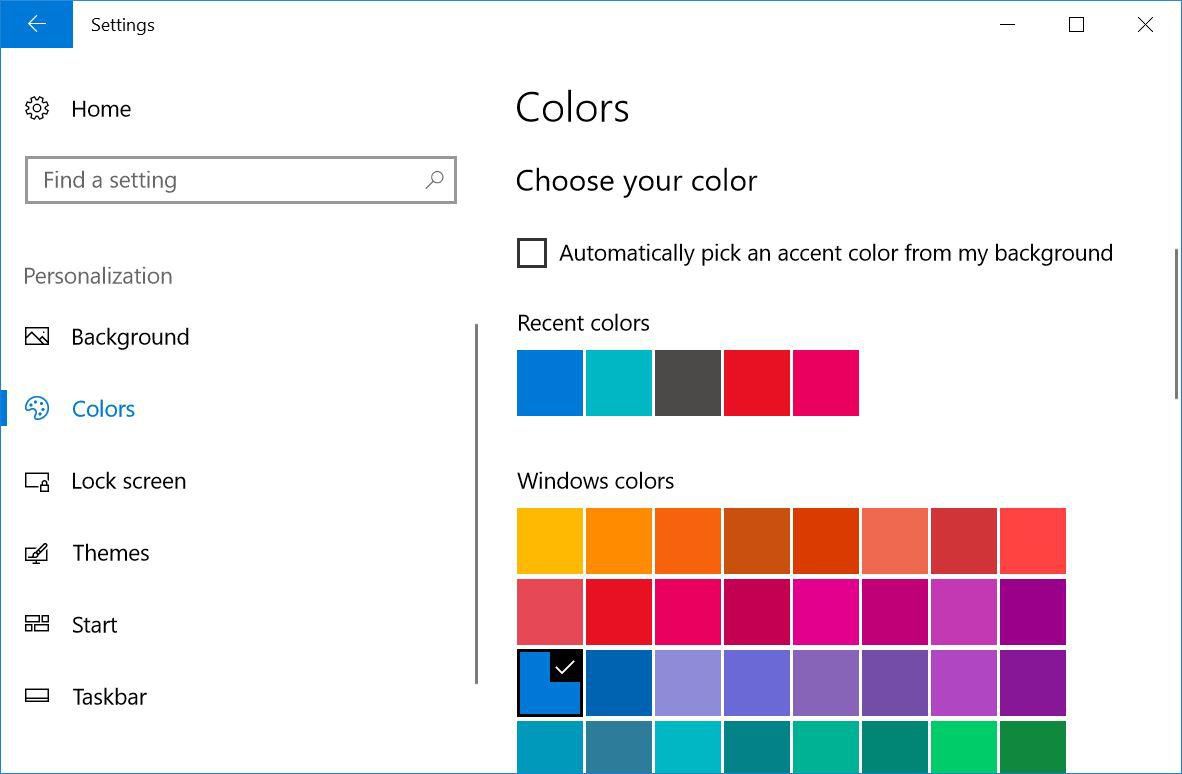
How to customize the far-left panel?
At the last-left panel of the Start menu, you can have a minimum of 2 icons and a maximum of 12 icons.
If you want to alter the icons that appear, then go to the Settings menu -> Personalization > Start > Choose which folders appear on Start.
In this window, you can clasp on/off the following icons: Settings, Documents, File Explorer, Downloads, Music, Pictures, Videos, HomeGroup, Network and Personal folder.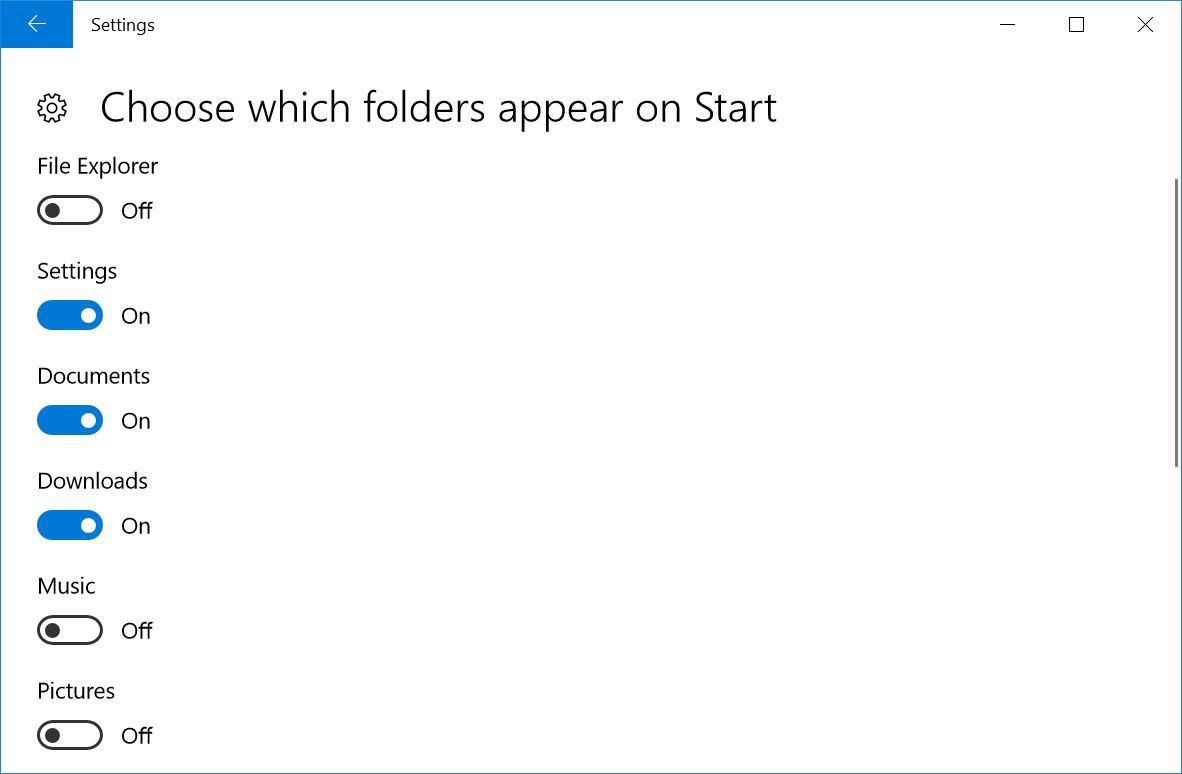
How to Pin and unpin tiles?
In order to pin an app to the Start menu as a tile, you have to first search the app in the center-left panel of the Start menu and right-click on it. Click the option Pin to Start, or you can also drag and drop it into the tile section of the Start menu.
If you want to unpin a tile then you have to right-click on the tile and click on the Unpin from Start option.
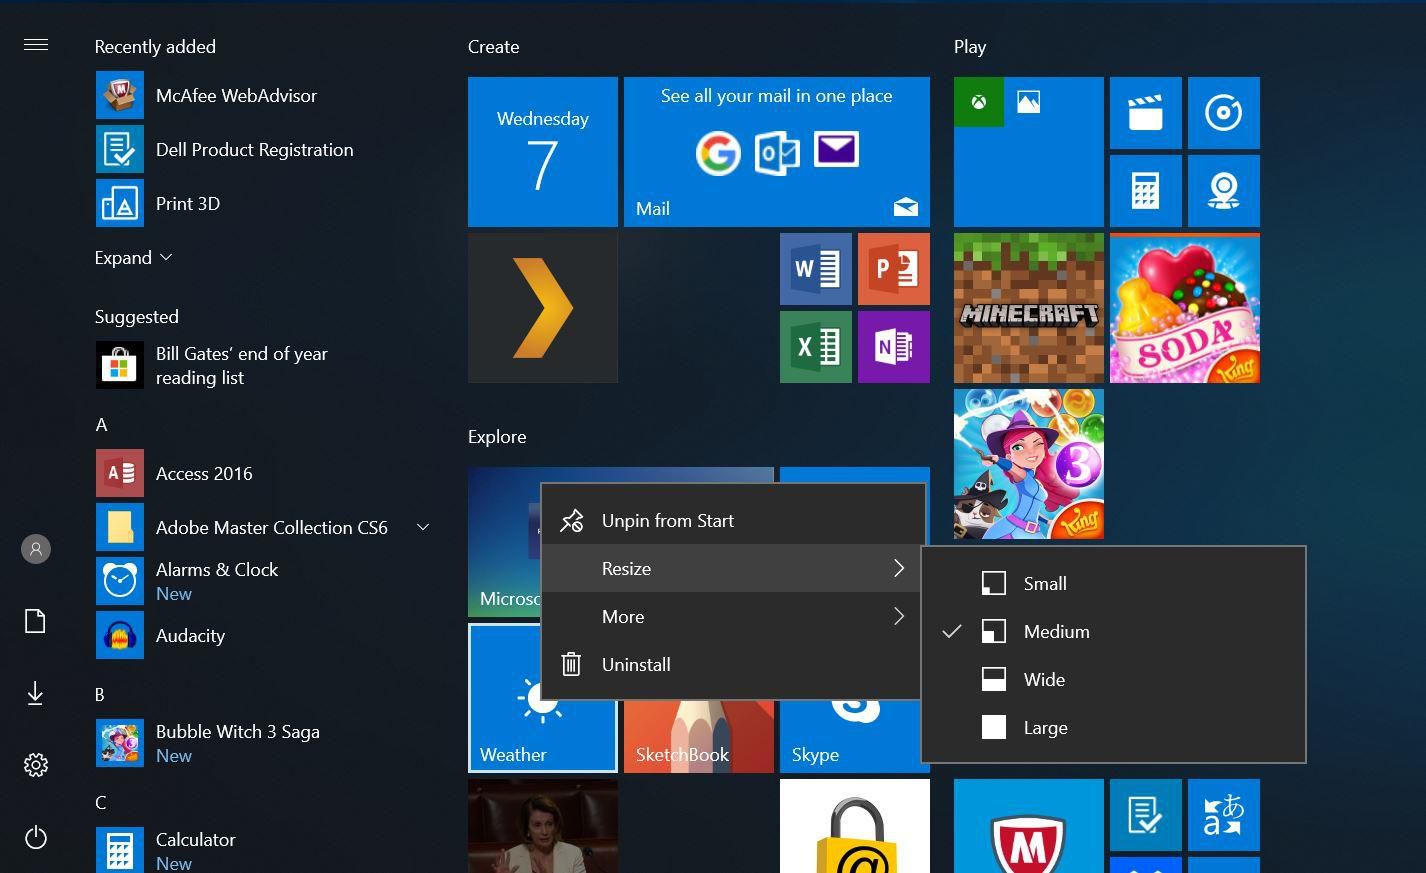
How to Move and Resize Tiles?
Right-click on the tile that you want to move or resize and then use Resize option to seta size.
According to the tile/app, you can select small, medium, wide or large. Most of the tiles are fixed either small or medium-sized, but other Windows apps such as Edge or Maps will be able to be resized to wide or large.
In order to move a tile, click or tap on the tile, hold it, and drag it the place where you want to place it.
How to make Start Menu Wide?
Is your PC or Laptop’s Start menu is looking very crowded, if yes then don’t worry as you can easily make it wider. Simply, go to the Settings > Personalization > Start and toggling on Show more tiles
Create Start menu folders
If the lots of thumbnails littering on your desktop and you want to fix it then you can easily organize Start menu tiles into folders. You have to do is, drag the tile on the top of another tile to create a folder of tiles.
How to Edit the tile sections?
Same as the Windows 8 and 8.1, Windows 10 also offers you to divide your live tiles into different categories according to your need. In order to create a new category, click on the tile, hold it and drag it to the end of the Start menu until a solid bar appear. Now, you have to drop the tile below this bar, that’s all- your tile will end up in its own little section.
Conclusion
Hence, with the help of the above-given tips and tricks, you can modify your Windows 10 System’s Start menu according to your need. By applying these methods you can turn a boring or odd-looking start menu into an attractive and well-organized platform on which you can easily find app and features to make your task easy.
If you really like this blog then kindly share it with your friends, colleagues, and your other contacts. Or if you have any query related to Windows Computer or Laptop then you can also contact us via Facebook or Twitter.
Hardeep has always been a Windows lover ever since she got her hands on her first Windows XP PC. She has always been enthusiastic about technological stuff, especially Artificial Intelligence (AI) computing. Before joining PC Error Fix, she worked as a freelancer and worked on numerous technical projects.