
It is always important to free up system memory by cleaning temporary files and folders. In order to store temporary information, several temporary files are created by the Windows system which is also known as .tmp files.
These files are created and stored on the system drive (where your OS is installed, generally C drive), it stays in the system’s HDD until the user deletes it.
It is always suggested to delete all the temp files because if you ignore this situation, then it can eventually reduce the performance of your computer. It is not only about performance but it can also trigger several other system issues like app confliction, DLL errors, and more.
So, it is important to delete the recycle bin folder’s data and unwanted temporary files from Windows 10 system to clean the hard drive. There are already lots of methods available to clean up the unnecessary files that are piling up in your Windows systems.
But doing this cleanup process every time can make you irritated and also need your precious time. If you want to clean up TEMP files and folders automatically, then this article has everything you want.
In this article, you are going to learn several techniques that will help to delete temporary files automatically after every startup. Through these practices, you can help your system to maintain its performance and freeing up more storage area.
How to Delete Temp Files Automatically at Every Boot in Windows 10?
Now it is pretty clear that by deleting the unwanted files you can help your PC to perform better and save a lot of space for your storage. By using below given steps, your system will erase temp files automatically without doing anything or performing manual solution.
To automate the deletion of the temp file on the Windows 10 computer, follow the below-given solutions carefully.
#1: Clean Up Temp Files Automatically in Windows 10 by Creating Batch File
By creating a batch file you can easily delete the temp folder’s content. If you will embed this batch file in the Startup folder, then it will delete temporary files automatically after every startup of Windows 10 computer.
Here are steps of how can you do it:
- Go to the Windows Search box and type notepad and click on the Notepad to open it.
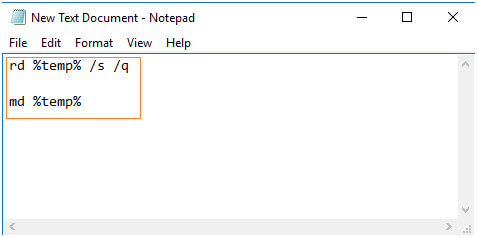
- After opening Notepad you need to type the following lines:
rd %temp% /s /q
md %temp%
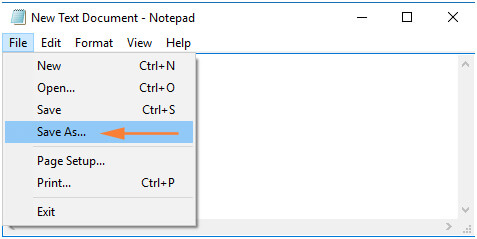
- Now, click on the File menu and choose Save option or you can also press CTRL+S keys from your keyboard to save the file.
- While saving you will get Save As dialog pop-up. In the “File Name” bar select the enter the File Name as
%appdata%\microsoft\windows\start menu\programs\startup\cleantemp.bat
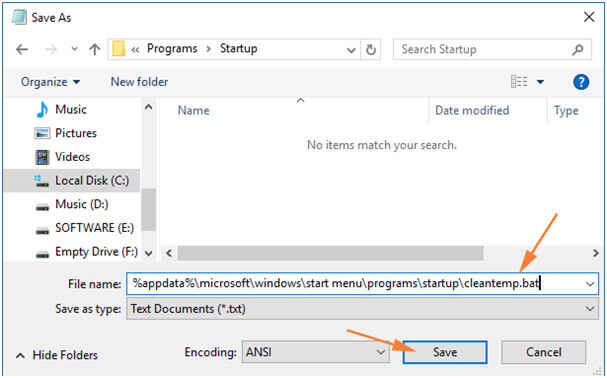
- At the last, click on the Save button to save this file, these steps will create a batch file and place it in the Startup folder.
The main task of this batch file is to free the temp folder by deleting all the temporary files. And the purpose of placing this file inside the startup folder is – As we know that all the data stored under the startup folder gets executed automatically when the system starts.
Hence, when you will boot your system then the batch files get executed automatically and get rid of all the temp files without your concern.
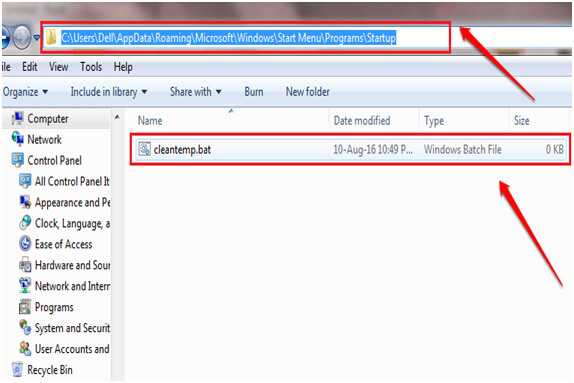
But in case you want to stop this process and delete the batch file that you were created previously then you can do this task easily.
- Simply copy-paste the below-given path in Windows File Explorer
%appdata%\microsoft\windows\start menu\programs\startup
- A window will appear along with your batch file, select it and delete.
#2: Use Storage Sense in Windows 10 to Delete Temp Files Automatically on Startup
With the help of the Storage Sense option of Windows 10, you can delete temporary files automatically after every startup. To do this, follow the below-given steps:
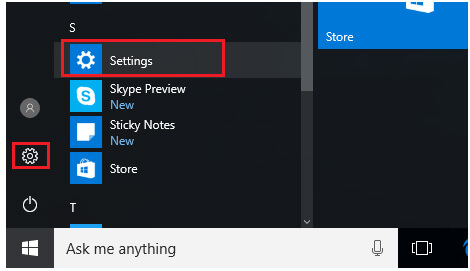
- First of all, click on the Start button and choose Settings
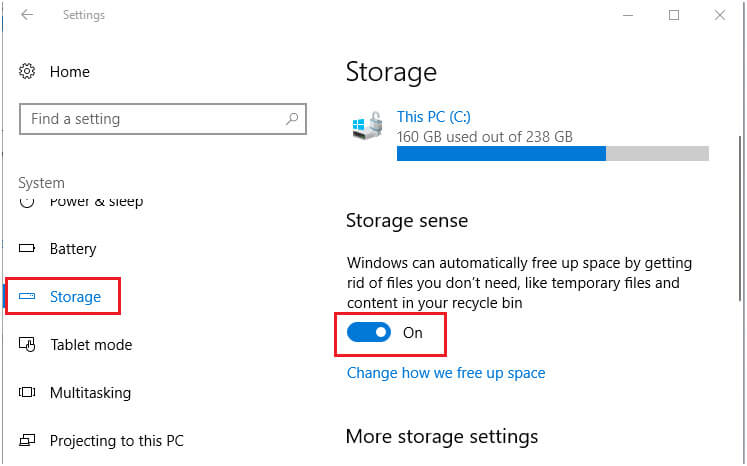
- Click on the Storage option present on the left of the items list.
- Now you will find Storage sense option on the right-hand side of the window. Click on the ‘On’ button to enable this option.
- Doing this will automatically free up space by getting rid of files you don’t need, like temporary files and content in your recycle bin.
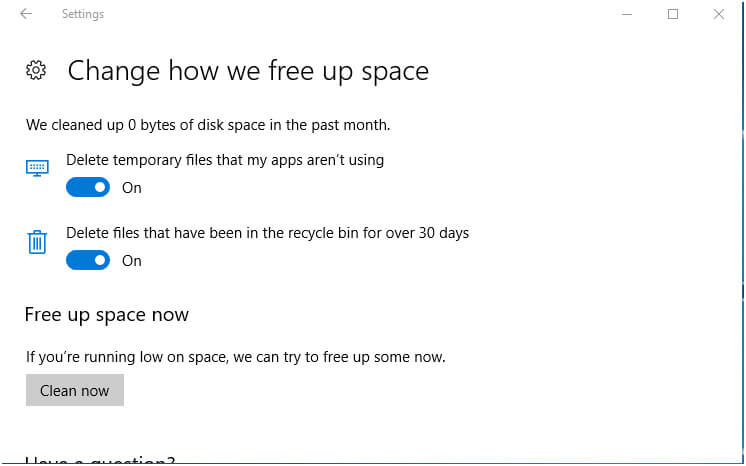
- In order to immediately delete all temporary files and clean your recycle bin, you need to click on the More storage settings, then click on the Clean now button.
#3: Clear Temporary Files Automatically by Using Disk Cleanup
Disk Cleanup is a Windows in-built tool that cleans junk files to clean up the disk space on the computer. It can clean patched Windows Update files, browser cache, files of Recycle bin, and several other items.
Apart from these it also has one more option, the ability to remove the temporary directory. And, this is what you need to clean the temporary files at the startup of your computer.
Hence, to use the Disk Cleanup for removing the temp files at every boot, follow the given steps:
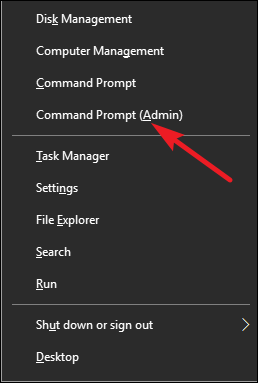
- Press Windows + X key and select Command Prompt (Admin)
- Now, types the following command in the Command Prompt:
cleanmgr.exe /SAGESET:number
Note: In this command, replace “number” with any value from 0 to 65535, e.g. 1.
- Now, the Disk Cleanup Settings window will open. Here, select the Temporary files
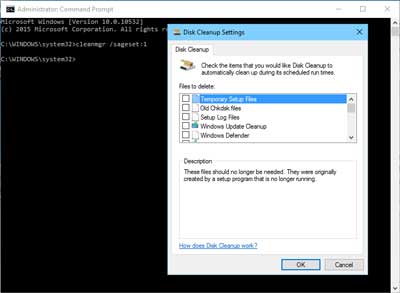
- Click on the OK button
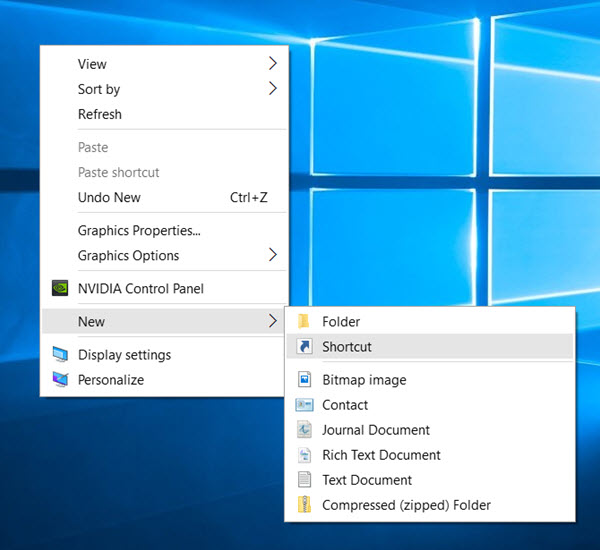
- Go to the desktop, and right-click on the empty space
- Go to the New option and select the Shortcut
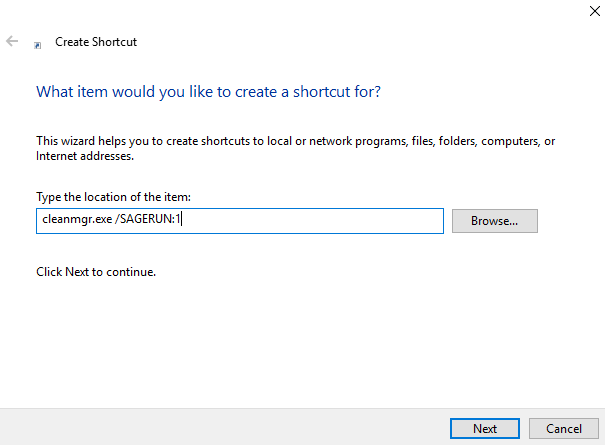
- Now, in the Create Shortcut box, set the location of the item as:
cleanmgr.exe /SAGERUN:1
Note: Replace 1 with the SAGESET number you have chosen.
- Click on the Next button
- Next, set the shortcut name as Clear Temp Directory and click on the Finish button
The shortcut is created now. From now on, whenever you will click on this shortcut, it will remove the temp directory. Now to clear this temp directory automatically on every startup, follow these steps:
- Press Windows + R key to open the Run box
- In the Run box, type shell:Startup and click on the OK button.
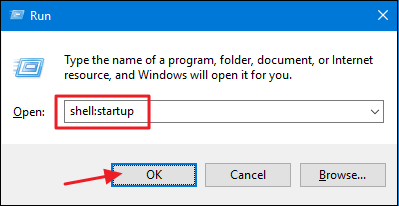
- In the Startup window, paste the shortcut you have just created
From now on, the temp directory will get cleaned every time you will start your computer.
Easy Way to Fix Windows PC Errors and Issues
If you are experiencing several stubborn PC errors and issues and you don’t want to follow any manual solution, then there is an easy solution for you. Try the professionally designed PC Repair Tool.
This is an advanced repair tool. It scans PC to detect and fixes common PC related errors, damaged registry issues, protect you from the file loss, repairs corrupted system files, keeps PC secure from virus or malware.
It also optimizes PC for providing enhanced performance to its users and to maintain the PC’s health.
Get PC Repair Tool to Resolve PC Errors
Conclusion
As we know how important it is to free up the system memory for the smooth performance of our computer. And, for this, it is needed to clean up temporary files of PC.
And, with the end of this article, you have the list of methods you can apply to delete temporary files automatically after every startup of your computer. By using these methods you will be able to clean the memory and make your computer running smoother.
I hope you found this article helpful and your all queries are answered. If so, then share this article, and don’t forget to get connected with us on Facebook and Twitter for more such guides and PC solutions related articles.
Hardeep has always been a Windows lover ever since she got her hands on her first Windows XP PC. She has always been enthusiastic about technological stuff, especially Artificial Intelligence (AI) computing. Before joining PC Error Fix, she worked as a freelancer and worked on numerous technical projects.