
We all know, how much a Ransomware category virus create problems once it get chance to get into the PC. The very first issue that conquered after the intervention of Ransomware on PC is restriction of important files and documents. Moreover, it demands for the ransom money to regain file access.
So, it’s very important to know how to remove Ransomware virus. If your PC is attacked with such suspicious threat very badly. Then you can manually remove Ransomware threat by following the below methods.
But you need to be carefully while performing these methods as these steps revert the crucial changes made by ransomware threat.
How To Remove Ransomware
Here are the main highlights of the methods we are going to discuss to remove Ransomware and its associated files:
- Start The PC In Safe Mode
- System Restore
- Recovering Hidden And Encrypted Files
- Restore From Backup
- Negotiating
1. Start The PC In Safe Mode
You can try opening of your system in safe mode either with “command prompt” OR in “Safe Mode with Network”
1: Start your PC to “Safe Mode with Command Prompt”
- Go to the Start menu and tap to the “Shut Down.” arrow button. Now from the shut down menu choose the“Restart”
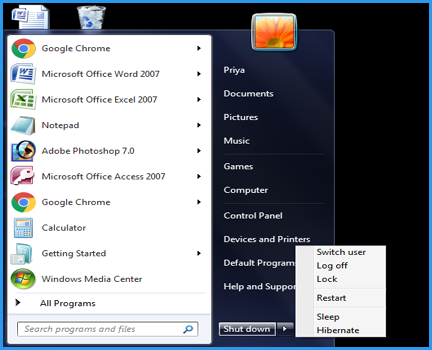
- Once your PC is powered on, immediately keep pressing the “F8” key from your keyboard.
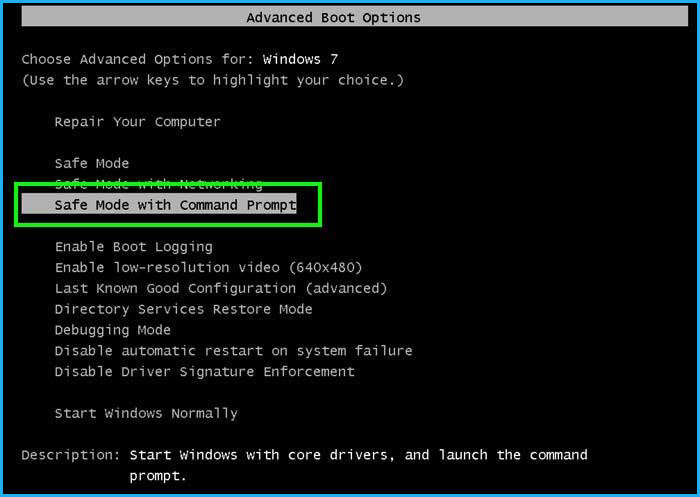
- Very soon you will get into the boot screen and a Window of “Advanced Boot Options” gets open on your PC’s screen.
- From this opened “Advanced Boot Options box” you have to choose the “Safe Mode with Command Prompt“ option and then press “enter” button from your keyboard.
- Wait for a while as this process will take some time to load necessary system files.
2. Start The PC In Safe Mode With Network
This step will detach all the objects and files which were created by Ransomware. So, that later it can removed efficiently. Follow the below steps to start your PC in safe mode with network. As, it is applicable to almost all Windows version.
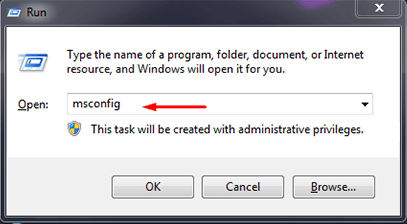
- Tap to the Windows + R Key from your keyboard.
- This will open the Run Window. In which you have to write msconfig after then press Enter.
- Now on your screen System Configuration box will appear on which you have to tap on the Boot tab.
- Choose the Safe Boot option and under it there is a Network option. So, choose that too.
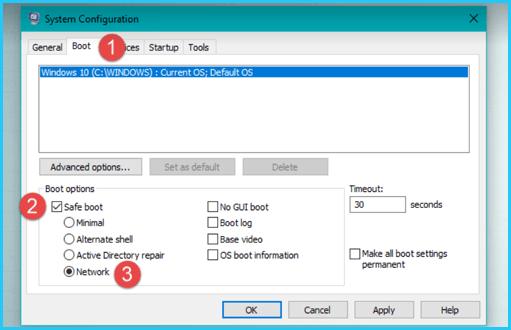
- After then tap to the Apply-> OK option.
2. System Restore
If the ransomware is hindering you to work flawlessly with the Windows OS or preventing you to run any program. Just as the lock-screen ransomware virus species generally does.
In that case using the System Restore will roll the Windows back to normal. Don’t worry…! Doing this won’t hamper your personal files.
For starting up the restoration process by making use of the System Restore option. Follow these below mentioned steps as per your OS version:
Windows 7
- At first turn off your PC if it’s ON. When you see anything starts appearing on your PC’s screen keep pressing F8 key repeatedly from your keyboard.
- Doing this will open the Advanced Boot Options menu on your screen.
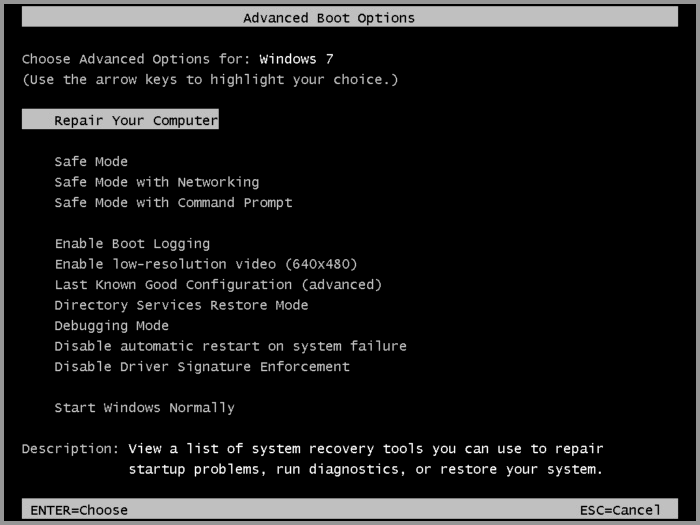
- From the list of opened menu select the “Repair Your Computer” option and then press the Enter option.
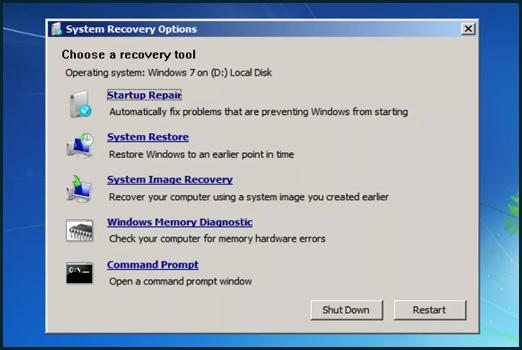
- You need to login like a user. So, assign the Windows account name along with the password. (if haven’t set any password then leave the box empty)
- After login, tap to the “System Restore” option.
Windows 8, 8.1, or 10
To perform the system restore step in Windows 8, 8.1, or 10 PC. Follow the below step:
For Windows 10:
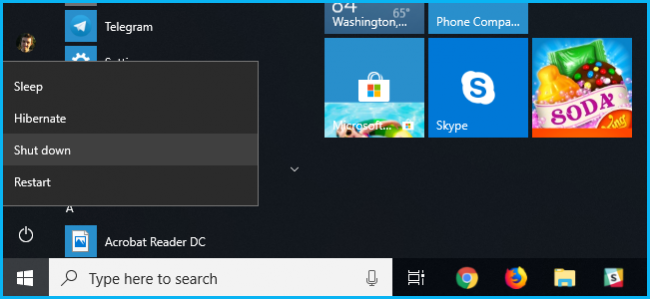
- Turn on your PC and once you get into the Windows login screen. Keep pressing the Shift key from your keyboard. After then tap to the power icon and then choose the Restart.
For Windows 8/8.1:
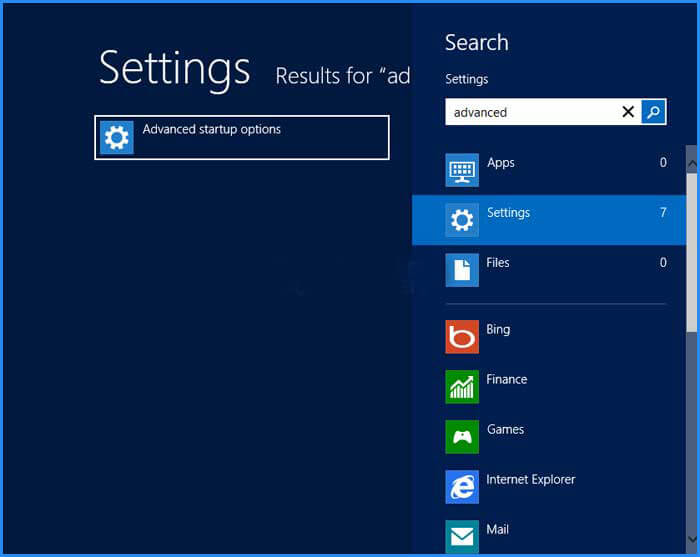
- Hold “Windows key + C“ together after then click to the “Settings“.
- Tap to the “Power“ button and holding the Shift key from your keyboard just tap to the “Restart“option.
- After performing the above operation on your respective Windows 10/8/8.1 OS version. You will see that your, PC Reboot and gets into the recovery screen.
- From this recovery screen you have to tap to the Troubleshoot .
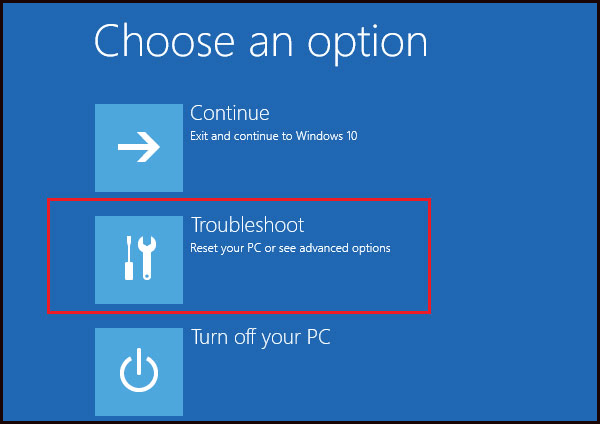
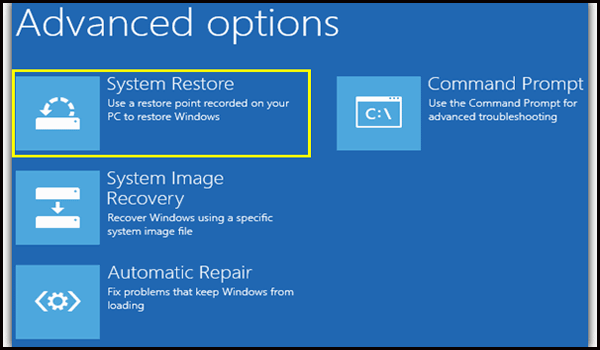
- tapping on the troubleshoot option will open “Advanced Options”Window. From this you have to choose System Restore option.
Note: If you are unable to get into the recovery screen then make use of Windows installation media (USB drive or disk) according to the version of OS you are currently been using. Doing this will boot up your system to the install media. From the main menu, tap to the Repair your computer option before starting with the installation process.
3. Recovering Hidden And Encrypted Files
It is found that some ransomware encrypt and hide your system icons, files and shortcuts etc. by making the files hidden. But the best part is that you have the option to recover and encrypted files. Follow the below steps on how to find hidden files, on different OS version.
Show Hidden Files On Windows 8 And 10
- On the File Explorer’s ribbon tap to the “View”
- After then hit the checkbox of “Hidden items” present in the Show/hide section.
- In this way immediately the File Explorer will display the hidden files.
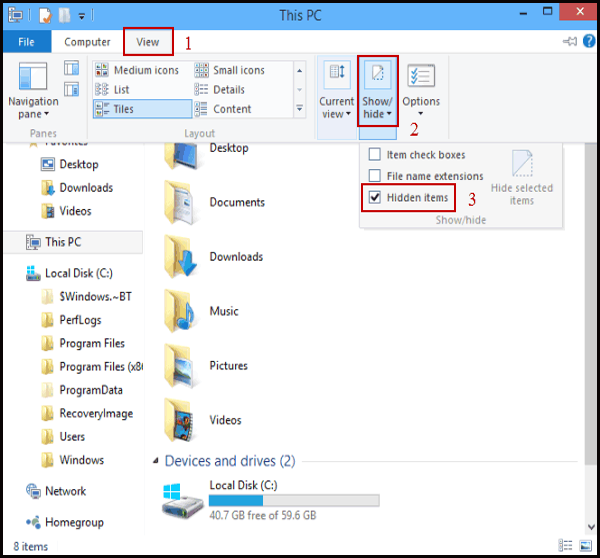
The setting won’t change until you modify it. So, whenever you need to hide something, just change the setting.
Show Hidden Files On Windows 7
- On the tool bar of Windows Explorer tap to the “Organize” After then choose the “Folder and search options” and tap to open it.

- The next Window that appears on the screen is of “Folder Options”. In this Window just make a tap on the “View”
- In the view tab choose the “Show hidden files, folders, and drives” option present within the “Hidden files and folders”.

- To save all the changes, tap to the OK
4. Restore From Backup

This option is applicable only if you guys have kept proper backup of all important stuffs on cloud storage or on different local drive.
- What you need to do is just copy the backup data on to the storage disk.
- After copying of the data, scan this storage disk with some reliable anti-malware software. Perform this task on some malware free system.
- It’s time to format the affected disk and make easy restoration of the backup data safely.
How To Restore Backup In Windows 7
Follow the below steps to restore backup in Windows 7 by making use of Backup and Restore utility:
Step 1. Get Into Backup And Restore Center
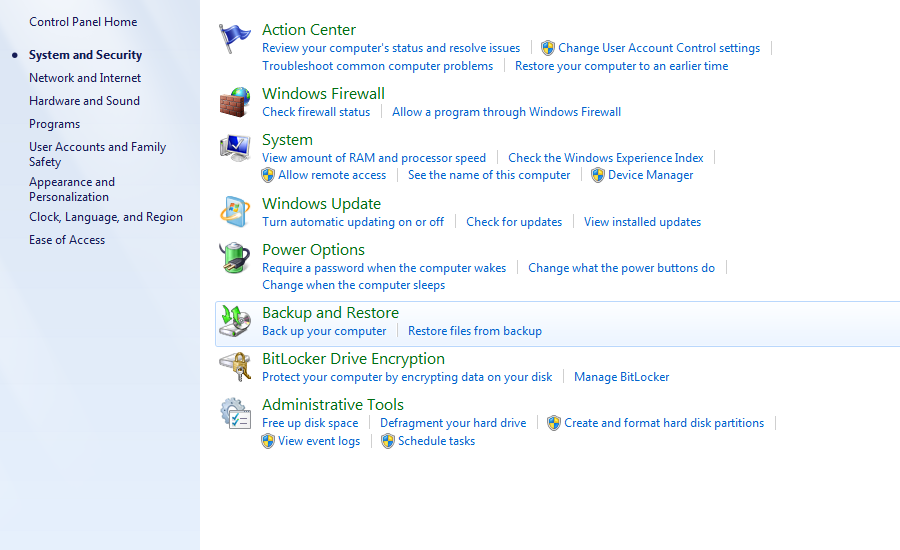
- Go to the Start menu on your PC.
- Choose the Control Panel and then tap to the System and Security option.
- From the opened window of System and Security choose the option Backup and Restore.
Or
Alternatively, at the Start menu’s search box you just have to type backup. After then from the list of appearing menus you have to choose Backup and Restore option.
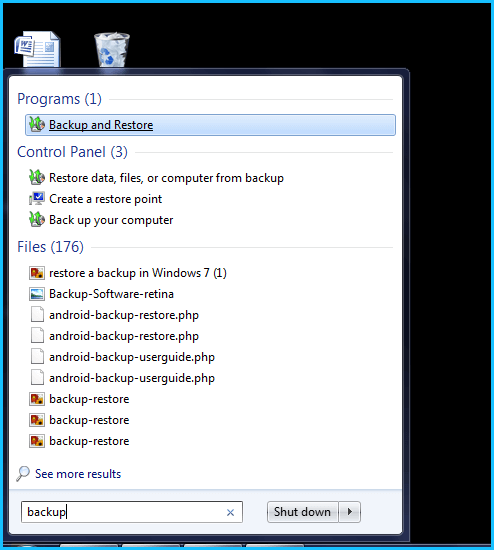
Step 2. Search For The Backup Files/Folders
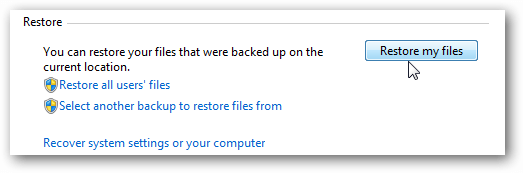
- In the opened Back And Restore file window, tap on the “Restore my files” option button.
- Now you have to browse your backup files. You can make the searching process easier and faster by selecting the option of “choose different date.” As with this option you can choose the backup file as per the date on which you have saved it for backup.
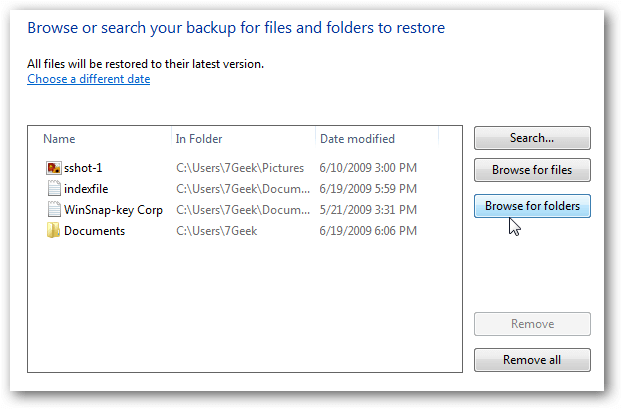
- After selecting the backup file you want to restore just make a tap on the Next.
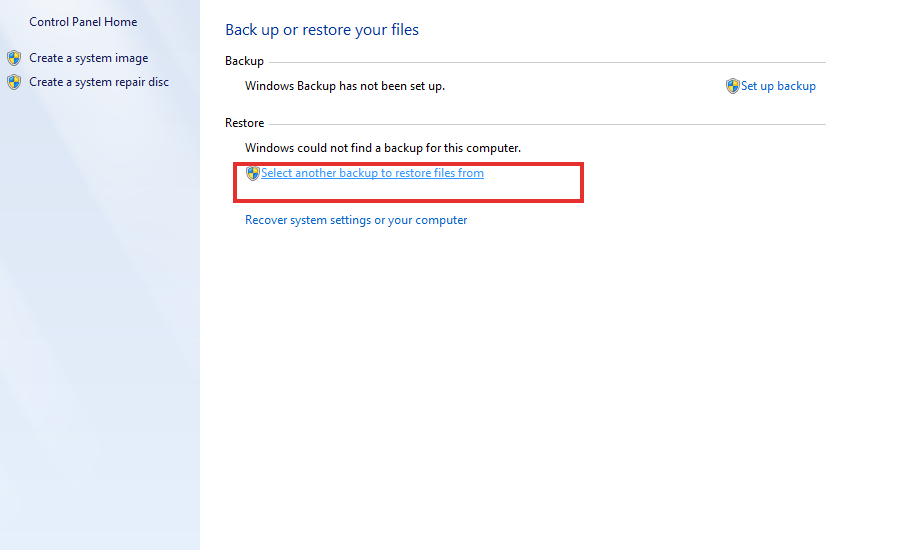
Note: If there is no previous backup, then you won’t get the Restore my files button on this Backup And Restore page. In that case you can choose the option “Select another backup to restore files” if you have stored your backup on other network location.
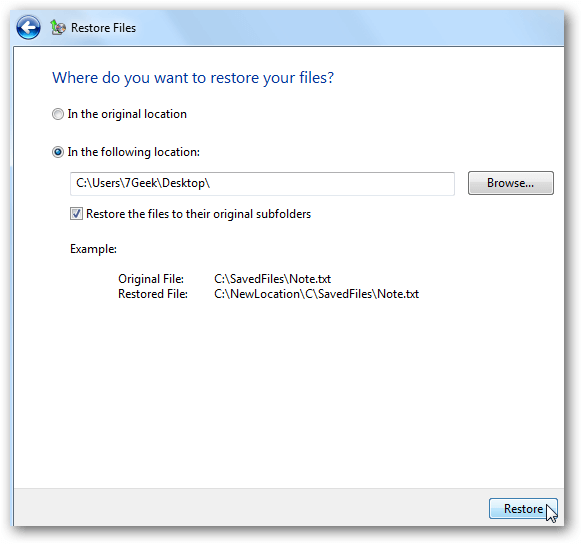
Step 3. Assign Restore File Location And Start Restoration
- Either you can restore the backup file into the same location from where you have extracted it. Or you can choose any new location.
- After assigning the location, tap to the Restore.
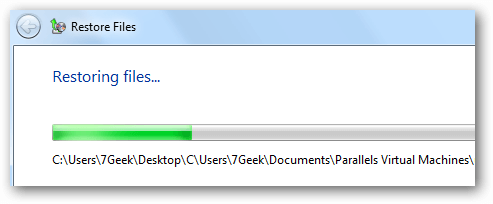
- Now the restore process will start. This process of restoration takes time as per the file size. Moreover, the time duration also depends on the location from where the backup has been restored.
- After the completion of the process, tap to the Finish.
How To Restore Backup In Windows 8/8.1
Windows 8 feature of backup and restore is very useful but only if you have activated the system for regular backup. If you have activated the backup option then Windows 8 will backup the content at regular time interval.
So, the following steps will only be useful if you have previously stored a backup and now want to restore it.
Step 1:
Go to your system Start menu button and in the search box type the restore option. From the opened list of menu choose the “Restore Your Files with File History”.

Step 2:
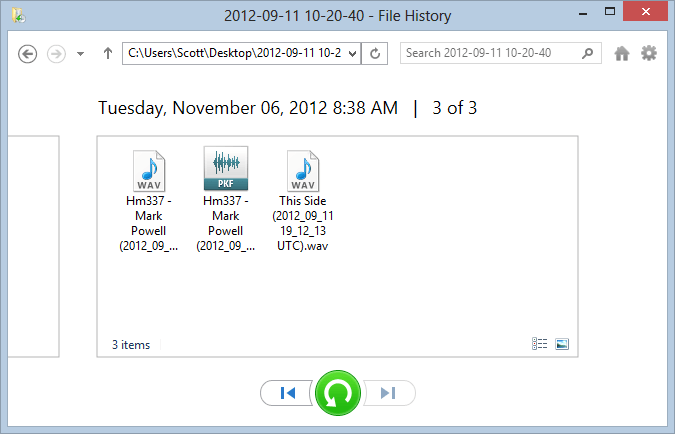
This will open a Window where you can see all your previously stored backups.
Step 3:
From this available backup list, choose the backup file that contains all your updated data.
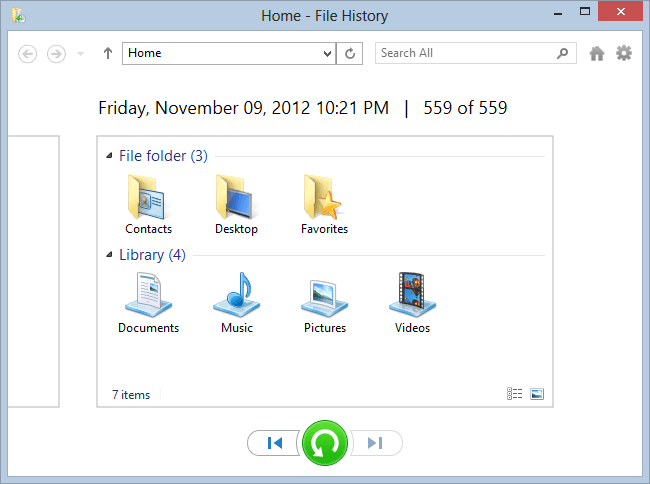
Step 4:
After selecting the backup file make a tap on the Restore or green button to start the restoration process.
Tapping to Restore will save your restored backup file in the same original location. But if you are willing to save it in some other location then make a right-click on the green Restore button. You will get “Restore to” option where you can set new location.
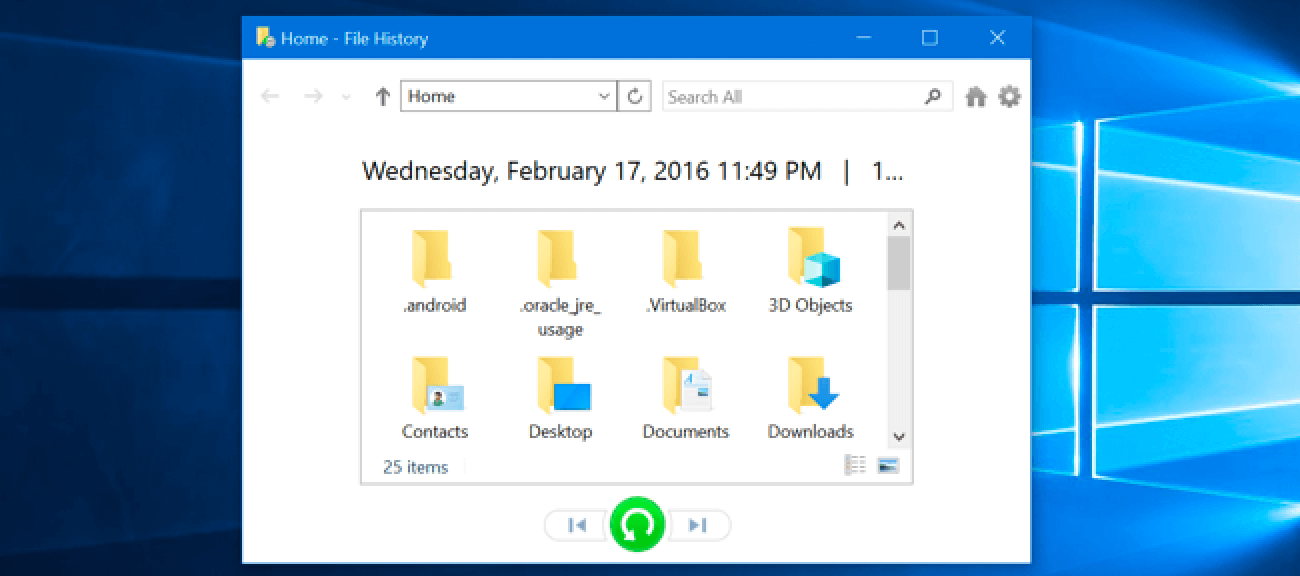
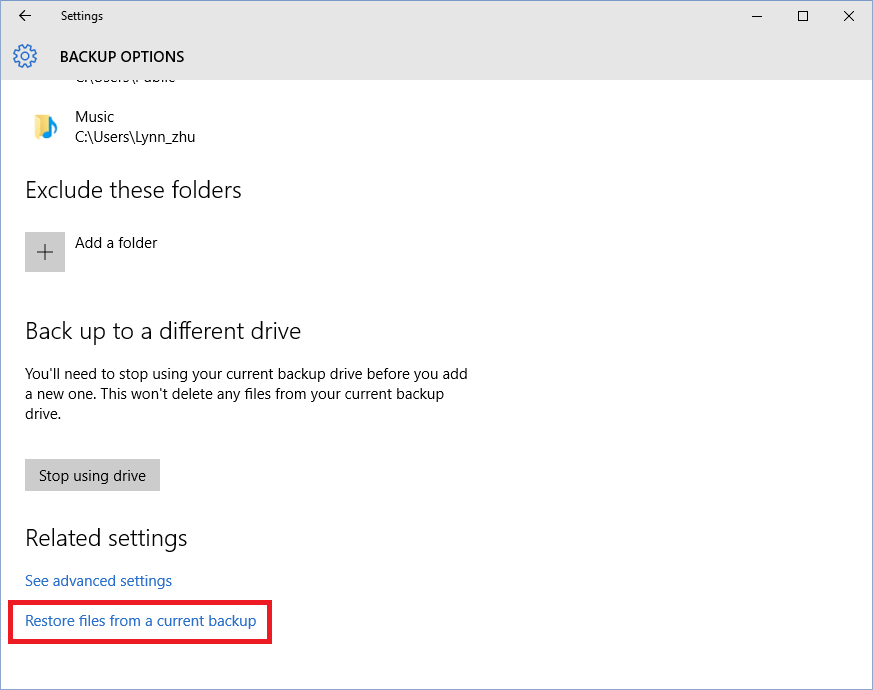
How To Restore Backup In Windows 10
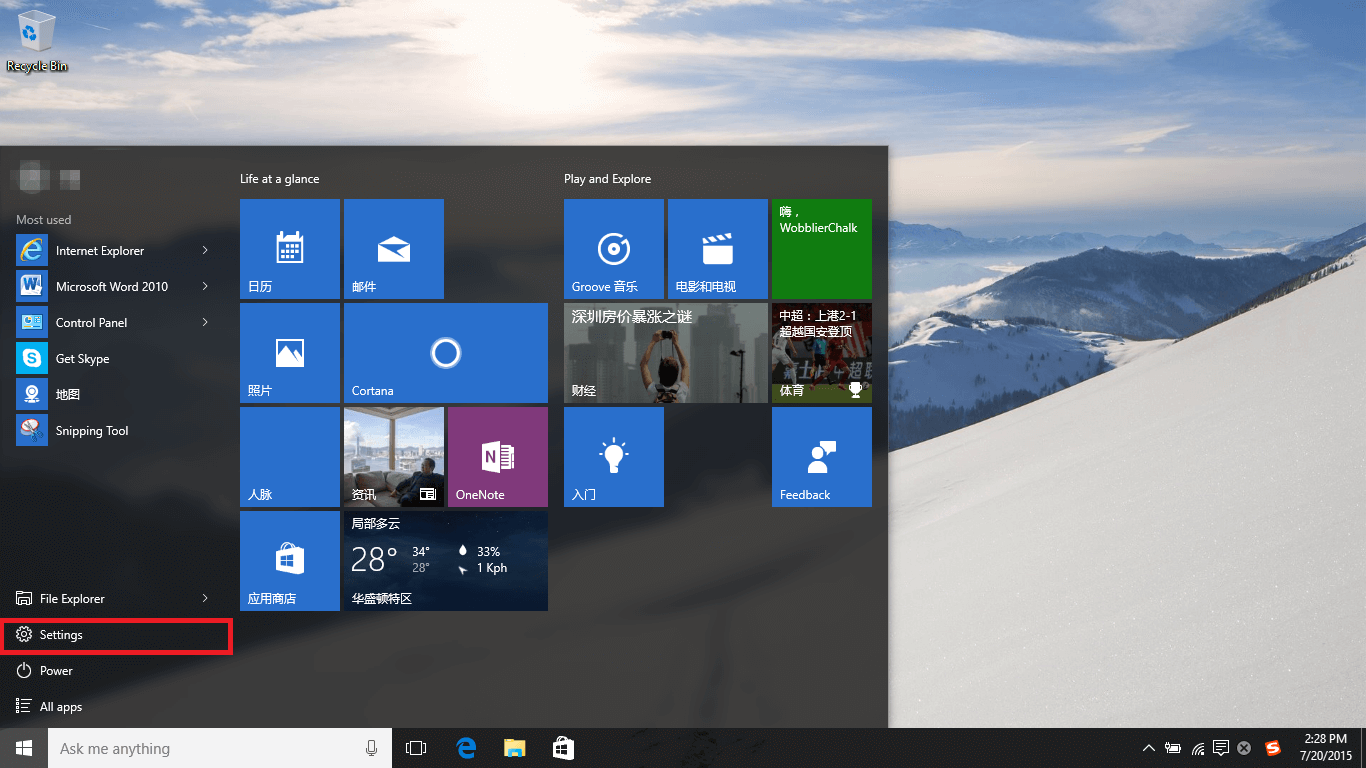
- Hit the start button on your PC.

- After then hit the “Settings” button.
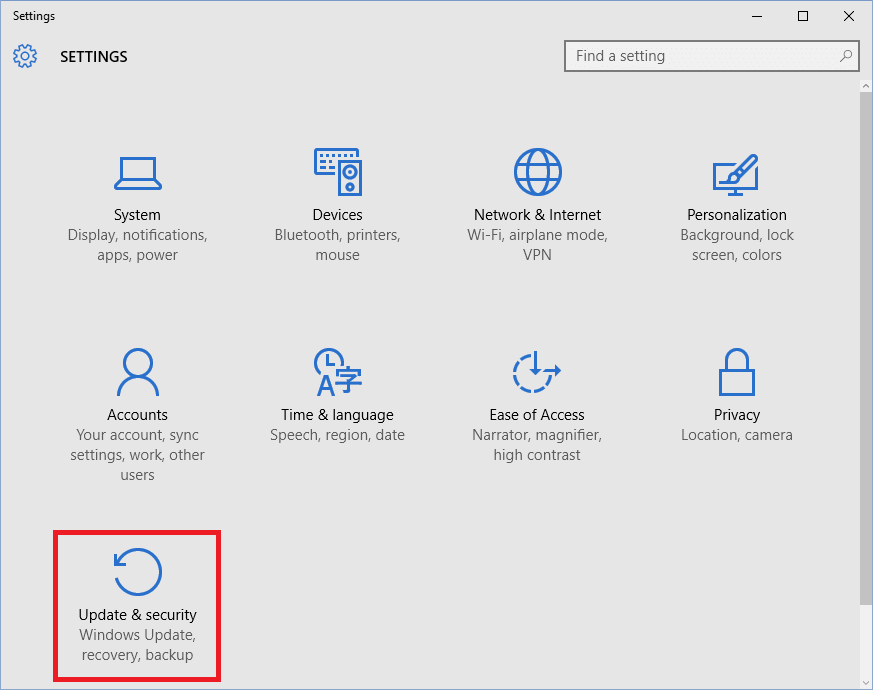
- Now on the opened Window of Settings you have to hit the “Update & security” option.
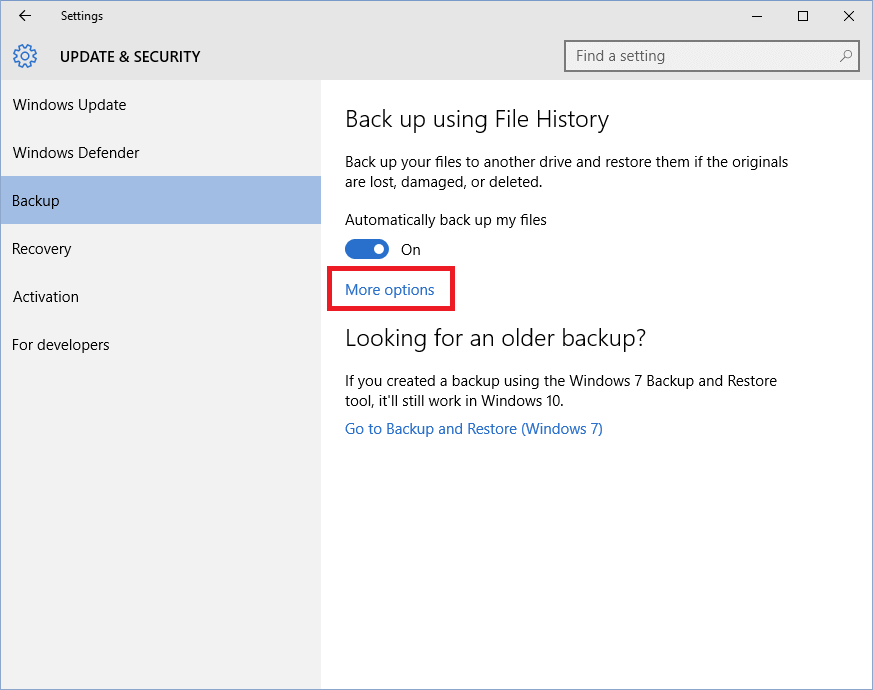
- Hit the “Backup” option and then choose the “Back up using File History”
- Now make tap on the icon of “More options”.
- Scroll down in the page and hit the “Restore files from a current backup”
- Now in the search box, enter the name of file you are looking for. Or you can use the right and left arrow keys to search in different files and folders.
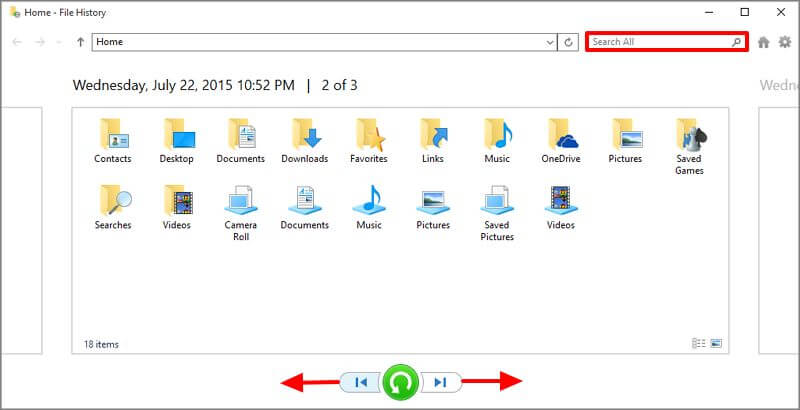
- After selecting the backup file make a tap on the green color Restore button to start the restoration process.
Tapping to Restore will save your restored backup file in the same original location. But if you are willing to save it in some other location then make a right-click on the green Restore button. You will get “Restore to” option where you can set new location.

5. Negotiating

Unfortunately, if you don’t have the backup nor having any decrypter for the Ransomware but you want to get back your crucial data anyhow. Then in that case the only solution left is to pay the ransom money to cyber criminals.
Always you don’t have to pay the complete Ransome money. You can pay them some smaller amount to get your files back.
All they want is money, so chances get high that Cyber Criminals will decrypt your crucial data for small amount of money.