 Is your Windows PC or Laptop is showing error 0x8007042c while updating or executing any tasks?
If your answer is YES then you are at the right place, in this blog we will discuss Windows update 0x8007042c error and apply different methods to fix this irritating error.
To Fix Error Code 0x8007042c , we recommend Advanced System Repair:
This software is your one stop solution to fix Windows errors, protect you from malware, clean junks and optimize your PC for maximum performance in 3 easy steps:
- Download Advanaced System Repair rated Excellent on Trustpilot.
- Click Install & Scan Now to install & scan issues causing the PC problems.
- Next, click on Click Here to Fix All Issues Now to fix, clean, protect and optimize your PC effectively.
According to some users, this error message generally appears and blocks the update process. You can’t fix this error code after restarting your PC/laptop or applying any temporary method.
So, you need to follow the methods given in this article and apply them carefully. But, before applying any of the discussed methods it is recommended to know some of the common causes of Windows 10 Update Error 0x8007042c.
If you are receiving this error message then there is an issue in Windows Update, Windows Firewall, or some other related services. Sometimes, third-party antivirus applications can also generate this issue.
Why is 0x8007042c Error Preventing Windows 10 Update Process?
- An interruption in the execution of Windows Service
- Disabled Firewall service
- Computer Malware infection
- Corruption of Registry
Well, these are some of the causes responsible for the Windows update error 0x8007042c. Now follow the given fixes carefully to fix the error and install the Windows update easily.
How do I Fix Error Code 0x8007042c?
Note: Before applying any of the below-given tricks you should create a restore point of your system or laptop. This is because to deal with any kind of accidental situations.
Fix 1: Check the Windows Services and make sure it is running properly
- Open run dialogue box by pressing Windows + R key and then type “services.msc” as shown in the below image. Press Enter key.

- Now you need to find the below-given services:
Background Intelligent Transfer Service (BITS)
Cryptographic Service
Windows Update
MSI Installer
- After finding them, right-click on them one by one and then select Properties. In the properties section, you should check that their Startup type is set to Automatic.
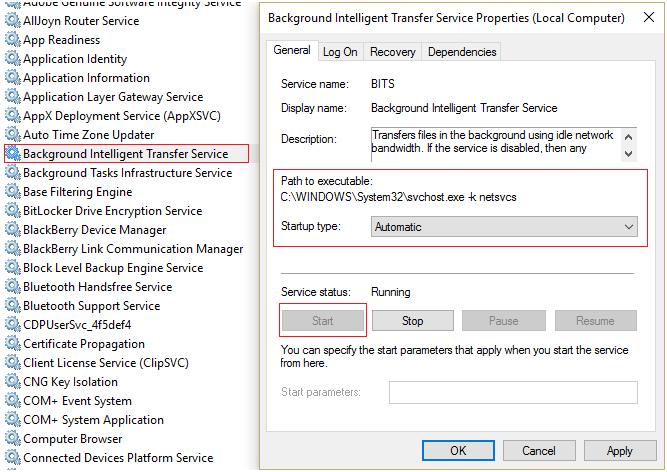
- If you found any of the services in disabled mode, then click on Start under Service Status.
- After it, right-click on the Windows Update service and choose Restart.
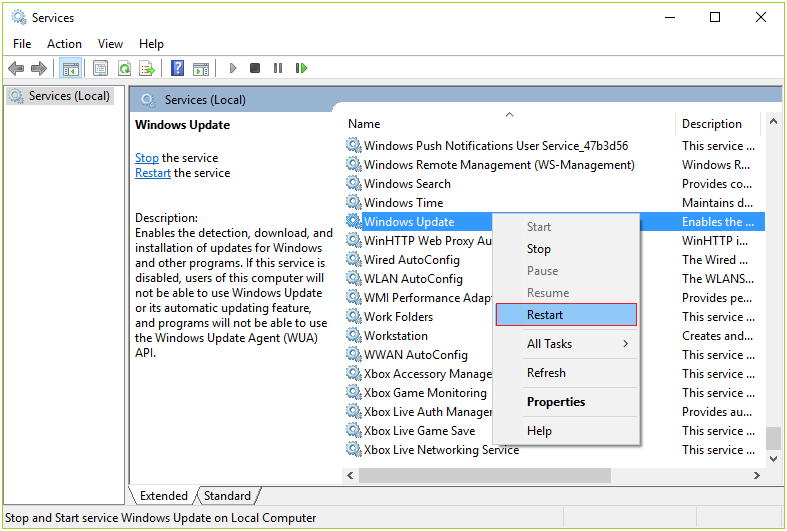
- Click on Apply followed by OK and then restart your PC/Laptop to save changes.
See if the issue is solved or not, if Windows 10 Update Error 0x8007042c is fixed then ok otherwise continue with the below method.
Fix 2: Rename SoftwareDistribution Folder
- Now you need to open the command prompt with admin privilege, press Windows Key + X then choose Command Prompt (Admin).
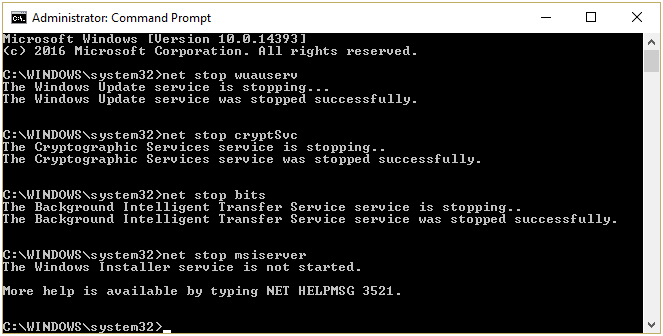
- After it runs the below-given commands to stop Windows Update Services.
Note: To run these commands, press Enter key after each command:
net stop wuauserv
net stop cryptSvc
net stop bits
net stop msiserver
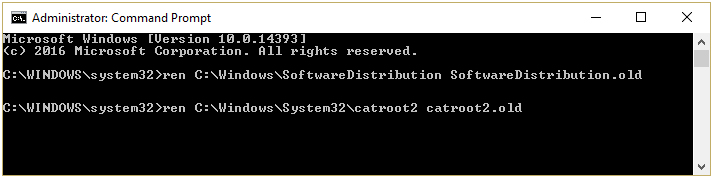
- After running all the above-given commands, then type the following command to rename SoftwareDistribution Folder and then hit Enter:
ren C:\Windows\SoftwareDistribution SoftwareDistribution.old
ren C:\Windows\System32\catroot2 catroot2.old
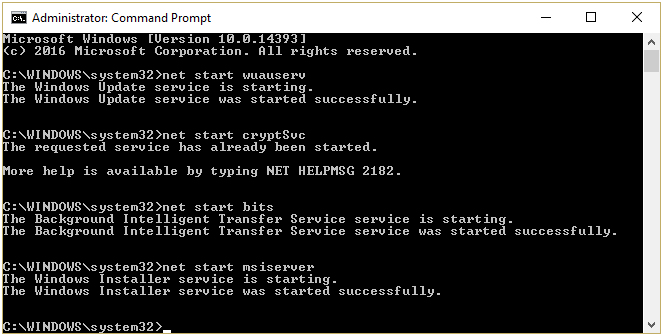
- At last, type the below-given command to start Windows Update Services and press Enter key after every command as you did in the above section:
net start wuauserv
net start cryptSvc
net start bits
net start msiserver
- Restart your PC to save changes.
Visit Microsoft for More Discussion: https://support.microsoft.com/en-in/help/2530126/-0x8007042c-error-message-when-you-try-to-start-windows-firewall
Fix 3: Use Inbuilt Troubleshooter to Fix Error Code 0x8007042c
Go with the inbuilt troubleshooter of Windows. This tool will help you to detect and fix the error. Follow the below-given steps to run the inbuilt troubleshooter
- Go to the Windows search option by pressing Windows key and search for the troubleshooter.
- After it, click on the troubleshooter and choose the settings tab that is below the search box.
- Click on the option to find and fix problems and after it selects the view all option.
- Choose the Windows update troubleshooter and run it.
This tool will take a few minutes to find and fix any types of errors. After the completion, try to update your PC again.
Or you can set your Windows OS to update itself on the next scheduled time.
Fix 4: Turn off Antivirus
As above said that, Windows 10 Error Code 0X8007042C can appear because of the third-party antivirus installed on your system. Follow the below-given steps to fix the error.
- Completely remove or uninstall any third-party antivirus you have installed previously on your system.
- After it, click on the Windows key and search for updates.
- Open the updates window, and then check for updates.
- Install all the updates on your system.
- After the completion of the installation, reboot your computer.
Easy Solution to Fix Error 0x8007042c in Windows 10
Well, if the given fixes won’t work for you to fix Windows update error 0x8007042c, then it is suggested to run the PC Repair Tool, to fix the error easily. This is an advanced repair utility that just by scanning once detect and fix various Windows errors and issues.
Despite this, it is also capable to fix various other stubborn computer errors, protect you from file loss, Windows files corruption, malware and virus infection, DLL errors, application errors and many others. It not only fixes errors but also increases the Windows PC performance.
Get PC Repair Tool, to fix Windows update error 0x8007042c
Conclusion
So, this is all about the Windows update error 0x8007042c, try the fixes given one by one to get rid of the error and update the Windows 10 system with ease.
Follow the given fixes carefully and check which one works for you.
Or else you can also run the PC Repair Tool, to fix the error automatically and boost your system performance.
Hope the article worked for you.

Always up to help others with their PC-related issues, Jack loves to write on subjects such as Windows 10, Xbox, and numerous technical things. In his free time, he loves to play with his dog “Bruno” and hang out with his friends.