Summary: Do you want to keep an eye on your data usage and want to restrict your bandwidth consumption? If yes, then in this article I am going to walk you through the simple steps to set and reset data usage limit in Windows 10 computer.
In this Internet era, we spend most of our time on online activities, whether its work, education, or socializing. And for internet users, it becomes essential to check daily data usage on devices.
Many online users use limited data plans, so it is necessary to restrict the data limit to prevent the overuse of the internet. You can use the data limit feature on Androids and other OS, even on Windows 10.
Windows 10 is packed with lots of features, and data usage settings are one of these features. You can use this feature to monitor your data usage and to set data usage limit on Windows 10 computers.
If you also want to restrict your bandwidth consumption, then you must read this article. In this article, I am going to show you how you can set and reset data usage limit on Windows 10 computers.
But before setting the data limit, you must know about how to check data usage. Because it will help you to keep track of your daily data consumption.
How Can You Check Data Usage on Windows 10 Computers?
Windows 10 tracks the data usage of all network adapters. If you want to check the data usage on your Windows 10 computer, then follow these steps one by one –
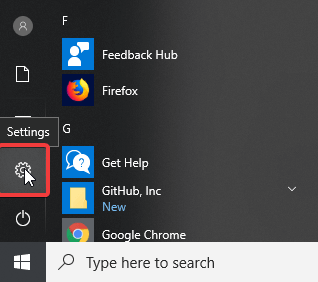
- Go to the Windows Start button
- Click on the Settings icon
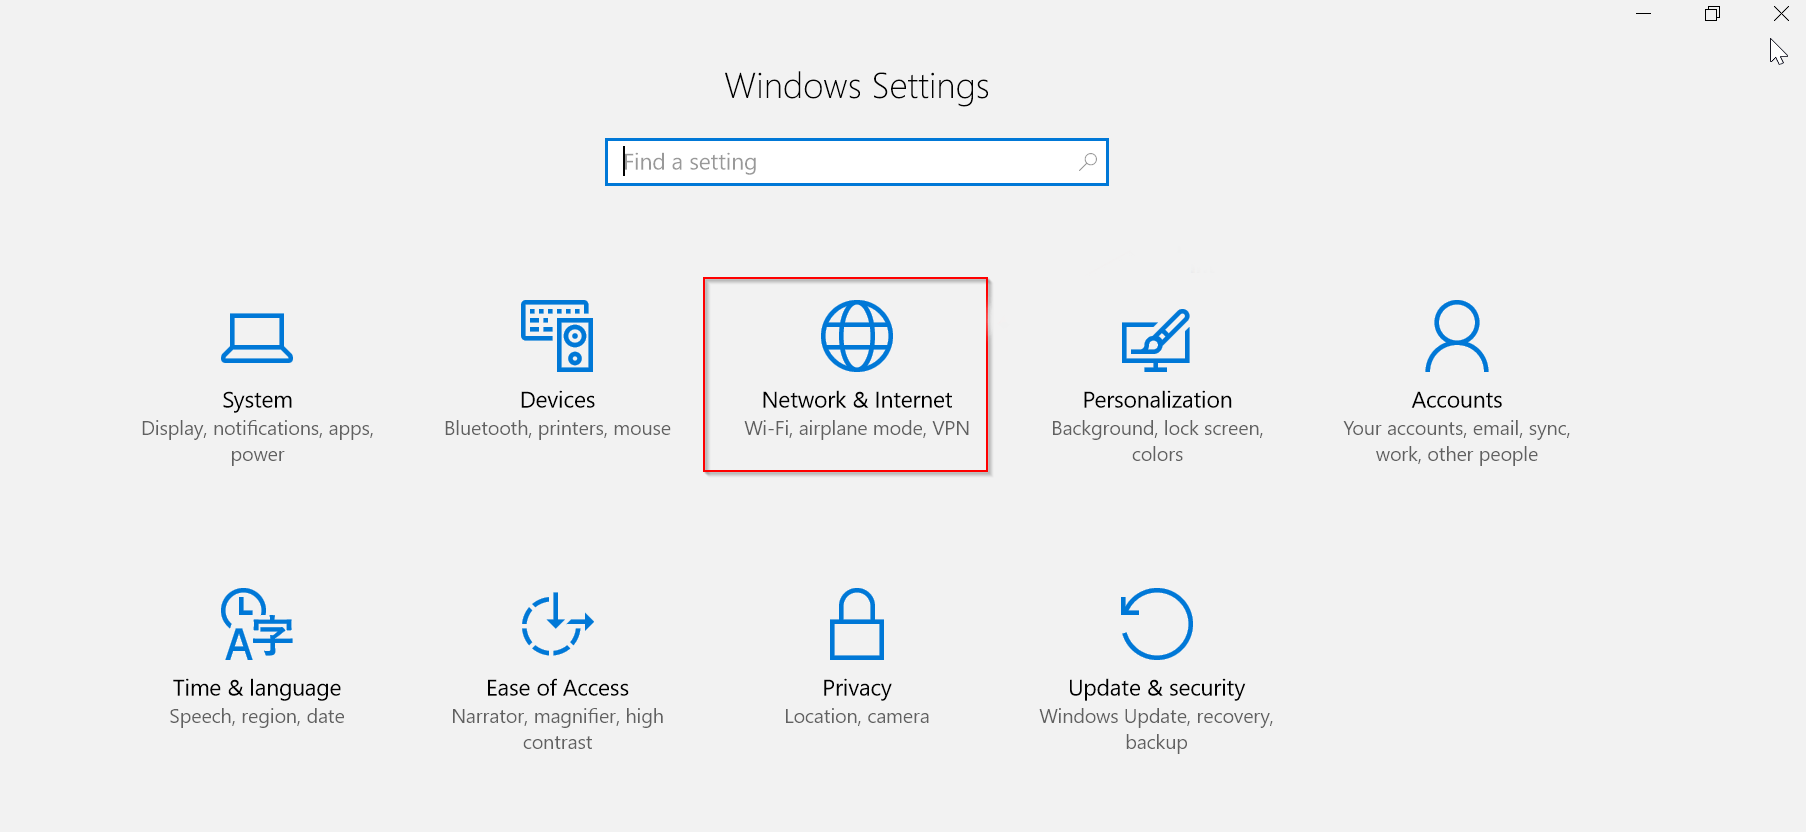
- Go to the Network & Internet
- Click on the Data Usage
- Now under the Overview section, you can check the data usage of each network adapter. It will show you the data used by the network adapters from the last 30 days.
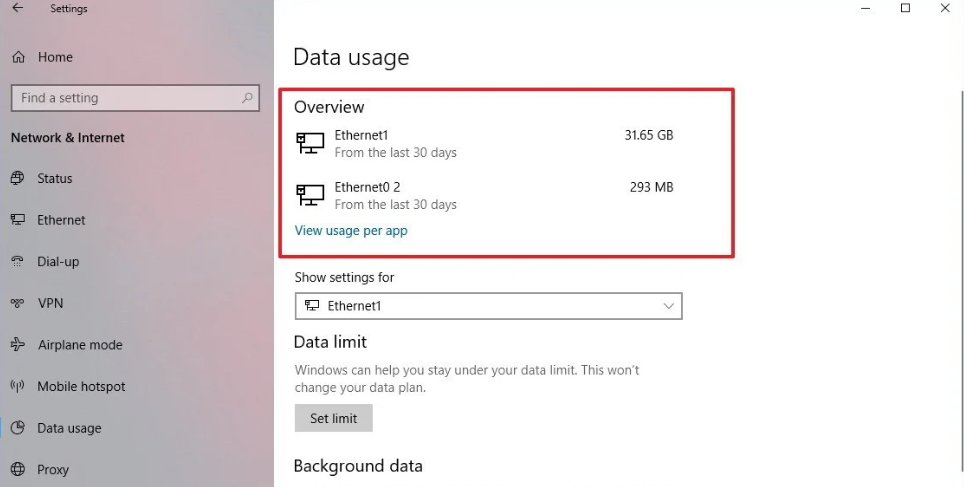
You can also check the data used by the app installed on your Windows 10 computer. To check data usage of each app, click on the View usage per app under the Overview section.
Now you can check data consumed by each app on Windows 10 computer.
Windows 10 will give data usage detail of the last 30 days. So, if you want to track the recent data consumption of the device, then you need to reset the data usage.
How to Reset Data Usage?
Even though Windows 10 resets the data usage details automatically after every 30 days but you can do it manually too, as per your convenience. You can remove the data usage and reset the data counter by following the steps given below:
- Go the Windows Start button
- Click on the Settings icon -> Network & Internet
- Go to the Data Usage
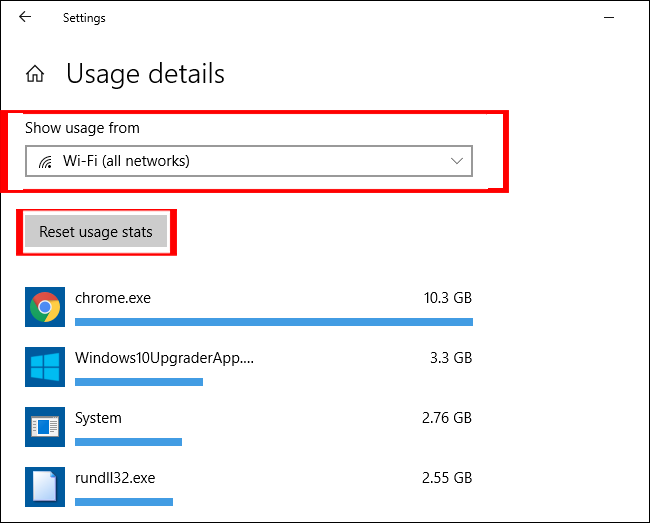
- Under the Overview section, click on the View usage per app option
- Click on the Show usage from and from the dropdown list choose the Wifi or Ethernet Adapter which you want to reset
- Now click on the Reset usage stats button
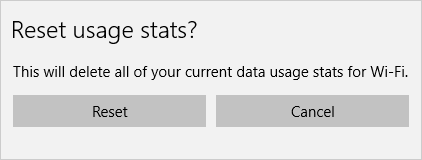
- To confirm, click on the Reset button
If you are using multiple adapters and want to reset data usage of each of these, then follow the same steps given above for each adapter.
Now you know how you can keep track of data consumption of your device.
If your data consumption on Windows 10 PC is high, then you should restrict your data usage by using the Data usage limit feature.
This option allows users to set up the Data usage limit according to their requirement to make sure that they don’t cross the limit of bandwidth while browsing the internet. This is one of the useful features for the users that have a limited data plan.
So let’s go and find out how you can set and reset data usage limit on Windows 10 computer.
How to Set Data Usage Limit on Windows 10?
If you use a limited data plan for internet connection, then you can set data limits of an Ethernet network adapter or Wifi on Windows PC/laptop.
Setting the data usage limit on your computer will help you to restrict the unnecessary data usage and will show a notification to avoid using data more than your plan.
Follow the steps given below to set data usage limit on Windows 10 computer:
- Go to the Windows Start button
- Click on the Settings
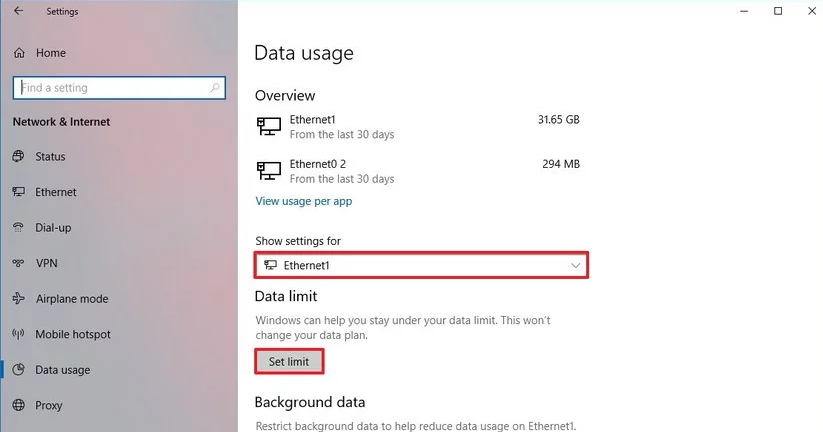
- Click on the Network & Internet
- Select Data Usage
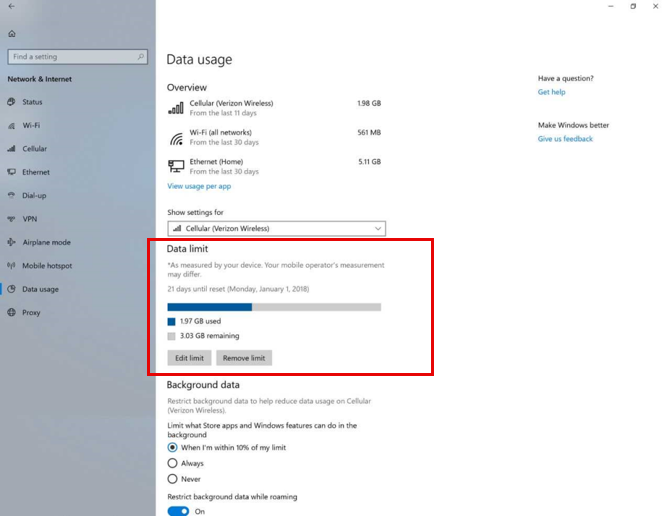
- Now select your Wifi or wired network from the Show settings for the dropdown list
- Click on the Set limit button under the Data limit section
- Now select the limit type among Monthly, Onetime and Unlimited options
- After selecting the limit type, specify other information, such as Data limit, Unit, etc.
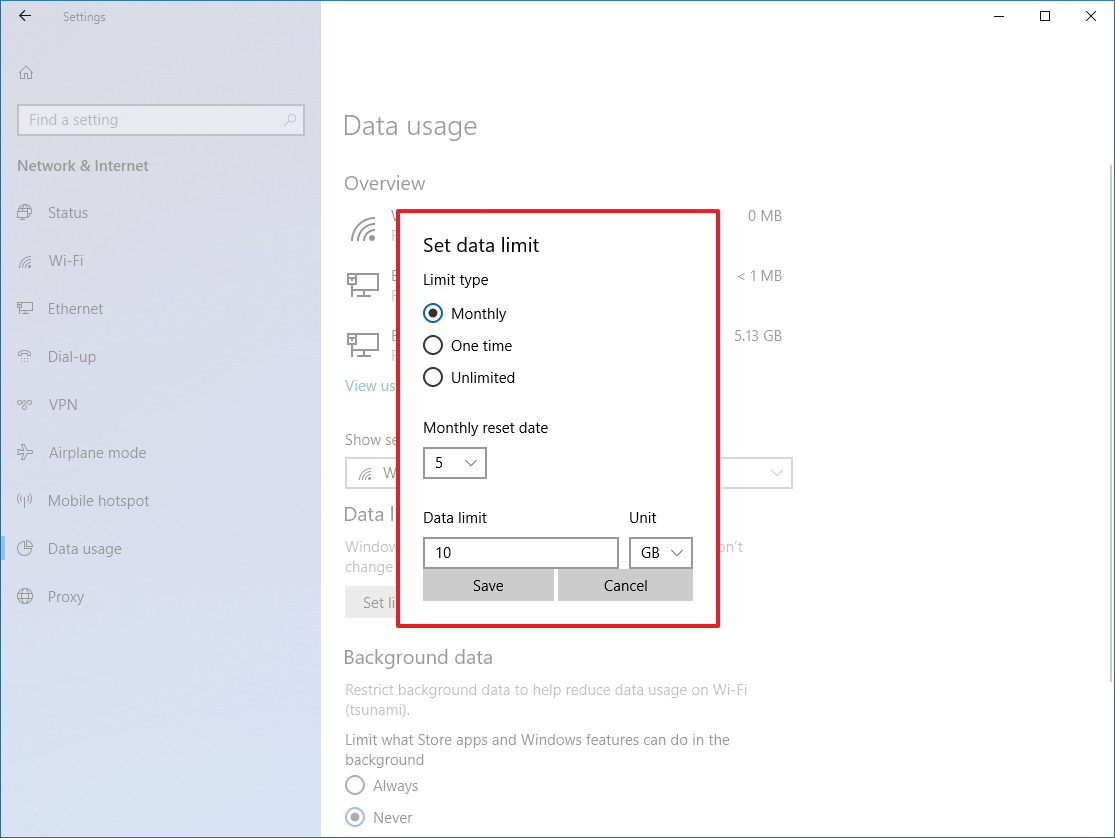
- Click on the Save button to make the changes
After setting the data limit, Windows will track the data usage of your device and will notify you after when you will get closer to the data limit. It will monitor all the activities on your device and gives you alert messages to reduce data consumption.
You can also check the consumed data and the remaining data manually. To do so, follow these steps:
- Go to Start > Settings > Network & Settings
- Click on the Data Usage > Check consumed data and remaining data under Data Limit section
How Can You Set the Background Data Limit?
You can also restrict the background data in Windows 10 computers. Limiting background data will help you from high data consumption issues.
To set the background data limit, follow the given steps:
- Go to the Windows Start button > Settings > Network & Internet
- Click on the Data usage
- Go to the Background Data section
- Now select either of Never or When I am within 10% of my limit option
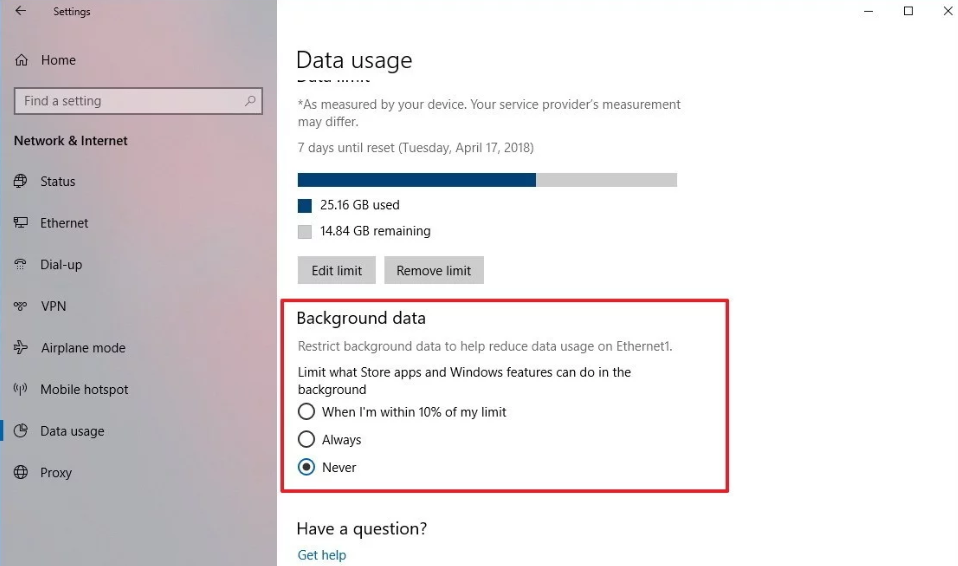
Using these simple steps will help you to turn off Windows 10 background data. The background data activity will remain turned off unless the user wants to run it again.
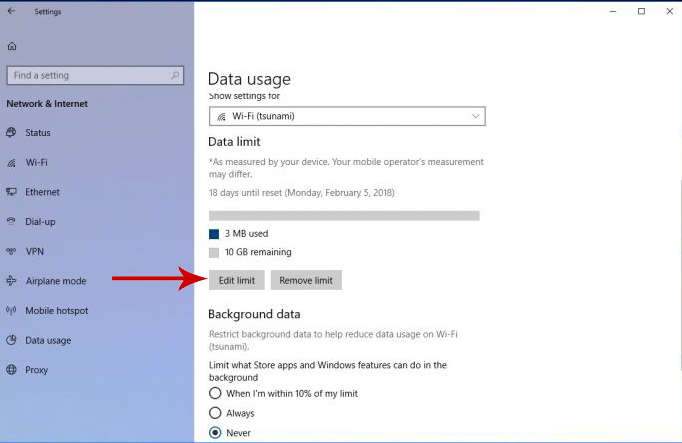
How to Reset the Data Limit?
If you want to edit or make changes in settings of data usage, then you can reset data usage limit on Windows 10 PC/laptop. To do this follow, these steps:
- Click on the Start button -> Settings -> Network & Internet -> Data Usage
- Go to the Data limit section
- Click on the Edit limit button and make changes according to your requirements
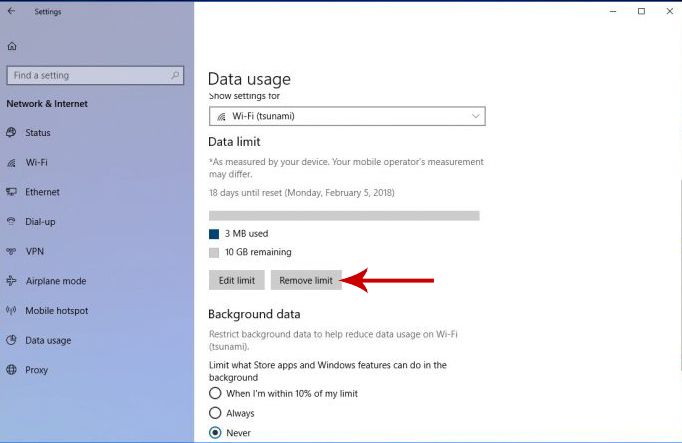
If you don’t want to restrict your data usage, then you can remove data usage limit. To do so, follow the steps stated below:
- Got to the Data Usage ->Data limit section
- Click on the Remove limit button
- Click on Remove button to remove the data limit
To remove background data limit, follow these steps:
- Go to the Data usage -> Background data section
- Select Never option to disable background data limit
Conclusion
So, these are the steps to set and reset data usage limit on Windows 10 computers.
It’s worth trying the data usage limit feature of Windows 10. It will not only help you to monitor data but will also help you to manage your data usage consumption to prevent you from going over your data pack limit.
If you are facing any kind of PC related errors and issues, then try PC Repair Tool. This tool will help you to fix several stubborn issues on your PC, such as DLL, BSOD, registry, updates, game errors, and much more.
I hope you liked this article and the steps I have mentioned in this article will help you to set and reset data limit on your computer.
And don’t forget to catch us on Facebook and Twitter for more such articles and solutions for your Windows 10 issues.

Always up to help others with their PC-related issues, Jack loves to write on subjects such as Windows 10, Xbox, and numerous technical things. In his free time, he loves to play with his dog “Bruno” and hang out with his friends.